

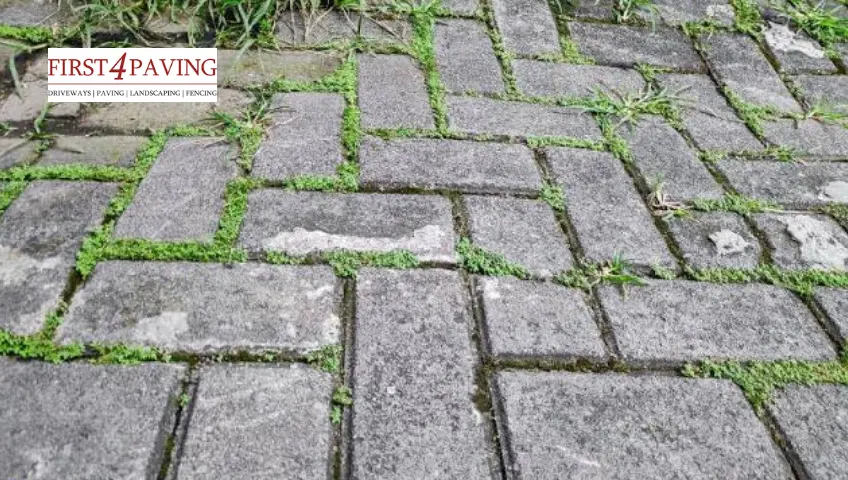
Block paving is one of the most popular driveway and patio surfaces in the UK, but the small joints between each block are also the perfect place for weeds to take hold. Left untreated, weeds don’t just look untidy; they force joints apart, wash out jointing sand, and can eventually cause blocks to rock or sink under vehicle weight.
Sealing block paving is the most reliable, long-term fix. Done properly, it locks the jointing sand solid, closes off the surface to airborne seeds, and repels the moisture weeds need to germinate. This guide covers exactly how to do it, from clearing existing growth through to choosing a sealant, applying it correctly, and maintaining the surface afterwards, along with the mistakes that cause most sealing jobs to fail early.
⚡ Quick Answer
To seal block paving and stop weeds for good:
- Remove all existing weeds, roots included
- Pressure wash and let the surface dry fully (24–48 hours)
- Resand the joints — ideally with polymeric sand
- Choose a PU or resin-based sealant for the best weed resistance
- Apply two thin coats, letting each go touch-dry first
- Wait for the cure time before walking (12–24 hrs) or driving (48–72 hrs) on it
Done right, this keeps a driveway weed-free for 3–5 years. Prefer not to DIY it?
Get a free sealing quote →
Why Weeds Grow in Block Paving
Block paving is laid with sand-filled joints rather than solid mortar, so it’s never fully sealed against the outside world by default. Three conditions combine to let weeds establish:
- Porous, unsealed jointing sand. Kiln-dried sand stabilises the blocks but has no binding agent, so it stays loose and open to seeds and moisture.
- Moisture retention in the joints. Rain, condensation, and shade keep the sand damp long enough for seeds to germinate and roots to establish.
- Organic debris build-up. Leaves, dust, moss spores, and grass clippings collect in joints over time, effectively “feeding” a compost-like layer for weeds to root into.
Common Weeds and Growth Found on Block Paving
Not every patch of green on a driveway is the same problem, and knowing what you’re dealing with helps you treat it correctly before sealing:
| Growth | Appearance | Typical Location |
|---|---|---|
| Dandelions | Deep taproot, yellow flower, regrows if root is left | Sunny, open joints |
| Clover | Low, spreading, three-leaf clusters | Sunlit joints and edges |
| Chickweed | Dense mat, small white flowers | Damp, shaded joints |
| Moss | Green, cushion-like, no visible roots | Shaded, north-facing, poorly drained areas |
| Algae | Dark green or black slime, no leaf structure | Constantly damp or shaded patches |
Deep-rooted weeds like dandelions need the root removed or killed, not just the visible growth, or they will push straight back through a new seal within weeks.
What You’ll Need to Seal Block Paving
- Stiff outdoor broom and/or pressure washer (fan nozzle)
- Weed killer suitable for hard surfaces (for existing growth)
- Kiln-dried or polymeric jointing sand
- Block paving sealant (see selection guide below)
- Roller, pump sprayer, or soft-bristle brush for application
- Squeegee (optional, for even sealant distribution on larger areas)
How to Seal Block Paving to Stop Weeds: Step-by-Step
Step 1: Remove Existing Weeds — Root and All
Pull visible weeds by hand where possible, making sure you remove the root; snapping off the top growth of a dandelion or similar taproot weed leaves it able to regrow within days. For widespread or stubborn growth, apply a hard-surface weed killer 3–5 days before cleaning, giving it time to kill the root system fully. Never seal over live weeds; sealant will not stop something that’s already rooted, and it will simply grow straight through the new coating.
Step 2: Deep Clean and Fully Dry the Surface
Pressure wash the entire area using a fan nozzle held at a slight angle, rather than pointing the jet straight down into the joints. A direct, close jet can blast out too much jointing sand or even erode the joint edges, creating deeper gaps than you started with. Work in sections, clearing dirt, moss, algae, and any oil or organic staining as you go.
Drying time matters more than most guides admit: residual moisture trapped deep in the joints, not just on the surface, is one of the most common causes of sealant failure, showing up as patchy whitening or peeling later. Allow at least 24 hours to dry in mild weather, and up to 48 hours in cooler or damp conditions, before moving on.
🧽Not keen on doing this stage yourself?
Our driveway cleaning services handle the cleaning professionally, so the surface is ready for sealing from day one.
Step 3: Resand the Joints
Sweep new sand into every joint until it’s packed level, or up to roughly 1cm below the block surface to give the sealant room to bond without pooling on top. Two sand options are worth weighing up:
- Kiln-dried sand — cheaper, easy to apply, but stays loose and can still wash out over time.
- Polymeric sand — costs more, but contains a binder that hardens when activated with water, forming a semi-rigid joint that resists both weed growth and washout far better than kiln-dried sand alone.
For weed prevention specifically, polymeric sand gives a noticeably better long-term result, especially on driveways exposed to regular rainfall and vehicle weight.
Brush off every trace of excess sand dust from the block surfaces afterwards, leftover dust will cloud or discolour the finished sealant.
Step 4: Choose the Right Sealant
Not all sealants behave the same way once applied, and the wrong choice for your paving type or usage can lead to whitening, poor adhesion, or a surface that looks glossy but offers little real weed resistance.
| Sealant Type | Weed Resistance | Best Suited To | Typical Coverage |
|---|---|---|---|
| Acrylic (water or solvent-based) | Good | Patios, light-use paths | 5–7m² per litre |
| Polyurethane (PU) | Excellent | High-traffic driveways | 4–6m² per litre |
| Resin-based | Very good | Wider joints, older paving | 4–6m² per litre |
PU and resin-based sealants penetrate deeper into the joint itself, which is where the actual weed-blocking work happens, a glossy surface coating alone does little if the joint underneath stays porous.
Step 5: Apply the Sealant Correctly
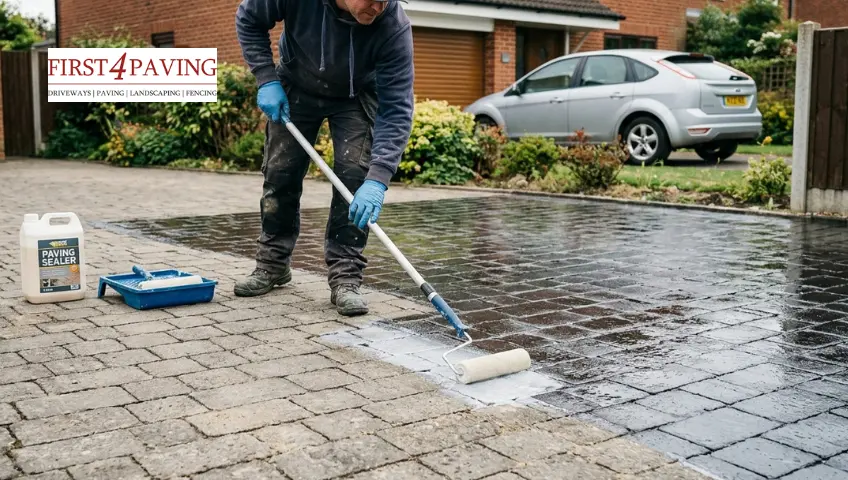
Apply in thin, even coats — two thin coats consistently outperform one thick one, since a single heavy application can pool in low spots, over-saturate the sand, and cause it to lift rather than harden. Work in manageable sections using a roller, sprayer, or brush, paying particular attention to fully saturating the joints themselves rather than just the block faces. Let each coat go touch-dry before applying the next.
Step 6: Respect the Cure Time
Most sealants are touch-dry within a few hours but need considerably longer to cure fully:
- Foot traffic: typically safe after 12–24 hours
- Vehicle traffic: typically 48–72 hours, sometimes longer in cold or humid weather
- Full hardness: up to two weeks in some products
Always check the specific product’s datasheet, as cure times vary noticeably among acrylic, PU, and resin formulations.
If the process feels too time-consuming or complex, hiring a trusted paving company in Enfield can help ensure your block paving is cleaned, re-sanded, and sealed correctly for long-lasting protection against weeds and weather damage.
What Sealing Actually Does to Block Paving
A block paving sealant works in three ways, and understanding each helps explain why proper preparation matters as much as the product itself:
- Hardens the joint sand. Sealant soaks into the top layer of jointing sand and binds the grains together, turning a loose, seed-friendly gap into a solid, weed-resistant strip.
- Repels water. Most sealants create a hydrophobic surface — water beads and runs off rather than soaking into the joints, cutting off the moisture supply weeds rely on.
- Blocks light and reduces organic build-up. A sealed surface sheds dust, leaves, and debris more easily during routine sweeping or rinsing, so less organic matter accumulates to feed new growth.
Common Mistakes That Cause Sealing to Fail
| Mistake | What Happens | Fix |
|---|---|---|
| Sealing over damp joints | Trapped moisture causes whitening, bubbling, or peeling | Wait a full 24–48 hours of dry weather before sealing |
| Applying too much sealant at once | Sand lifts, joints soften, surface pools unevenly | Apply two thin coats instead of one thick one |
| Using traffic too soon | Tyre or footprints mark the surface and break the seal | Follow the product’s specific cure times before use |
| Wrong sealant for the paving/jointing type | Whitening, poor adhesion, or surface damage | Match sealant chemistry to your paving and jointing product |
| Sealing over live weeds | Weeds push straight through the new coating | Remove and treat all weeds fully before starting |
How Long Does Sealing Keep Weeds Away?
A correctly applied and maintained seal typically lasts 3 to 5 years before resealing is needed, though this depends heavily on traffic, sun exposure, and product quality. Shaded, damp, or heavily used driveways tend to need resealing closer to the 3-year mark; lightly used patios can often go the full 5 years or more.
Watch for these signs it’s time to reseal:
- Water no longer beads on the surface
- Colour looks dull, faded, or patchy
- The first few weeds start reappearing in the joints
Ongoing Tips & Maintenance To Control Weeds from Block Paving
- Sweep regularly to stop leaves, dust, and organic debris settling in joints
- Rinse off moss, algae, or bird droppings promptly rather than letting them sit
- Top up jointing sand in any areas that start to look low, even on sealed paving
- Spot-treat individual joints where weeds reappear, rather than waiting to reseal the whole surface
- Avoid aggressive, close-range jet washing directly into joints during routine cleaning, as this strips sand and sealant prematurely
🧱 If you’re starting from scratch rather than resealing existing paving, our block paving driveway installation service in Enfield covers design, laying, and jointing, so it’s sealed and weed-resistant from day one.
DIY vs Professional Sealing
Sealing block paving is a realistic DIY job for most homeowners provided the surface is properly cleaned, resanded, and fully dried first, the process itself isn’t complicated, but it is unforgiving of shortcuts. Professional application tends to make more sense for larger driveways, surfaces with extensive existing weed damage, or where a perfectly even, streak-free finish is a priority, since professional equipment and experience reduce the risk of pooling, patchiness, or missed joints.
🚗 Want it done right, first time?
First4Paving’s driveway contractors in Enfield handle the full process — clean, resand, seal, and aftercare advice — so your driveway stays weed-free for years, not months.
Conclusion
Weeds in block paving are rarely a one-off problem; they’re a symptom of open, unsealed joints and moisture that keeps coming back until the underlying gaps are properly closed off. Removing existing growth, resanding correctly, and applying a suitable sealant addresses the root cause rather than just the visible symptom, which is why a properly sealed driveway can stay weed-free for 3 to 5 years rather than needing constant spot-treatment.
The steps themselves aren’t complicated, but the results depend heavily on getting the preparation right: a fully dried surface, properly packed joints, and the correct sealant for your paving type will always outperform rushing straight to application.
If you’d rather leave the preparation, product selection, and application to professionals, at First4Paving our driveway contractors in Enfield can handle the full process for you, from initial clean through to sealing and aftercare advice.
FAQs
Does sealing block paving actually stop weeds?
Yes. Sealing hardens the jointing sand and closes off the moisture and light that weed seeds need to germinate, which significantly reduces regrowth for several years. It won’t guarantee zero weeds forever, but it removes the conditions weeds rely on.
How often should block paving be resealed to stop weeds?
Most block paving needs resealing every 3 to 5 years, depending on foot and vehicle traffic, sun and shade exposure, and the quality of the sealant used.
What’s the best sealant for stopping weeds on a driveway?
Polyurethane and resin-based sealants generally offer the strongest weed resistance and durability for driveways, as they penetrate deeper into the joints than standard acrylic sealants.
Can you seal block paving over existing weeds?
No. Weeds should always be removed, including the root, and treated before sealing. Sealing over live weeds will not stop them growing straight through the new coating.
How long does block paving sealant take to cure?
Most sealants allow foot traffic after 12–24 hours and vehicle traffic after 48–72 hours, though full hardness can take up to two weeks depending on the product and weather conditions.
How wide should a block paving driveway be?
A block paving driveway should ideally be 10ft to 12ft wide. Anything narrower can make it genuinely difficult for drivers to manoeuvre, enter, exit, or park comfortably.
Is kiln-dried sand or polymeric sand better for stopping weeds?
Polymeric sand offers better long-term weed resistance than kiln-dried sand, as it hardens once activated with water, forming a more solid barrier that resists both weed growth and washout.