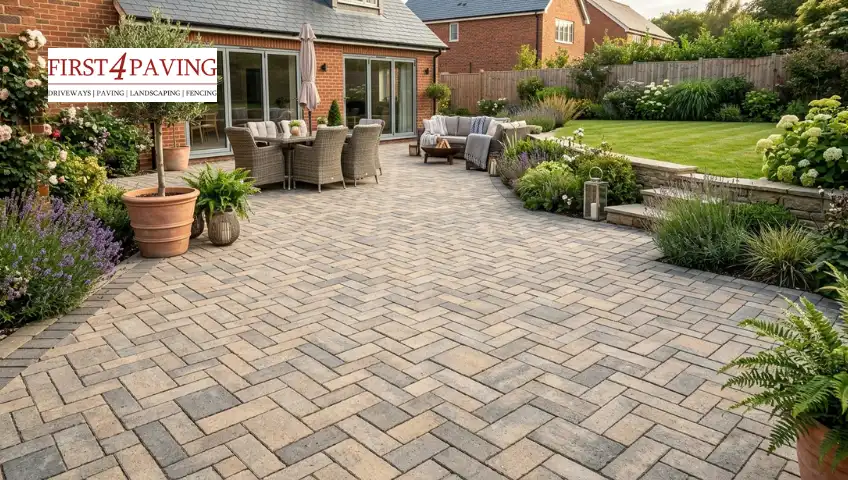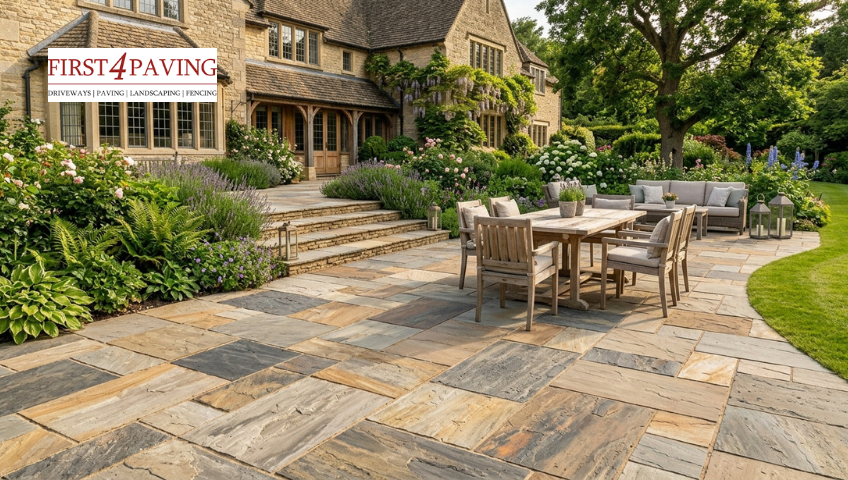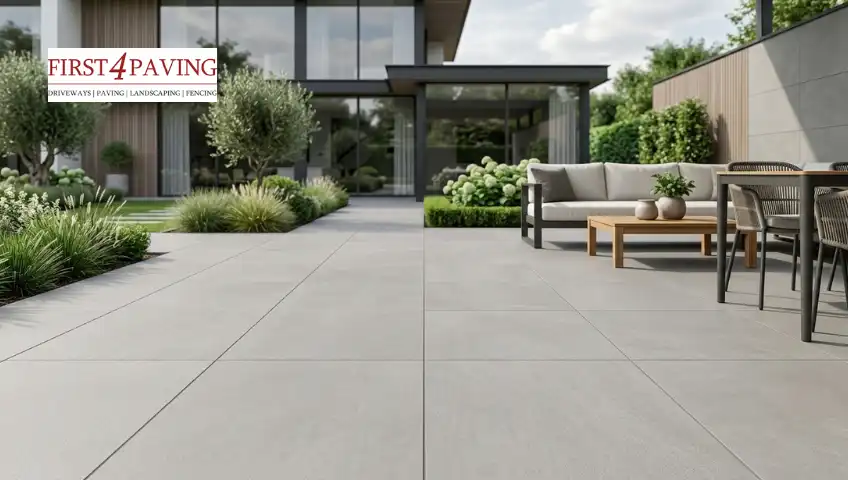

What Is the Best Material for a Patio

What Is the Best Material for a Patio: A Complete Homeowner’s Guide

Porcelain paving is generally considered the best patio material overall. It is non-porous, highly weather-resistant, requires minimal maintenance, and can last 20 to 30 years with little upkeep, making it ideal for the UK’s unpredictable climate. That said, the right choice still depends on your budget and style. 

A patio is one of the most valuable additions you can make to your outdoor space. It extends your living area, boosts kerb appeal, and can even increase your property’s value. However, the material you choose will determine how your patio looks, how long it lasts, and how much upkeep it demands over the years. With so many options on the market, homeowners often find the decision overwhelming.

In this guide, we walk you through the most popular patio materials used across the UK, looking closely at their advantages, drawbacks, and the situations they suit best, so you know exactly which option is right for your home.

Types of Patio Materials for UK Homes

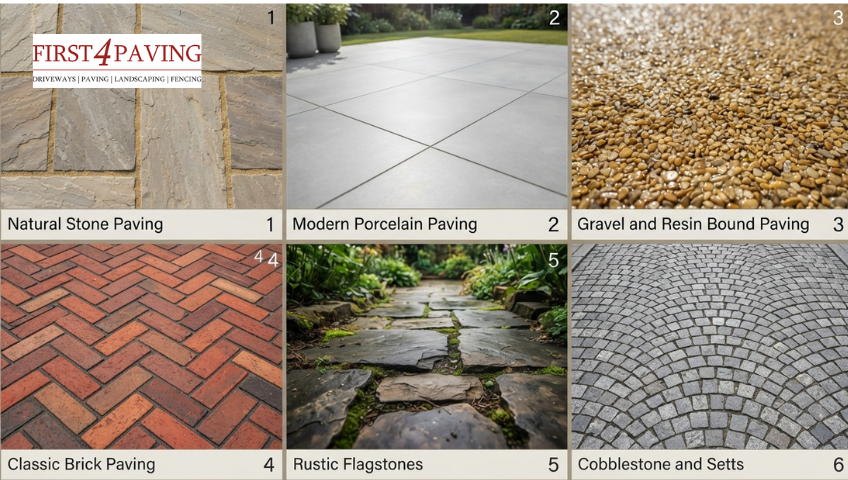
1. Natural Stone Paving

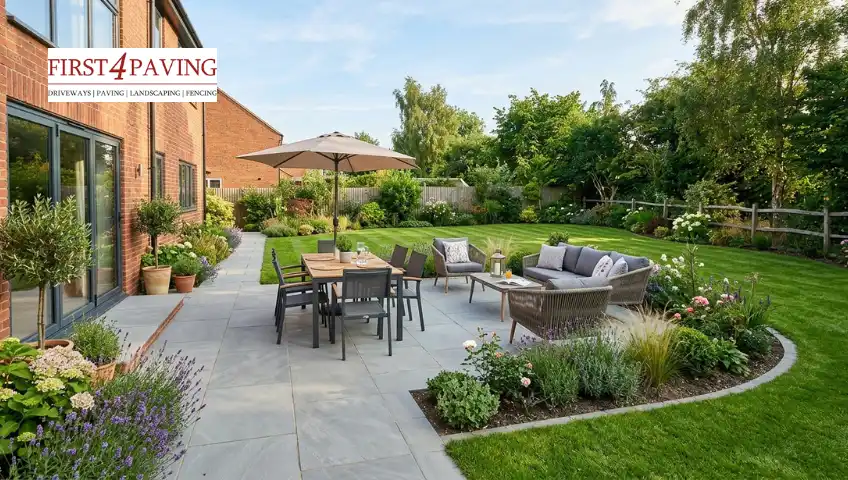
Natural stone, such as Indian sandstone, limestone, or granite, remains one of the most sought-after choices for UK homeowners who want a premium, timeless finish. Its natural origins mean every patio has a distinct character, making it a popular choice for those who want their outdoor space to feel truly one of a kind. It also tends to age gracefully, developing a subtle patina that many homeowners find adds to its charm over time.
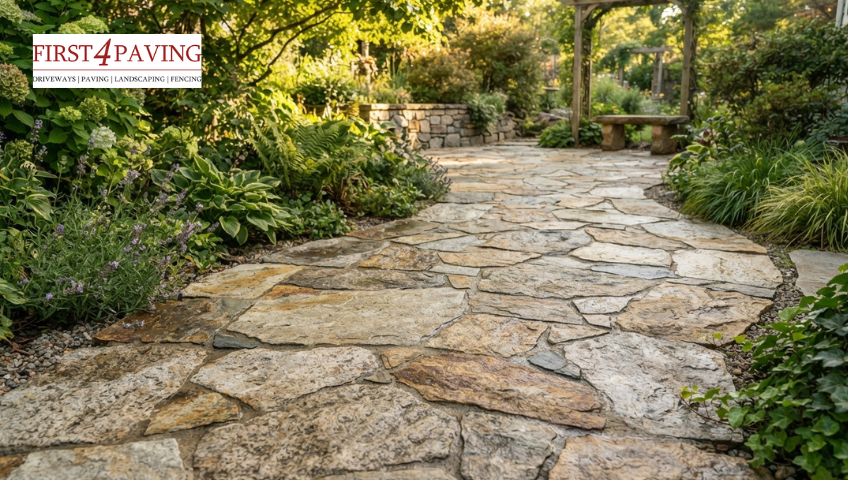
Natural Stone Paving

Advantages:

  • Unique, natural variation in colour and texture, meaning no two slabs are identical
  • Extremely durable, often lasting 20 years or more with proper care
  • Adds significant kerb appeal and property value
  • Available in a wide range of finishes, including riven, honed, and tumbled

Considerations:

  • Higher upfront cost compared to concrete or gravel
  • May require periodic sealing to prevent staining and moss growth
  • Some stones, such as sandstone, can be porous and prone to weathering if untreated

2. Porcelain Paving

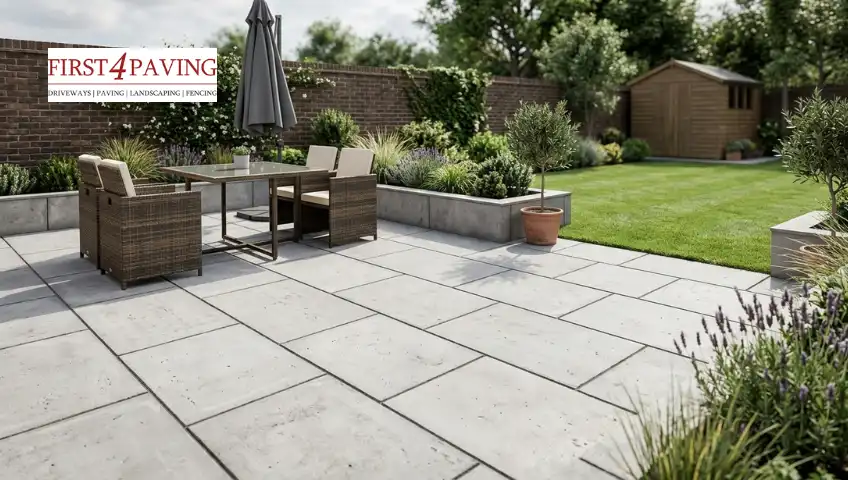
Porcelain has surged in popularity in recent years, and for good reason. It combines a high-end appearance with practical, low-maintenance performance. Manufactured under controlled conditions, it offers a level of consistency and precision that natural materials can’t match, making it a favourite among homeowners who want a clean, contemporary finish without compromising durability.
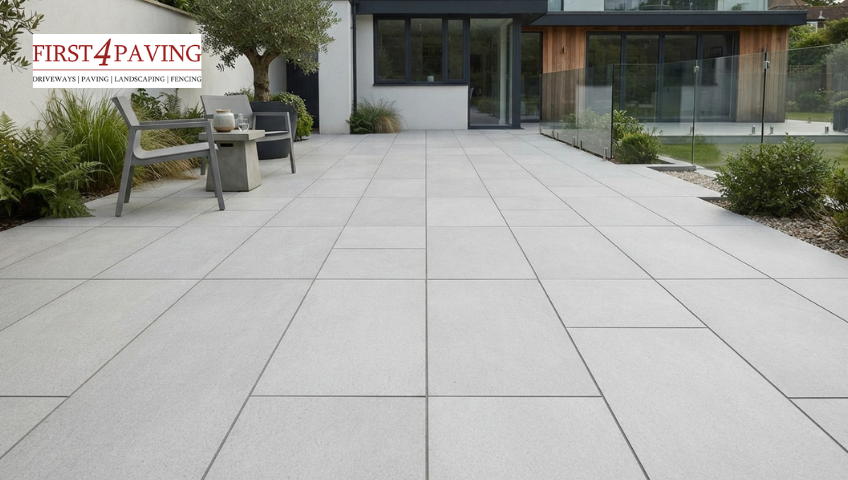
Porcelain Paving

Advantages:

  • Non-porous, so it resists staining, frost damage, and algae
  • Extremely low maintenance, as a quick wash keeps it looking new
  • Consistent colour and finish, ideal for a modern, uniform look
  • Slip-resistant options available for pool areas and wet conditions

Considerations:

  • Higher initial cost, similar to or above natural stone
  • Requires precise installation, so professional fitting is recommended
  • Limited natural texture variation compared to stone

3. Gravel and Resin Bound Surfaces

For homeowners wanting a more informal or contemporary look, gravel and resin-bound patios offer flexibility and fast installation. These surfaces work particularly well for irregular or curved layouts where rigid materials would be more difficult and costly to install, and they can be a practical solution for homeowners looking to update their outdoor space without a lengthy project timeline.
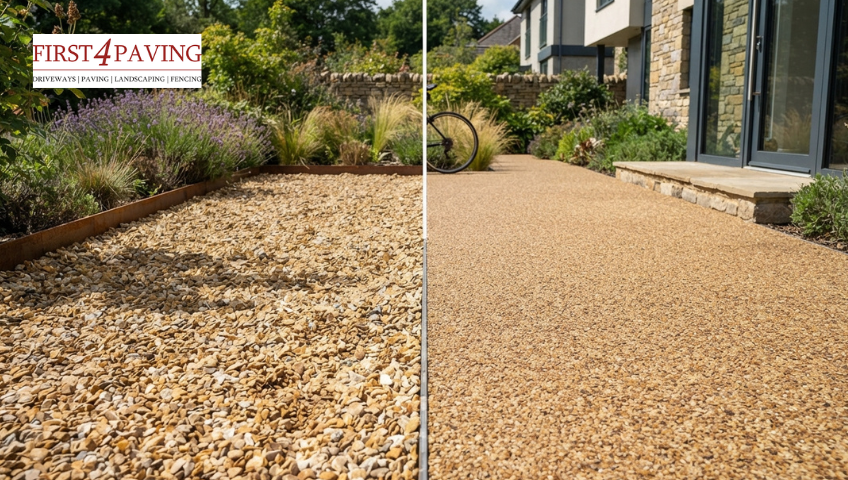
Gravel and Resin Bound

Advantages:

  • Among the most affordable patio options
  • Quick and straightforward to install
  • Resin-bound surfaces are permeable, aiding drainage and reducing puddling
  • Easy to adapt to curved or irregular patio shapes

Considerations:

  • Loose gravel can migrate and requires occasional top-ups
  • Not ideal for high heels, wheelchairs, or pushchairs
  • Resin surfaces may need resealing every few years to maintain appearance

4. Brick Paving

Brick paving brings a warm, traditional character that suits period properties and cottage style gardens particularly well. Its rich, earthy tones and familiar texture make it a natural fit for homes looking to preserve a classic aesthetic, and it pairs especially well with traditional planting schemes and period architectural features.
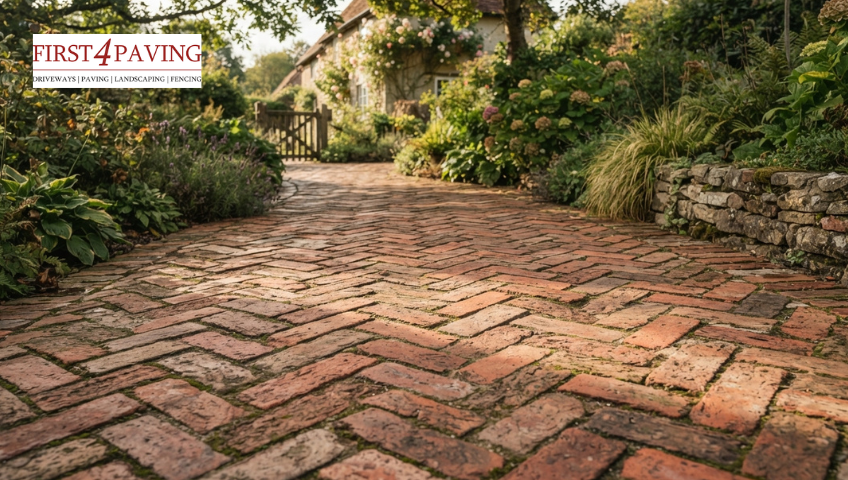
Brick Paving

Advantages:

  • Classic, timeless appearance that complements traditional and period homes
  • Strong and durable when properly laid
  • Individual bricks can be replaced if damaged, without redoing the whole patio.
  • Wide range of laying patterns, such as herringbone or basketweave

Considerations:

  • More expensive and labour-intensive to install than concrete block paving
  • Porous surface that can absorb stains and support moss or weed growth
  • May require re-pointing over time to keep joints secure

5. Flagstones

Flagstones, including limestone and slate, sit within the natural stone family but offer a distinct texture and finish compared to sandstone or granite. Their smoother, more refined surface gives them a slightly more formal appearance, making them a popular choice for homeowners seeking an elegant, polished look without straying from natural materials.
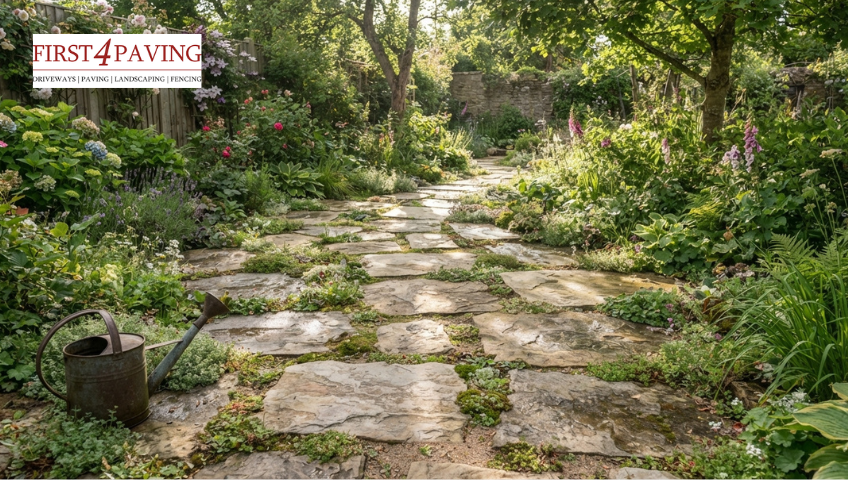
Flagstones

Advantages:

  • Elegant, refined appearance with a smoother or more uniform surface than riven stone
  • Highly durable and long-lasting when sealed correctly
  • Available in a range of natural tones to suit different garden styles
  • Adds a premium, high-end feel to outdoor spaces

Considerations:

  • Can be slippery when wet if not treated with a suitable finish
  • Higher cost compared to concrete or gravel
  • Requires professional installation for a level, secure finish

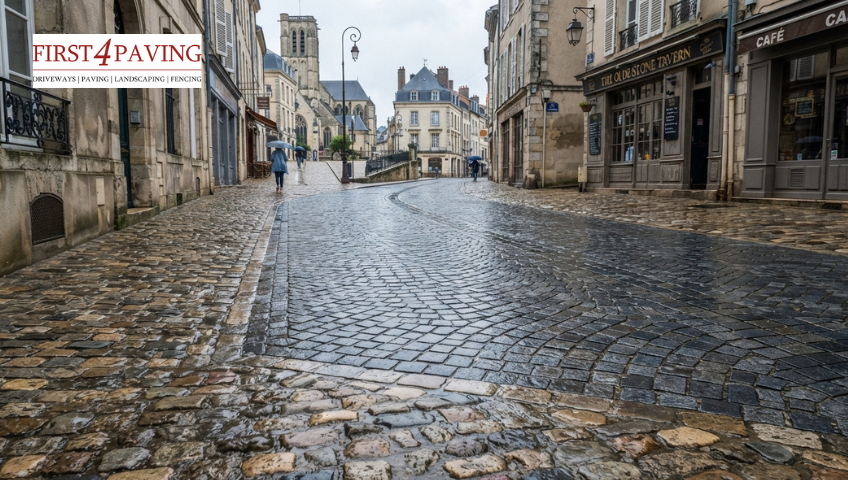
6. Cobblestone and Setts

Cobblestone and granite setts offer a rustic, old-world aesthetic that works particularly well for driveways, borders, or accent areas within a larger patio. Their irregular, textured surface adds a strong sense of character and history to outdoor spaces, and they are often chosen to create a striking contrast when paired with smoother, more contemporary materials.

Cobblestone and Setts

Advantages:

  • Distinctive, characterful look that adds texture and visual interest
  • Extremely hard-wearing and able to withstand heavy loads
  • Resistant to cracking and weather damage
  • Often used to complement other materials as an edging or feature

Considerations:

  • Uneven surface can make it less comfortable for furniture or bare feet
  • Among the more expensive options due to labour-intensive installation
  • Not ideal as the sole material for a large, functional seating patio

Best Patio Materials Compared

When comparing the best patio materials, our patio experts in Enfield consider several key factors: durability, cost, maintenance, and weather performance 

  • Porcelain Paving: Best for long-term durability and low maintenance
  • Natural Stone: Best for premium, classic appearance
  • Concrete Block Paving: Best budget-friendly option
  • Gravel/Resin Bound: Best for quick installation and flexible layouts
  • Brick Paving: Best for traditional and period style homes

Each system has its place depending on the property type and homeowner expectations. If you are unsure about your budget, it helps to understand how much a new patio costs before making a final decision.

Patio Material Cost, Lifespan & Maintenance Comparison

MaterialAverage Cost (per m²)LifespanMaintenance LevelBest For
Porcelain£70–£11020–30 yearsVery lowOverall best choice, modern homes, low upkeep
Natural Stone£60–£10020–25+ yearsModerate (periodic sealing)Period homes, premium finish
Gravel/Resin Bound£30–£6010–15 yearsModerate (top ups/resealing)Informal gardens, quick installs
Brick Paving£50–£9015–20 yearsModerate (re-pointing)Traditional, cottage-style homes
Flagstones£65–£11020–25+ yearsModerate (sealing)Elegant, high-end patios
Cobblestone/Setts£70–£12025+ yearsLowAccent areas, driveways, edging

Note: Prices are approximate and can vary depending on region, supplier, and installation complexity. Always request a personalised quote for accurate figures.

Key Factors for Choosing a Patio Material

Choosing the right patio material really matters. It helps protect your outdoor space and can save you money over time. Here are a few important things you should keep in mind:

  • Price vs Quality: Lower cost doesn’t always mean better value. Stronger materials reduce future costs.
  • Weather Resistance: In wet or changing climates, use non-porous materials to lower the risk of frost damage and staining.
  • Property Fit: Pick a material that suits your home. Period properties work best with natural stone or brick, while modern homes suit porcelain.
  • Maintenance Level: Less upkeep means saving time and money in the long run.

Professional Patio Installation

A high-quality installation matters as much as the material itself. Poor artistry can lead to uneven surfaces, drainage issues, and costly repairs. Working with experienced installers who specialise in patio paving services ensures that every layer is laid correctly, using the right techniques for long-term performance.

At First4 Paving, we deliver complete patio services with attention to detail and high-quality materials, ensuring strong, reliable, and weather-resistant results for every project.

Contact us today for a free, no-obligation consultation. Our team will guide you through every step, from choosing the perfect material to a flawless installation, so you can start enjoying your new patio sooner than you think.

Conclusion

Choosing the best patio material ultimately comes down to balancing your budget, maintenance preferences, and the look you want to achieve. Natural stone, porcelain, and flagstones offer premium durability and aesthetics for those willing to invest, while concrete block paving, gravel, and brick provide practical, cost-effective alternatives. Whichever material you choose, professional installation is key to ensuring your patio stands up to time and weather. With the right guidance, your new patio can become one of the most rewarding upgrades to your home.

FAQs

What is the most durable patio material?

Natural stone, porcelain, flagstones, and cobblestone are generally considered the most durable, often lasting 20 years or more with proper installation and care.

Which patio material requires the least maintenance?

Porcelain paving is the lowest-maintenance option, as it is non-porous and highly resistant to staining, frost, and algae growth.

What is the cheapest patio material?

Gravel and concrete block paving tend to be the most budget-friendly options, both for material cost and installation.

Can I lay a patio myself, or should I hire a professional?

While some materials like gravel are DIY-friendly, natural stone, porcelain, brick, and flagstones require precise levelling and jointing, so professional installation is strongly recommended for a long-lasting result.

How long does a patio installation typically take?

Most residential patios take between 2 and 5 days to install, depending on the size, material, and any groundwork required.
How to Stop Green Algae on Patio Slabs

How to Stop Green Algae on Patio Slabs: Causes, Solutions and Prevention Tips

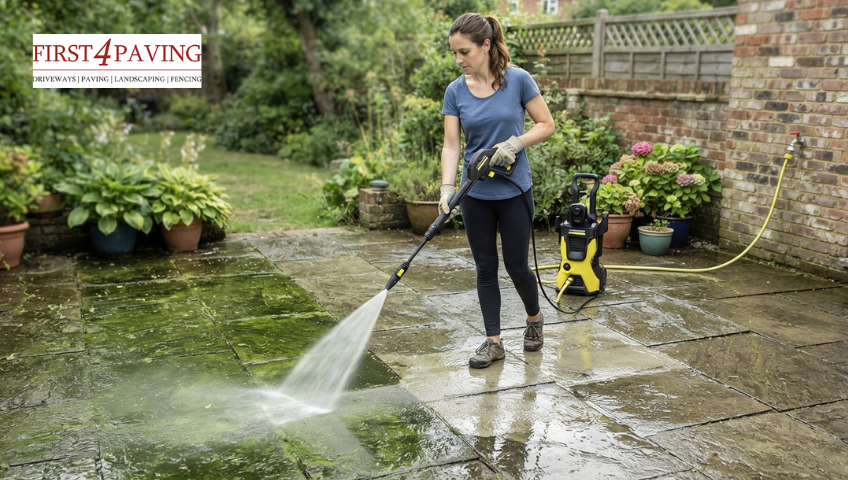
Green algae grows on patio slabs because of trapped moisture, shade, and organic debris sitting on the surface. To stop it, clear away moss and leaves regularly, improve drainage and airflow, clean the slabs with an algae-killing solution or pressure wash, and finish with a breathable sealant to stop spores from taking hold again.

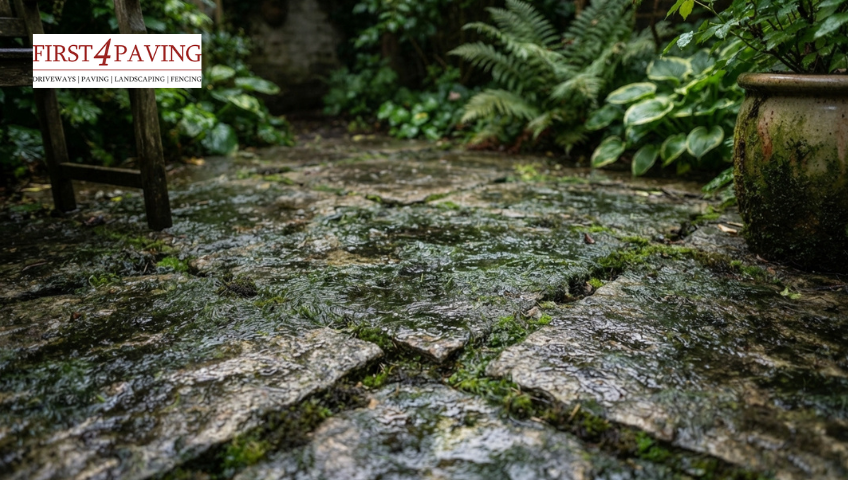
If you’ve noticed slippery green patches creeping across your patio, you’re not alone; it’s one of the most common problems homeowners across Enfield and Hertfordshire ask us about. Algae doesn’t just look unsightly; a damp, shaded patio slab covered in green growth becomes genuinely dangerous underfoot, especially after rain or overnight frost. The good news is that green algae is manageable once you understand why it forms. 

In this guide, we’ll walk you through exactly why green algae forms on patio slabs, how to remove it safely without damaging the surface, and the long-term steps that stop it from coming back, covering drainage, airflow, cleaning routines, and sealing, so you get a patio that stays clean season after season, not just for a few weeks.

What Causes Green Algae on Patio Slabs?

Algae is a simple organism that only needs three things to thrive: moisture, organic matter, and a lack of direct sunlight. Most patios provide all three without the homeowner realising it.

  • Patios that don’t drain properly hold rainwater far longer than they should
  • Low spots or cracked pointing trap water on the surface
  • Slabs laid without the correct fall stop water running off
  • Patios under trees or close to fences rarely get enough sun
  • North-facing patios often stay damp for days without direct light
  • Poor air circulation slows down how quickly the surface dries
  • Leaves, grass cuttings, and pollen break down into organic matter
  • Bird droppings and dirt add to the build-up over time
  • This debris settles into the slab’s porous surface and feeds algae spores
  • Natural stone and some concrete slabs are naturally porous
  • Porous surfaces absorb and hold water instead of letting it run off
  • Without a sealant, these surfaces are far more prone to algae, moss, and lichen

Causes Green Algae on Patio Slabs

How to Remove Existing Green Algae on Patio Slabs

Sweep and Clear Debris First

Before treating the algae itself, clear away leaves, moss, and loose dirt with a stiff outdoor brush. This prevents you from spreading organic matter during cleaning and gives any treatment direct contact with the slab surface.

Use a Dedicated Patio Cleaner or Algae Treatment

A specialist patio and algae cleaner (rather than a generic household detergent) is designed to break down algae at the root and is safe for most paving materials. Apply according to the product instructions, leave it to work, then rinse thoroughly.

Pressure Washing: Use It Carefully

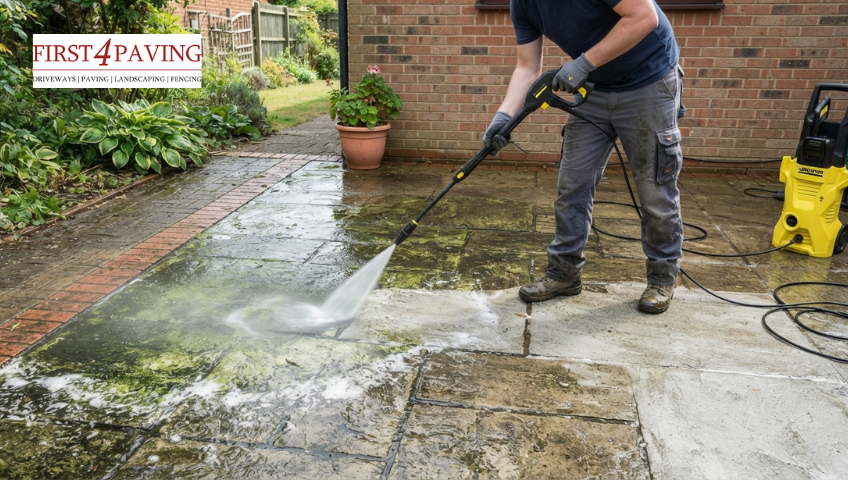
A pressure washer can lift stubborn algae quickly, but you need to use it correctly. Too much pressure or a nozzle too close can damage the slab surface, strip pointing, or push sand out of the joints on block paving, making the area more vulnerable to regrowth. A moderate pressure with a fan nozzle, kept at a consistent distance from the surface, is the safer approach.

A Natural Alternative: White Vinegar or Diluted Bleach

For smaller areas, a solution of white vinegar and water, or heavily diluted bleach, can kill algae effectively. Always rinse thoroughly afterwards and avoid these methods near plants, lawns, or ponds, as they can damage surrounding greenery.

How to Stop Green Algae on Patio Slabs 

Stopping algae for good means tackling the conditions that let it grow back, not just cleaning the surface once. As a patio expert in Enfield would tell you, a few consistent habits make the biggest difference over time. 

Improve Drainage

Poor drainage is one of the most common reasons algae keeps returning. Check your patio for low spots where water pools after rain, as these damp patches are exactly where algae thrives. If pooling is a recurring issue, have a professional assess the slab fall (the slight slope that lets water run off), since this often points to a base or installation problem rather than something surface cleaning can fix.

Trim Back Overhanging Trees and Shrubs

Shaded patios stay damp for far longer after rain, giving algae the perfect environment to spread. Cutting back branches, hedges, and shrubs that overhang the patio lets more sunlight and airflow reach the surface, which naturally slows regrowth. This is especially worth doing in spring and summer when foliage is at its thickest.

Clean Little and Often

Rather than waiting for algae to build up, a quick sweep and rinse every few weeks stops organic debris, leaves, pollen, and dirt from settling into the surface and feeding future growth. This becomes even more important in autumn, when leaf fall is at its heaviest and debris can build up quickly if left unattended.

Apply a Breathable Sealant

A good-quality, breathable sealant is one of the most effective long-term defences against algae. It stops water from soaking into the surface while still allowing trapped moisture underneath to escape, keeping the slabs drier for longer. For the best results, reapply the sealant every couple of years, as its protective properties gradually wear down with weather exposure and foot traffic.

Repoint or Fill Damaged Joints

Cracked, crumbling, or missing pointing between slabs creates small pockets where moisture collects and lingers. These damp gaps are an easy foothold for algae spores to settle and spread. Repointing or filling damaged joints closes off these entry points and helps keep the whole patio surface more resistant to regrowth.

Keep Furniture and Pots Slightly Raised

Garden furniture, plant pots, and other items sitting flush against the slabs block airflow underneath and create trapped, damp patches that rarely dry out. Raising these items slightly with pot feet or furniture risers lets air circulate and prevents hidden damp spots from becoming algae hotspots.

Avoid Overwatering Nearby Plants and Lawns

Excess water from overwatered lawns, flower beds, or hanging baskets often runs onto nearby patio areas, keeping the surface damp longer than it should. Being mindful of how much you water plants close to the patio, and directing runoff away from paved areas where possible, helps keep the surface drier overall.

Check Gutters and Downpipes

A blocked or poorly positioned downpipe can quietly flood the same section of patio every time it rains, creating a persistent damp patch that’s easy to overlook. Checking that gutters are clear and downpipes are directing water away from the patio, rather than onto it, removes a common but hidden source of recurring algae.

Prevention Tips to Keep Algae From Coming Back

  • Sweep the patio regularly to stop leaves and debris settling into the surface
  • Keep trees and shrubs trimmed back to maximise sunlight and airflow
  • Check drainage after heavy rain and address pooling early
  • Reapply a breathable sealant every couple of years
  • Keep gutters and downpipes clear so water doesn’t run onto the patio
  • Raise furniture and pots slightly to prevent trapped damp patches
  • Repoint joints as soon as cracks or gaps appear, rather than waiting

When to Call a Professional

If algae keeps returning no matter how often you clean, it’s often a sign of an underlying drainage or installation issue rather than a surface problem. Uneven falls, poorly bedded slabs, or ageing pointing all create the perfect conditions for algae to keep coming back, and no amount of cleaning will fix that on its own.

At First4 Paving, we provide reliable patio services across Enfield and Hertfordshire, and we assess patios for exactly this kind of issue, checking drainage, base condition, and jointing before recommending whether a clean and reseal will do the job, or whether sections need relaying.

If you’re dealing with a patio that keeps growing algae no matter what you try, First4 Paving can help get to the root of the problem and bring it back to how it should look. Contact us today to discuss your patio and get a personalised quote.

Conclusion

Green algae on patio slabs almost always comes down to trapped moisture, shade, and organic build-up, and once you address those root causes, the problem stops coming back. Regular cleaning keeps things looking good in the short term, but drainage, airflow, and a good sealant stop algae from taking hold season after season. If your patio keeps getting green no matter how often you clean it, it’s usually worth having the base and drainage checked rather than repeating the same clean-up every few weeks.

FAQs

How often should I clean algae off my patio?

A light sweep and rinse every few weeks is usually enough, with more frequent attention during autumn when leaf fall is heaviest.

Is pressure washing bad for patio slabs?

Not if it’s done correctly. Too high a pressure or too close a nozzle distance can damage the surface or strip pointing and jointing sand, so a moderate setting with a fan nozzle is safer.

Can I use bleach to remove algae?

Diluted bleach can work on smaller areas, but rinse it thoroughly and keep it away from plants, lawns, and ponds, as it can damage surrounding greenery.

How long does a sealant last on patio slabs?

Most breathable sealants last around two to three years before they need reapplying, depending on weather exposure and foot traffic.

Why does algae keep coming back even after cleaning?

Recurring algae usually points to an underlying issue like poor drainage, shaded conditions, or damaged pointing. Cleaning removes the algae but doesn’t fix the cause.

Patio drainage channel with gravel border in a wet UK garden

The Complete Guide to Patio Drainage in the UK

Standing water on a patio is not just something that looks bad. It can quickly turn into a real problem. Surfaces become slippery, moss and algae start to grow, and over time, the paving can begin to shift or crack. In some cases, poor drainage can even put extra pressure on nearby structures. With how often it rains in the UK, even a slightly uneven patio can start showing issues sooner than expected. 

The positive side is that these drainage problems are usually both preventable and fixable. Whether you are planning a new patio or dealing with an existing one that holds water, the right drainage setup can completely improve how it performs and lasts over time. 

In this guide, we will look at how patio drainage works, which systems actually perform well in UK conditions, the common mistakes people make, and simple ways to improve water flow around your outdoor space.

What Is Patio Drainage?

Patio drainage refers to the system of slopes, channels, pipes, and permeable surfaces that work together to move rainwater away from your patio and prevent it from pooling. Without a proper drainage setup, water has nowhere to go after rainfall; it sits on the surface, seeps beneath slabs, or runs toward your house walls.

Good drainage keeps patios safer, cleaner, and helps protect nearby walls and garden spaces from water damage. Since the UK gets regular rainfall, many homeowners now add patio drainage solutions during patio installation or renovation projects.

Common Patio Drainage Problems in the UK 

1. Water Pooling on the Surface

A wet stone patio with large puddles reflecting a cloudy sky, surrounded by lush green plants.

Standing water is one of the most common signs of poor patio drainage in UK systems. After heavy rain, puddles often appear in low areas of the patio. This usually happens when the surface slope is uneven or too flat.

2. Slippery Moss and Algae

Green moss and algae growing between wet stone patio flags in front of a modern stone house.

Wet patios can quickly attract moss and algae growth. These slippery green patches not only affect the look of the patio but also create safety risks during rainy and winter months.

3. Cracked or Loose Paving

Excess moisture under paving slabs can slowly weaken the patio base. Over time, this may cause cracked paving, loose stones, or sinking slabs.

4. Water Near House Walls

Poor drainage around patios near the house can direct rainwater toward walls and doors. If ignored for too long, this may lead to damp patches or damage around the property’s foundations. Pairing good drainage with well-designed front door steps keeps your entrance both stylish and protected.

Why Proper Patio Drainage Matters

Many people think patio drainage is only about appearance, but it plays a far more important role in protecting your property and keeping your outdoor space safe all year round.

In the UK, where rain is a regular occurrence throughout every season, even a small drainage issue can quickly turn into a costly problem. A well-designed drainage system for patios near the house helps in several important ways:

  • Reduce water damage: Standing water near walls and foundations can slowly cause dampness, cracks, and long-term structural issues that are expensive to repair.
  • Prevent slippery surfaces: Wet patios attract moss and algae growth, which create genuine safety risks for children, elderly family members, and anyone using the space during wet weather.
  • Extend patio life: Excess moisture weakens the base beneath paving slabs, leading to sinking, cracking, and loose stones that need costly repairs or full replacement.
  • Lower maintenance needs: A patio that drains well stays cleaner for longer, meaning less frequent pressure washing, moss treatment, and joint repairs.
  • Improve outdoor comfort: A well-drained patio dries out quickly after rain, so you can use your outdoor space far sooner rather than waiting days for puddles to clear.

Good drainage also benefits the surrounding garden. When rainwater is directed properly through channels, soakaways, or permeable surfaces, your soil stays balanced rather than waterlogged for days after a heavy downpour, helping plants thrive and reducing the risk of lawn damage close to the patio edge.

Types of Patio Drainage Systems

Different patio drainage systems are used across UK homes to manage rainwater and prevent surface flooding. The right option depends on your patio size, layout, and soil type.

1. Channel Drains

A modern linear drainage channel installed in a sleek, wet grey stone patio next to bi-fold doors.

Channel drains are narrow drains fitted along patio edges or near doors. They collect rainwater and direct it into underground pipes. A patio drainage channel is a popular choice for modern patios because it handles heavy rainfall well.

2. French Drains

A gravel-filled French drain border collecting rainwater runoff next to a wet flagstone patio.

French drains use gravel and underground pipes to move water away from wet areas. They work especially well in gardens with clay soil where water drains slowly.

3. Soakaways

Cross-section diagram of a patio drainage system showing runoff water flowing into an underground soakaway crate

A soakaway is an underground drainage area filled with stones or drainage crates. Water slowly filters into the soil, making it a common choice in many patio drainage UK projects.

4. Gravel Drainage Areas

Gravel helps absorb rainwater naturally and reduces puddles on patio surfaces. It also adds a clean and decorative finish to outdoor spaces.

5. Permeable Paving

Permeable paving patio drainage system

Permeable paving lets water pass through small gaps between blocks or stones instead of collecting on the surface. It is one of the most effective patio water drainage ideas for eco-friendly patios.

How to Improve Patio Drainage

Fixing drainage problems does not always mean rebuilding the entire patio. A few smart changes can greatly improve water flow and reduce standing water.

  • Create the Right Patio Slope: A patio should slightly slope away from the house so rainwater can flow toward drains or garden areas. Even a small adjustment can improve patio drainage performance in the UK.
  • Install Drainage Channels: Adding a patio drainage channel near doors, walls, or low areas helps collect rainwater before puddles form. Modern drainage channels are available in different styles to match patio designs.
  • Use Permeable Materials: Permeable paving, gravel joints, and porous surfaces allow water to drain naturally through the patio instead of sitting on top.
  • Add Gravel Borders: Gravel borders around patios help absorb extra water and reduce runoff. They also give outdoor spaces a cleaner and more decorative finish.
  • Improve Soil Drainage: Heavy clay soil often traps water for long periods. Mixing compost or organic material into the soil can improve drainage over time.

Best Patio Materials for Drainage

The right paving material plays a big role in controlling rainwater and improving patio drainage solutions.

  • Porcelain Paving: A strong, low-maintenance option that looks smart and performs well when laid with the correct slope to help water run off properly.
  • Natural Stone: A classic choice that gives a premium finish. Some types can naturally absorb a small amount of water, which helps reduce surface pooling.
  • Resin-Bound Surfaces: A modern, permeable solution that allows rainwater to drain through the surface rather than sitting on top, keeping the area clearer during wet weather.
  • Permeable Block Paving: Designed with small gaps that let water pass through into the ground below, making it one of the most effective options for managing patio drainage in the UK.

Patio Drainage Installation

A successful patio drainage installation starts with proper planning, the correct materials, and a layout that allows water to flow away from the surface efficiently. A well-installed drainage system helps prevent standing water, slippery areas, and long-term patio damage. For best results, it is always worth working with an experienced paving contractor who understands local drainage requirements and soil conditions. 

Step 1: Check the Patio Slope 

Start by checking how rainwater currently moves across the patio. The surface should have a slight slope that directs water away from the house and toward a suitable drainage point. This step helps identify low spots where water may collect after heavy rain.

Step 2: Choose the Right Drainage System

The best drainage setup depends on the patio size, surface material, and water runoff levels. Large patios often need channel drains or soakaways, while smaller patios may only require gravel borders, drainage gaps, or permeable paving to improve water flow.

Step 3: Prepare a Solid Sub-Base

Preparing a patio sub-base with crushed stone for drainage

A strong sub-base is important for both stability and drainage. Crushed stone or MOT Type 1 is commonly used beneath patios because it allows water to drain through the foundation while supporting the surface above.

Step 4: Install Drains and Pipework

A landscaper installing an underground drainage pipe connected to a patio channel drain.

Once the base is prepared, the drainage system can be installed. This may include fitting channel drains, underground pipes, soakaways, or drainage grates, depending on the patio design and property layout.

Step 5: Test the Water Flow

Before finishing the installation, test the patio with water to make sure it drains correctly. This final check helps confirm that water flows smoothly into the drainage system without pooling on the surface.

Patio Drainage Maintenance Tips

Even the best patio drainage systems need regular maintenance to work properly and prevent water problems.

  • Clean drains regularly: Remove leaves, dirt, and moss from drainage channels every few months to keep water flowing smoothly.
  • Remove moss and algae: Use a patio cleaner or stiff brush to clean slippery green patches, especially during wet weather.
  • Check for cracks in paving: Repair small cracks early before they turn into bigger patio damage.
  • Inspect drainage after heavy rain: After storms or long rainy periods, check if water drains properly across the patio surface.
  • Keep drainage channels clear: Blocked patio drainage channel systems can quickly lead to standing water and puddles.
  • Watch for sinking slabs: Uneven or loose paving may be a sign of hidden drainage issues underneath the patio.
  • Trim nearby plants regularly: Overgrown plants and roots can block drains and affect water flow around the patio.
  • Check gravel areas: Rake and refresh gravel drainage zones when needed to help maintain proper drainage.

How Much Does Patio Drainage Cost in the UK?

The cost of patio drainage UK projects depends on the patio size, drainage system, and installation work needed. This is usually just one part of your overall budget alongside new patio installation costs.. Simple fixes like a patio drainage channel may cost a few hundred pounds, while larger drainage projects can cost more.

Drainage TypeEstimated Cost (UK)
Gravel border / simple fix£150 – £400
Patio drainage channel (single run)£300 – £800
French drain installation£500 – £1,200
Soakaway system£1,000 – £2,500
Full permeable paving (per m²)£60 – £120 per m²

Factors that push costs higher:

  • Heavy clay soil requires extra excavation
  • Large patios needing multiple drain runs
  • Access difficulties (narrow side gates, raised patios)
  • Premium materials like porcelain or natural stone

While professional drainage installation adds to upfront costs, it is worth comparing it against the price of repairing damp walls (£500–£3,000+), replacing sunken paving, or treating foundation damp, all of which become real risks when drainage is ignored.

Conclusion

Effective patio drainage is not just a finishing touch; it is a long-term protection system for your outdoor space and your home. In a country like the UK, where rainfall is frequent and often heavy, ignoring drainage can quickly lead to slippery surfaces, structural damage, and costly repairs. On the other hand, a well-planned system ensures that water is controlled, directed, and safely absorbed without affecting your patio or nearby foundations.

Whether you choose channel drains, soakaways, permeable paving, or simple slope adjustments, the key is to match the solution to your garden’s conditions and maintain it regularly. Investing in proper patio drainage UK solutions today not only improves safety and appearance but also extends the life of your patio for many years to come.

FAQS

1. What is the best drainage option for a patio in the UK?

The best patio drainage option in the UK depends on your garden layout and soil type, but channel drains, soakaways, and permeable paving are among the most effective solutions for managing heavy rainfall.

2. What are the rules for patio drainage?

UK patio drainage rules generally require rainwater to drain into permeable ground, soakaways, or proper drainage systems rather than flowing directly into public drains or neighbouring properties.

3. What causes water to pool on a patio?

Water usually pools on a patio because of poor drainage, blocked channels, or an incorrect slope that stops rainwater from flowing away properly.

4. How much does patio drainage cost in the UK?

Patio drainage costs in the UK can range from around £150 for simple gravel drainage fixes to over £2,500 for larger soakaway or full drainage systems.

5. Can poor patio drainage damage my house?

Yes, poor patio drainage can direct water toward walls and foundations, which may lead to damp problems, cracked paving, and long-term structural damage.

A beautiful stone slab patio with premium outdoor dining furniture and integrated garden borders, showcasing a high-end finish that impacts a new patio cost.

How Much Does a New Patio Cost in the UK?

A new patio can completely change the way you use your garden. Whether you want a quiet corner for your morning coffee or a proper space for summer get-togethers, it is one of the best investments you can make at home.

Before anything else, most homeowners want a straight answer: what will this actually cost me? And that is a fair question. Prices vary quite a bit depending on the size of your space, the materials you choose, and who you hire to do the work. A small, simple patio will look very different on your invoice compared to a larger, premium design.

In this guide, we break down every factor that affects the price, from materials and labour to the smaller costs that are easy to overlook. By the end, you will have a clear and realistic budget in mind, with no surprises along the way.

What Factors Affect the Overall Price?

When you start planning your patio installation, it helps to understand what drives costs up or down. The total price of a patio project is usually made up of these key elements:

  • Size of the Area: A larger space needs more materials and takes longer to build, which increases both material and labour expenses.
  • Choice of Materials: Basic concrete slabs are far cheaper than Indian sandstone or porcelain tiles. Your material choice has the single biggest impact on the final bill.
  • Ground Preparation: A flat, grassy garden is straightforward to clear. An uneven or sloped garden, or one with old concrete to remove, will require extra preparation work and add to costs.
  • Location and Labour: Hiring tradespeople in London and the South East typically costs more than in northern England or other regions.

Average Installation Cost by Patio Size

The table below gives a rough guide to what you might spend on a typical patio, including both materials and professional labour:

Patio SizeApproximate DimensionsEstimated Cost Range
Small3m x 3m (9 sq metres)£800 – £1,800
Medium5m x 4m (20 sq metres)£2,000 – £4,500
Large6m x 5m (30 sq metres)£3,500 – £7,000+

If your budget is tight, a smaller project is much easier to manage. For a larger garden with premium finishes, total costs can climb above £8,000.

Breaking Down the Cost of Patio Materials

The material you choose is the biggest factor in the final price tag. Let’s look at the most common options for a new patio cost so you can find the right match for your budget.

1. Concrete Slabs (Low Cost)

Concrete slab patio for affordable outdoor spaces

If you want a low-cost patio, standard concrete flags are your best bet. They are tough, practical, and budget-friendly. While they might look a bit plain compared to stone, they do the job perfectly.

  • Estimated price: £35 to £60 per square metre.

2. Block Paving (Mid-Range)

Block paving patio with herringbone pattern design

Choosing block paving gives you lots of design options. You can lay them in different patterns, like herringbone, making it a popular choice for both patios and block paving driveways. If budget is a concern, it’s worth comparing this against the cheapest driveway options available.

  • Estimated price: £50 to £90 per square metre.

3. Natural Stone (Premium)

Natural stone patio with premium garden paving

Materials like Indian sandstone, limestone, or slate offer a beautiful, high-end finish. The cost of garden paving using natural stone is higher, but every single slab looks unique, which adds a lot of charm to your home.

  • Estimated price: £75 to £130 per square metre.

4. Porcelain Tiles (Luxury)

Modern luxury porcelain tiles with a sleek patio drainage system.

Porcelain is highly fashionable right now. It looks incredibly modern, is scratch-resistant, and does not absorb water, making it easy to clean. However, the patio paving cost for porcelain is top-tier because it requires special tools to cut and lay.

  • Estimated price: £90 to £150+ per square metre.

Labour Costs: How Much to Get a Patio Laid?

Unless you are a DIY expert, you will likely need to hire someone experienced who can handle everything from ground preparation to the final finish. But how much does it cost to build a patio when you factor in the workforce?

On average, a landscape gardener or builder charges between £150 and £250 per day per person. Most jobs require at least two workers. Therefore, the daily patio installation cost for labour alone will sit around £300 to £500.

  • A small patio usually takes 1 to 2 days.
  • A medium patio takes about 3 to 4 days.
  • A large or complex patio can take a week or more.

When you ask for patio quotes, always check if the price includes digging up the ground, removing the old waste (like skip hire), and supplying the hardcore base materials.

Hidden or Additional Costs to Consider 

When working out the cost of patio installation, it is easy to forget about the extra details. Here are a few things that can alter your final bill:

  • Drainage: Water must flow away from your house. If your garden retains water, you might need to install extra patio drainage channels.
  • Steps and Walling: If your garden slopes, you may need steps or retaining walls, which is where professional landscaping work comes in and adds to the overall cost.
  • Skip Hire and Waste Removal: Digging up your garden creates a surprising amount of waste. If your contractor does not include skip hire in their quote, you may need to arrange and pay for it separately, which can add to your overall bill.

How to Save Money on Your Patio

If you are worried about the cost of laying a patio, there are a few clever ways to keep expenses down:

  • Clear the Area Yourself: You can lower the patio laying cost by doing the hard work early. Dig up the old grass and clear away plants before the workers arrive.
  • Choose Simple Shapes: Avoid curves or weird angles. Square or rectangular designs mean fewer cuts, less waste, and lower costs.
  • Buy Materials in Bulk: If you are buying your own patio supplies, look for trade discounts or end-of-season sales at local builders’ merchants.

Conclusion 

Planning a patio does not need to be complicated, but understanding what drives the cost will help you budget realistically and avoid surprises. Material choice is the biggest variable, while ground conditions, garden size, and location all play a role in the final figure.

The best approach is to get a proper quote from an experienced paving contractor, ask exactly what is covered, and decide on your materials before work begins. With a little preparation, you can create a stylish, long-lasting outdoor space that adds real value to your home.

FAQS

1. How much does it cost to lay a patio in the UK?

 Professional patio installation in the UK generally costs between £50 and £150 per square metre, depending on the material chosen and the job’s complexity. Concrete is at the lower end, while natural stone and porcelain sit at the higher end. Your location and the amount of ground preparation needed will also affect the final price.

2. Which patio materials are the most affordable? 

Concrete slabs are the most budget-friendly option, offering durability at a low cost. Gravel is another economical choice, though it requires more maintenance over time. Block paving sits in the mid-range and offers a good balance between cost and appearance. Natural stone and porcelain are the most expensive materials.

3. Can I install a patio myself to save money?

 Yes, a DIY installation can save a significant amount on labour. However, it requires careful planning, the right tools, and a properly compacted base to avoid uneven settling over time. If the groundwork is not done correctly, the surface may shift or crack within a few seasons.

4. How long does it take to lay a new patio?

 A small patio laid by professionals typically takes one to two days. Medium-sized projects usually take three to four days, while larger or more detailed designs may take a week or longer. DIY installations will generally take more time, particularly if you are new to the process.

5. Can I use a patio cost calculator? 

Yes, an online cost calculator can give you a useful starting estimate based on your size, chosen material, and location. Keep in mind that these figures are approximate. A proper quote from a contractor after a site visit will always be more accurate, as it accounts for ground conditions and any specific requirements of your project.