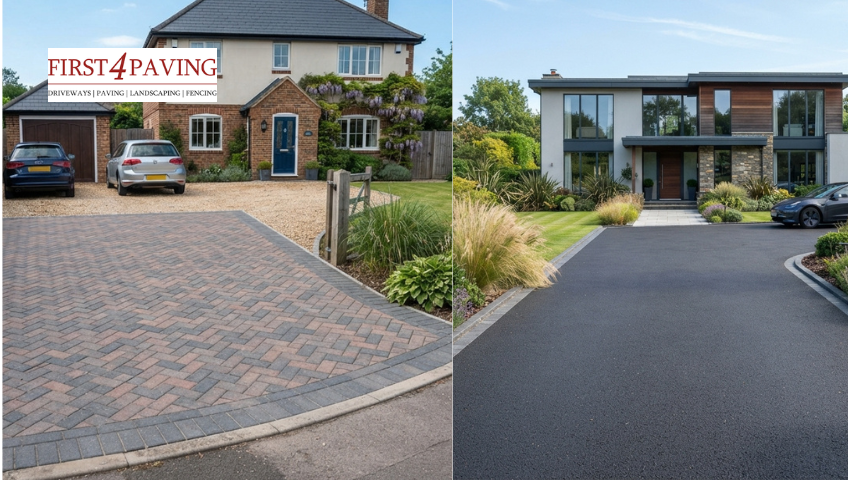

Block Paving vs Tarmac Driveway: Cost, Durability & Which Lasts Longer?

When it comes to choosing a new driveway, block paving vs tarmac is one of the most common comparisons homeowners across the UK make. Block paving is made from interlocking concrete or clay blocks, offering a decorative, customisable finish, while tarmac is a smooth asphalt surface known for quick installation and budget-friendly cost. Both handle daily vehicle use well but differ significantly in cost, durability, and longevity.

Block paving generally lasts longer (20–30+ years) and offers more design flexibility, but it costs more upfront. Tarmac is cheaper to install and quicker to lay, but it typically lasts 15–20 years and requires more frequent resealing. If budget is your main priority, tarmac wins. If you want a driveway that lasts decades and boosts kerb appeal, block paving is the better long-term investment.

Choosing between block paving and tarmac is one of the biggest decisions homeowners face when planning a new driveway. Both are popular across the UK, both handle daily traffic well, and both come with their own trade-offs in cost, durability, and lifespan. This guide breaks down exactly how they compare, so you can decide which one is right for your home.

What Is Block Paving?

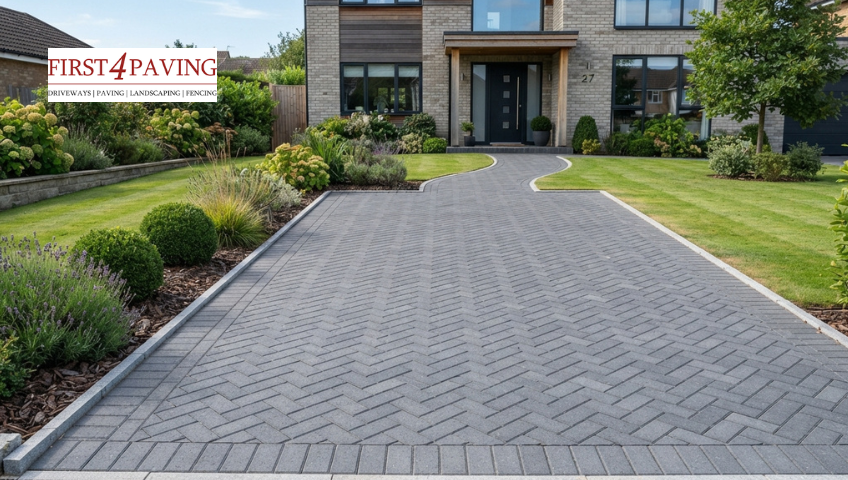
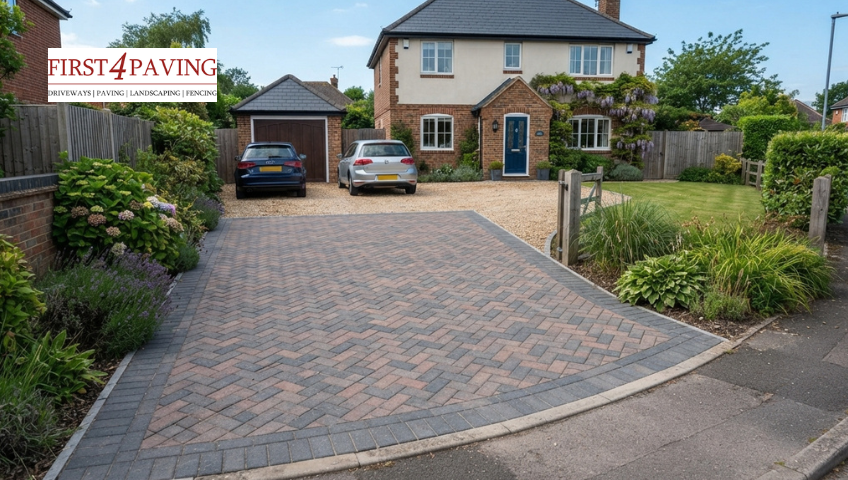
Block paving is a driveway surface made from individual concrete or clay blocks, laid by hand in an interlocking pattern. Because each block is separate, they can be arranged in different layouts herringbone, basketweave, stack bond and come in a wide range of colours and finishes, from charcoal and buff to brindle and silver grey.

This flexibility is what makes block paving so popular for homeowners who want their driveway to complement the look of their house, rather than serve a functional purpose.

What Is a Tarmac Driveway?

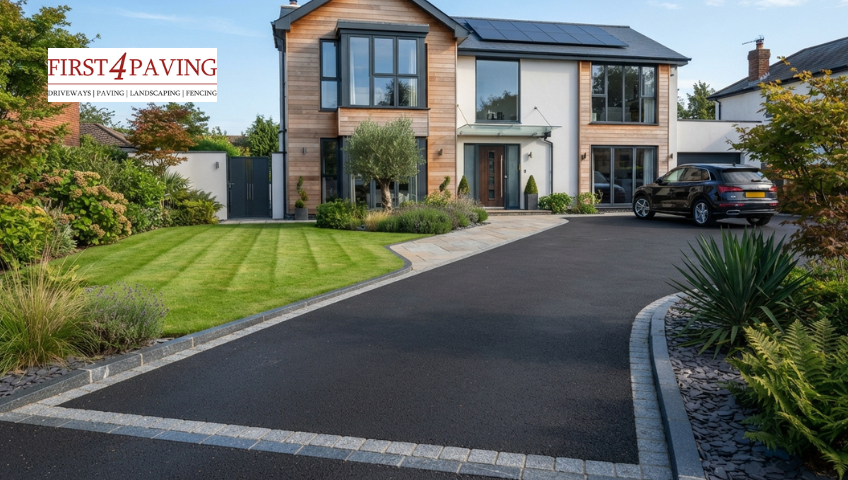
A tarmac driveway is made from asphalt, a mixture of aggregate and bitumen, laid as a single continuous surface and compacted while hot. It creates a smooth, uniform finish and is one of the fastest driveway surfaces to install, which is why it’s often the more budget-friendly option.

Tarmac doesn’t offer the same design variety as block paving, but it’s a practical, hard-wearing choice, especially for larger driveways or commercial areas.

Which Is More Durable, Block Paving or Tarmac?

Both surfaces are built to handle daily vehicle use, but they respond differently to weather, weight, and wear.

Block paving 

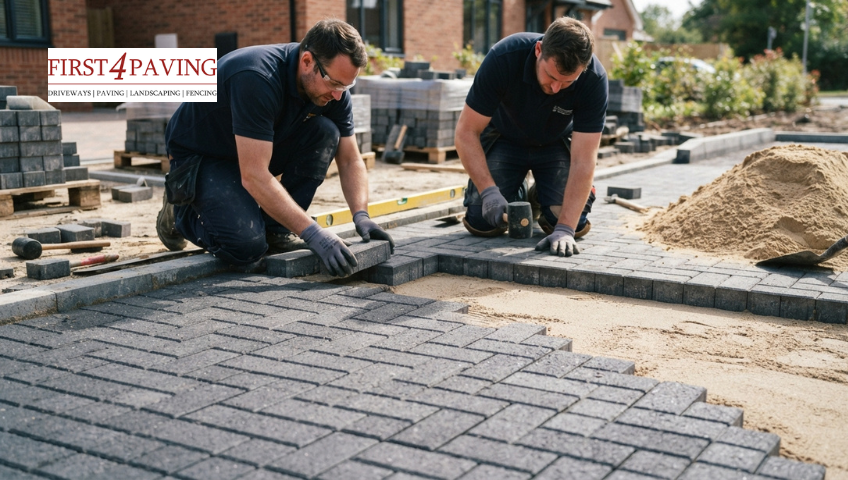
It handles heavy loads well because the weight is distributed across individual blocks rather than across a single continuous surface. It’s also less prone to cracking under pressure, since a single damaged block can be lifted and replaced without affecting the rest of the driveway. However, without proper edge restraints, blocks can shift or sink over time.

Tarmac Driveway

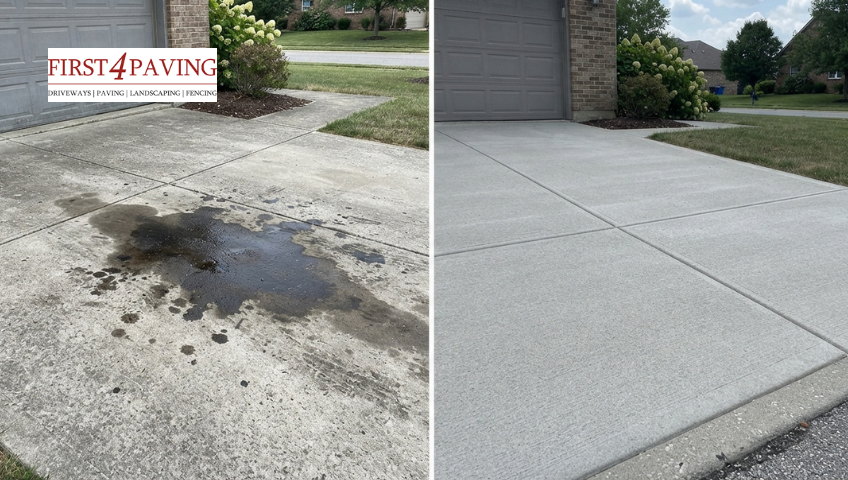
 It performs well under consistent daily use and resists water pooling when laid correctly with proper drainage. But because it’s a single solid surface, it’s more vulnerable to cracking during extreme temperature changes, and oil or fuel spills can soften and permanently stain the surface.

For most UK driveways, block paving slightly edges out tarmac in terms of durability, mainly due to its ability to withstand localised damage and to be repaired.

Block Paving

Which Driveway Needs Less Maintenance?

Maintenance is often the deciding factor for homeowners choosing between the two surfaces. For driveway experts in Enfield, this is one of the most common questions asked before installation, so here’s how the upkeep compares.

Block Paving Maintenance

Block paving needs a bit more regular, hands-on upkeep to keep it looking its best:

  • Re-sanding the joints: over time, the sand between blocks washes away with rain, so it needs topping up to keep the blocks locked in place and stop weeds taking hold
  • Re-levelling sunken blocks: if the ground beneath shifts or settles unevenly, individual blocks can sink slightly and need to be lifted, re-based, and relaid.
  • Weed and moss control: gaps between blocks can allow weeds and moss to grow, so regular sweeping, brushing, or treatment is essential to keep the surface tidy.
  • Periodic sealing: applying a sealant every couple of years helps protect the blocks from staining, fading, and water damage and makes cleaning easier.
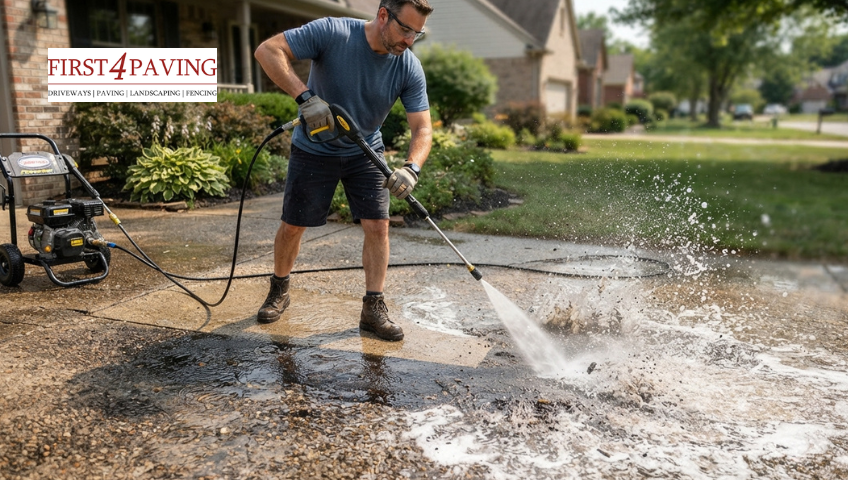
  • Regular pressure washing: an occasional deep clean helps lift dirt, oil marks, and algae buildup from the block surface and joints.
  • Replacing damaged blocks: if a block cracks or becomes stained beyond repair, it can be lifted out and replaced with a new one without disturbing the rest of the driveway.
  • Checking edge restraints: the borders or edging that hold the blocks in place should be checked periodically to ensure they haven’t loosened or shifted.

Tarmac Driveway Maintenance

Tarmac needs less frequent attention, but the repairs tend to be bigger when they’re needed:

  • Sealing every few years:  a sealant coat helps prevent water from seeping into the surface, which reduces the risk of cracking and frost damage over time
  • Filling cracks and potholes: small cracks should be patched early before they widen, and potholes should be filled promptly to prevent further deterioration.
  • Full resurfacing:  once the surface has worn down significantly or developed widespread cracking, a full resurfacing is usually needed to restore it properly
  • Removing oil and fuel stains: spills should be cleaned quickly, as tarmac can absorb and soften from prolonged contact with oil or fuel.
  • Clearing debris and standing water:  keeping the surface free of leaves, moss, and puddles helps prevent long-term surface damage.
  • Line and edge maintenance: if the driveway has painted lines or borders, these may need repainting or edge repair as they wear down over time.

Tarmac requires less day-to-day attention, but when it does need work, repairs are often more noticeable (patchwork sections can look different from the original surface). Block paving requires more regular small maintenance tasks, but repairs blend in seamlessly since individual blocks can be swapped out.

Block Paving or Tarmac Driveway: Which one is Better for Drainage?

This is an important consideration in the UK, where planning permission rules apply to non-permeable driveways over a certain size.

Permeable Block Paving

Permeable block paving allows water to drain through gaps between the blocks and into the ground below, often helping homeowners avoid the need for planning permission.

Standard Tarmac Driveway

Standard tarmac is non-permeable, meaning water runs off the surface rather than through it, which may require additional drainage solutions (such as soakaways) to remain compliant with UK regulations.

If drainage and planning compliance are a concern, permeable block paving is usually the more straightforward option.

Tarmac Driveway

What Is the Lifespan of Block Paving and Tarmac Driveways?

This is where the two surfaces really start to differ in the long run.

Block Paving Lifespan

Block paving typically lasts 20–30 years or more, provided it’s installed on a proper sub-base and maintained correctly. Because the surface is made up of individual interlocking blocks rather than a single continuous layer, it handles ground movement, weight, and weather far better over time. Any localised damage can be fixed without affecting the rest of the driveway. With regular joint re-sanding, occasional re-levelling, and periodic sealing, a well-installed block paving driveway can comfortably outlast a tarmac surface by a decade or more.

Tarmac driveway Lifespan

Tarmac typically lasts 15–20 years before it needs resurfacing or significant repair. As a single continuous surface, it’s more susceptible to cracking due to temperature changes, ground movement, and heavy or repeated loads at the same spot. While regular sealing and prompt crack repair can help extend its life, tarmac generally reaches the point of full resurfacing sooner than block paving does.

The lifespan of both surfaces depends heavily on installation quality. A poorly laid tarmac driveway can fail within a few years, just as poorly laid block paving can shift and sink prematurely. Choosing an experienced, reputable installer matters as much as the material itself.

Block Paving vs Tarmac: Which One Should You Choose?

FactorBlock PavingTarmac
Upfront costHigherLower
DurabilityVery durable, easy localised repairsDurable, but cracks under solid stress
Lifespan20–30+ years15–20 years
MaintenanceRegular small upkeepLess frequent, larger repairs
Kerb appealHigh  customisableModerate  uniform finish
DrainagePermeable options availableRequires separate drainage planning

Choose tarmac if: you want a lower upfront cost, a quick installation, and a simple, uniform look.

Choose block paving if: you want a driveway that lasts longer, adds kerb appeal, and offers more design flexibility.

Why Choose First4 Paving for Your Driveway?

Whichever option suits your home best, First4 Paving installs both block paving and tarmac driveways, so you get honest, unbiased advice rather than a recommendation pushed toward just one option. As Professional driveway contractors in Enfield, our team takes the time to assess your property, budget, and long-term goals before recommending the surface that’s truly right for you, not just the one that’s easiest to sell. We provide expert block paving and tarmac driveway services, and proudly cover driveway installations across Enfield and Hertfordshire, delivering high-quality artistry on every project. We proudly cover driveway installations across Enfield and Hertfordshire, delivering high-quality artistry on every project. 

Contact us today for a free, no-obligation quote and expert guidance on the best driveway choice for your home.

Conclusion

Both block paving and tarmac are proven, reliable choices for UK driveways, but the right one for you depends on your priorities. If a lower upfront cost and quick installation matter most, tarmac is hard to beat. If you’re after a driveway that lasts decades, adds genuine kerb appeal, and can be styled to match your home, block paving is the stronger long-term investment. Whichever direction you lean, getting it installed properly by an experienced contractor ultimately determines how long it lasts and how well it performs.

If you’re still weighing up your options, First4 Paving is here to help you choose with confidence and get the job done right the first time.

FAQs

How long does a block paving driveway last compared to tarmac? 

Block paving typically lasts 20–30 years or more, while tarmac usually lasts 15–20 years, depending on installation quality and maintenance.

Is tarmac cheaper than block paving in the UK? 

Yes, tarmac is generally cheaper to install per square metre than block paving, mainly due to lower labour requirements.

Does block paving need more maintenance than tarmac? 

Block paving requires more frequent, smaller tasks such as re-sanding and weed control, while tarmac requires less frequent but larger repairs such as resurfacing.

Can a tarmac driveway be repaired as easily as block paving? 

Not quite; block paving repairs are easier to blend in since individual blocks can be replaced, while tarmac patches can be more visible against the original surface.

How to Remove an Oil Stain from a Driveway

How to Remove an Oil Stain from a Driveway (Fast & Effective)

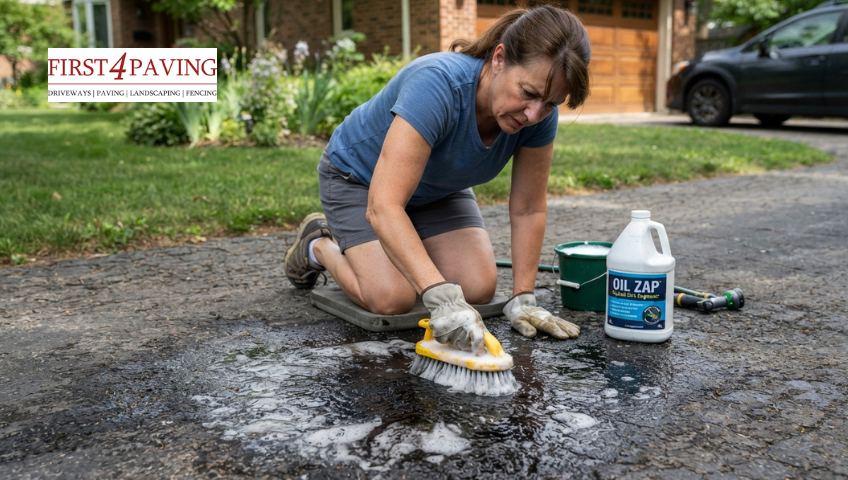
To remove an oil stain from a driveway, first absorb any fresh oil with cat litter or cornstarch, then scrub the area with a baking soda paste or Dawn dish soap using a stiff brush. For old, set-in stains, apply a degreaser or poultice, let it sit for several hours, then scrape and rinse. Repeat as needed, since older stains often take more than one treatment.

A fresh spill or a stain that’s been sitting for months- either way, most driveways can be brought back to looking clean with a few household products and some elbow grease. This guide covers exactly how to remove an oil stain from a driveway, or simply clean oil from one that’s picked up a mark over time, with separate methods for fresh spills and old, set-in stains, and guidance depending on whether your driveway is concrete, asphalt, or block paving.
Why Oil Stains Are Hard to Remove?

Concrete and asphalt are both porous materials, meaning they act like sponges rather than solid, sealed surfaces. When oil spills onto a driveway, it doesn’t just sit on the surface; it seeps into the tiny pores beneath the surface. The longer it sits, the deeper it travels, which is why a fresh spill wiped up in minutes is far easier to deal with than a stain that’s been baking in the sun for weeks or months. This is also why a quick rinse or a single pressure wash often isn’t enough on its own: it can clean the surface while oil trapped underneath slowly resurfaces later.

What things will you need to remove an oil stain from a driveway? 

  • Cat litter, cornstarch, or sawdust (as an absorbent)
  • Baking soda
  • Dawn dish soap or a laundry detergent
  • A stiff-bristled scrub brush
  • A garden hose (or pressure washer, optional)
  • A concrete-safe degreaser (e.g., Zep, Oil Eater, or Purple Power) for tougher stains
  • A plastic scraper
  • Rubber gloves and eye protection, especially if using a degreaser

How to Remove an Oil Stain from a Driveway: Methods That Actually Work

Whether you’re tackling a fresh spill yourself or following the same routine most driveway contractors in Enfield rely on, the methods below cover every stage of oil stain removal, from a same-day spill to a mark that’s been sitting for months.

Remove an Oil Stain from a Driveway

Method 1: Treat Fresh Oil Stains Immediately

If you’ve just noticed the spill, acting fast makes the rest of the process much easier, since fresh oil hasn’t had time to soak deep into the concrete yet.

  1. Pour a generous layer of cat litter, cornstarch, or sawdust directly over the stain.
  2. Let it sit for at least 20–30 minutes to soak up the oil. For a larger spill, leave it overnight.
  3. Sweep up the absorbent material with a broom and dispose of it in the trash. Don’t rinse it down a storm drain, since it now contains oil.
  4. Once the excess oil is absorbed, scrub the remaining residue with dish soap and warm water, then rinse with a hose.

Method 2: Remove Old, Set-In Oil Stains (Baking Soda Paste Method)

Old stains have already soaked into the concrete’s pores, so they need something that can break down the oil rather than just absorb it.

  1. Mix baking soda with a small amount of water into a thick paste (about the consistency of peanut butter, so it stays in place rather than running off)
  2. Spread the paste generously over the stain, covering it completely.
  3. Let it sit for 30 minutes to an hour.
  4. Scrub firmly in a circular motion using a stiff-bristled brush.
  5. Rinse thoroughly with a hose.
  6. Repeat if any discolouration remains; older stains often need two or three treatments.

Method 3: Using Dawn Dish Soap

Dawn is a popular choice for oil stains because it’s specifically formulated to cut through grease (which is also why it’s used to clean oil off wildlife after spills).

  1. Apply Dawn dish soap directly onto the stain.
  2. Add a small amount of warm water and work it into the stain with a stiff brush.
  3. Let it sit for 10–15 minutes; don’t let it dry on the surface.
  4. Scrub again, then rinse thoroughly with water.

This method is gentle enough to use on asphalt as well, unlike stronger chemical degreasers.

Method 4: Using a Concrete Degreaser (For Stubborn Stains)

When baking soda or dish soap isn’t enough, a concrete-safe degreaser is the next step up.

  1. Choose a degreaser made for concrete (e.g., Zep Driveway & Concrete Cleaner or Oil Eater).
  2. Apply per the product label; most recommend diluting for lighter stains.
  3. Let it sit for the recommended time (usually 1–15 minutes; check the label).
  4. Scrub vigorously with a stiff or steel brush.
  5. Rinse away thoroughly with water.

Note: oil that has deeply penetrated the surface can resurface within 24 hours after cleaning. If this happens, simply repeat the process.

Method 5: Remove Oil Stains Without a Pressure Washer

You don’t need a pressure washer to get rid of oil stains; it just takes a bit more manual scrubbing.

  1. Apply your chosen treatment (baking soda paste, dish soap, or degreaser) as described above.
  2. Instead of pressure washing to rinse, use a stiff push broom or scrub brush with a bucket of hot, soapy water.
  3. Rinse using a regular garden hose on a strong spray setting, sweeping water toward a drain or grassy area.
  4. For large or stubborn areas, repeat the scrub-and-rinse cycle two or three times rather than relying on higher pressure.

This approach takes a little more elbow grease, but works just as well for most household-sized stains.

Method Comparison Table

MethodBest ForTime Needed

Cat litter/cornstarch

Fresh spills20–30 min

Baking soda paste

Light to moderate stains30–60 min

Dawn dish soap

Fresh to moderate stains, asphalt-safe10–15 min

Concrete degreaser

Stubborn, older stains

1–15 min + scrubbing

Poultice (degreaser + absorbent)

Deep, long-set stains

5–12 hours

Pressure washing + degreaserLarge or widespread areas

15 min soak + wash

Removing Oil Stains from Concrete and Asphalt

Both surfaces respond to the same core methods covered above, but a few adjustments matter depending on which one you’re working with:

  • Concrete: The most forgiving surface for this job. It tolerates baking soda, dish soap, and most degreasers well and can handle longer dwell times and firmer scrubbing than the other two surfaces without risk of damage. Because concrete is more porous than asphalt, older stains may need two or three repeat treatments before they fully lift.
  •  Asphalt (tarmac): More sensitive to harsh chemicals and high heat, so stick to dish soap and gentler scrubbing; strong solvents can soften or discolour the surface. Avoid scrubbing too aggressively, since this can dislodge the loose stone aggregate on the surface. On a hot day, treat the stain in the shade or during a cooler part of the day, since softened tarmac is easier to mark or dent.
  • For a light or fresh mark on tarmac specifically, plain washing-up liquid diluted in warm water, applied with a soft-bristled broom, is often enough on its own. For an older or greasier mark, the best oil remover for tarmac is typically a dedicated tarmac-safe degreaser rather than a generic concrete product, since it won’t soften or discolour the surface.

How to Remove Oil Stains from Block Paving

Block paving needs a slightly different approach than solid concrete or asphalt. Because it’s made of individual blocks with sand-filled joints between them, oil can spread sideways into the gaps and soak into each block, and overly aggressive scrubbing or jet washing can wash out the joint sand.

Removing Oil Stains from Concrete and Asphalt

  1. Blot immediately if the spill is fresh. Lay paper towels or an absorbent (cat litter, sawdust) over the stain to soak up as much oil as possible before it spreads into the joints.
  2. Apply a cleaning agent and let it work. The best oil remover for block paving is usually a specialist block-paving product, since it’s formulated to work around jointing sand, but a degreasing dish soap or WD-40 can help with lighter stains. Whatever you use, let it sit for at least an hour, since block paving often needs longer dwell time than solid concrete. If you don’t have a pressure washer, this whole method works just as well with a hose and a stiff brush, following the same hand-scrubbing approach described earlier.
  3. Scrub gently with a stiff brush, working in the direction of the joints rather than across them, to avoid disturbing the jointing sand.
  4. Rinse with a hose rather than a pressure washer where possible. Jet washing an untreated stain can drive the oil deeper into the block rather than lifting it out; always treat the stain first, then rinse.
  5. Repeat as needed. Block paving stains, especially older ones, often take two or three treatments before they fully lift.
  6. Top up joint sand and, if any is washed out during cleaning, afterwards.

Will WD-40 Remove Oil Stains from Block Paving?

Yes, to an extent. WD-40 can help loosen and lift oil stains, especially fresh ones, because it’s designed to break down and displace oil. Spray it directly onto the stain, let it sit for 5-10 minutes, then scrub with a stiff brush and rinse with water. However, WD-40 itself contains mineral oil, so avoid overspray onto unaffected areas of the paving, as it can cause its own light staining. For older or more stubborn stains, a dedicated block-paving oil remover will deliver more reliable results than WD-40 alone.

How to Prevent Future Oil Stains

  • Sealing a driveway with a concrete or asphalt sealant creates a barrier that prevents oil from soaking in and is best done right after a deep clean, while the surface is fully dry. 
  • Use a drip pan or absorbent mat under any vehicle known to leak.
  • Clean spills immediately rather than letting them sit; the faster you act, the easier the cleanup.

At First4 Paving, as professional Driveway installers, we know a stained, tired-looking driveway can take the shine off an otherwise great-looking home, and sometimes a clean isn’t enough to fully restore it, especially if the surface is cracked, uneven, or coming to the end of its life. That’s where we can help. We provide driveway services including: Block paving, Resin driveways, Tarmac driveways, Gravel & shingles. Whether you need a stubborn stain sorted or you’re ready for a brand-new driveway altogether, our team covers Enfield and Hertfordshire and is happy to help. Contact us today for a free quote.

Conclusion

Most oil stains, even ones that have been sitting for months, will lift with a bit of patience and the right combination of absorbent, cleaner, and dwell time. If you’ve worked through the steps above two or three times and a faint mark still won’t budge, it’s worth calling in a professional driveway cleaning service rather than reaching for a stronger chemical, since overly harsh products can damage the surface more than the stain itself. And once the driveway’s clean, a coat of sealant ensures the next spill wipes away in minutes instead of turning into another afternoon project.

FAQs

Can I use bleach to remove an oil stain?

Not recommended: bleach doesn’t break down oil effectively and can discolour concrete or damage paving.

Does vinegar work on oil stains?

Yes, for lighter stains. Pour vinegar directly onto the stain, let it fizz and sit for about 15 minutes, then scrub and rinse. It’s a gentler, eco-friendly option, though less effective than a degreaser on older stains.

What PSI pressure washer should I use for oil stains?

Most concrete driveways can handle 2,500–3,000 PSI. Always pre-treat the stain with a degreaser first; full pressure on an untreated stain can drive oil deeper into the surface rather than lifting it out.

Does the type of oil matter (motor oil vs transmission fluid vs diesel)?

Not significantly for the removal method: all petroleum-based fluids respond to the same absorb-then-degrease approach. Diesel and transmission fluid tend to spread and soak in faster than motor oil, though, so treating the spill quickly matters even more. 

Can oil stains permanently damage a driveway?

Not usually structurally, but they can discolour the surface and prevent sealants or paint from bonding properly if not fully removed.

How to Lay a Block Paving Driveway

How to Lay a Block Paving Driveway

A block paving driveway is made up of individual concrete or clay blocks, laid closely together in a chosen pattern to form a strong, durable surface. Unlike a single poured surface such as concrete or tarmac, block paving is built from smaller interlocking units, giving it a distinctive, structured look that many homeowners prefer.

Getting the result right relies on several layers beneath the surface coming together correctly before a single block is laid. Knowing what is block paving? A carefully built system of layers rather than just a decorative top surface- helps explain why even the most attractive pattern will eventually shift, sink, or crack if the foundations are wrong.

This guide walks through the entire process of laying a block-paving driveway from start to finish, covering the required tools, the groundwork, and the steps for laying, cutting, and properly finishing the blocks. Whether you are planning to tackle the project yourself or simply want to understand what a professional installation entails, this breakdown covers everything that goes into building a driveway that lasts.

Tools and Materials You Will Need

  • Block paving units (in your chosen colour and pattern)
  • Type 1 MOT sub-base material
  • Sharp sand for the bedding layer
  • Kiln-dried sand for joint filling
  • Edge restraints (concrete, timber, or block kerbs)
  • Weed membrane
  • Plate compactor
  • Spirit level and string line
  • Rubber mallet
  • Block splitter or angle grinder for cutting

Understanding Block Paving Layers

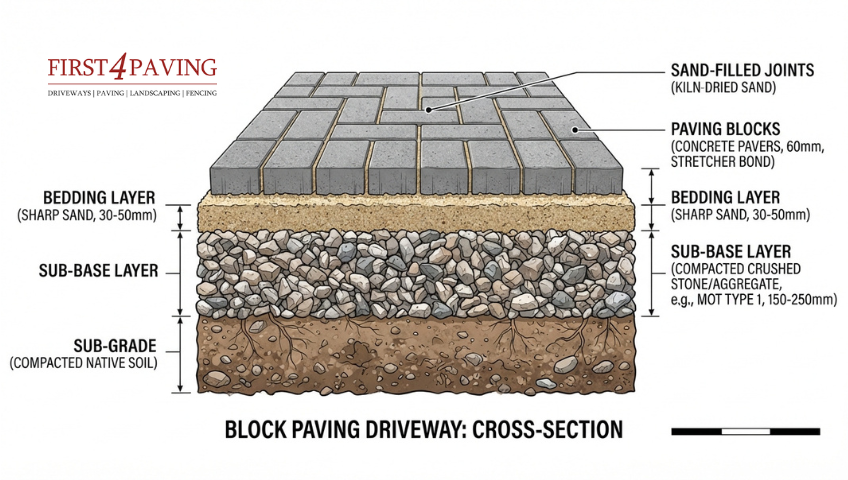
A block paving driveway is built up of several distinct layers, each playing a specific role in the driveway’s strength and drainage. From the ground up, this typically includes the sub-base, a bedding layer of sharp sand, the paving blocks themselves, and finally the jointing sand that locks everything together. Driveway experts agree that getting the depth and compaction of each layer right is what determines whether the driveway lasts for decades or starts to fail within a few years.

Block Paving Layers

How to Lay a Block Paving Driveway | Step by Step

Following the correct block paving steps in order is essential to achieving a durable, professional finish, from initial planning through to the final compaction and jointing.

Step 1: Planning and Measuring the Area

Start by marking out the full area of the driveway using string lines and pegs. Take accurate measurements of length and width, and decide on a laying pattern- herringbone, basketweave, or stack bond- as this affects how many blocks you will need and how they should be cut at the edges. At this stage, it is also important to plan the fall of the driveway, a slight slope of around 1 in 60 away from the house, to ensure rainwater drains properly rather than pooling on the surface.

Step 2: Excavation

Once the area is marked out, excavate to a depth that accounts for the sub-base, sand bed, and block thickness combined, typically around 200-250mm in total. Before digging, check for any buried services such as gas, water, or electricity lines running through the area. Removing turf, soil, or old paving at this stage also gives a clean base to work from.

Step 3: Installing the Sub-Base

Lay the Type 1 MOT sub-base in layers of no more than 100mm at a time, compacting each layer thoroughly with a plate compactor before adding the next. A well-compacted sub-base is one of the most important factors in preventing the driveway from sinking or shifting later, so this step should not be rushed.

Step 4: Adding Edge Restraints

Install edge restraints along the driveway perimeter to hold the blocks in place and prevent them from spreading sideways over time. Good block paving edging is what keeps the entire surface locked together, so this step should never be skipped, even on smaller driveways. Concrete edging is the most common choice for durability, though timber or block curbs can also work depending on the overall design.

Step 5: Laying the Sand Bed

Spread a layer of sharp sand over the compacted sub-base, screeding it to an even depth of around 30mm to 50mm. Sand in block paving plays two key roles: sharp sand acts as the bedding layer that lets blocks settle evenly, while kiln-dried sand is later used to fill and lock the joints once laying is complete.

Step 6: Laying Block Paving

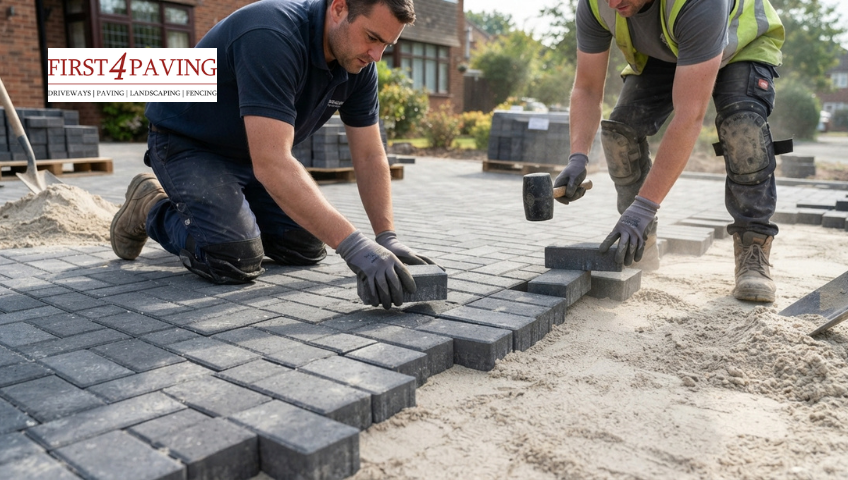
Begin laying the blocks from a fixed straight edge, working outward in your chosen pattern. Place each block gently onto the sand bed, using a rubber mallet to tap it level with its neighbours. Check levels regularly with a spirit level to ensure the surface stays level and follows the intended fall for drainage.

Step 7: Cutting Blocks for Edges and Borders

As you reach the edges of the driveway, blocks will need to be cut to fit neatly into gaps and corners. A block splitter works well for straight cuts, while an angle grinder is better suited to more intricate shapes. Taking time over these cuts makes a noticeable difference to the finished look of the driveway.

Step 8: Compacting and Jointing

Once all the blocks are laid, run a plate compactor over the entire surface to bed the blocks firmly into the sand below. Afterwards, brush kiln-dried sand into the joints between the blocks, then compact the surface again to help the sand settle fully and lock the blocks together.

Step 9: Final Checks and Clean-Up

Sweep away any excess sand and check the surface for uneven areas or blocks that may need adjusting. It is also worth checking that water flows correctly toward the intended drainage point after a light hose test.

How to Lay a Block Paving Driveway

Common Mistakes to Avoid

Here are the common mistakes u should avoid while laying a block paving Driveway

  • Skipping proper compaction of the sub-base, leading to sinking over time
  • Getting the fall wrong, causing water to pool on the surface
  • Leaving out edge restraints, which allows blocks to shift and spread
  • Rushing the jointing process, leaving blocks loose or prone to movement

How Long Does It Take to Lay Block Paving Driveway?

For a standard driveway, the process typically takes 2 to 4 days, depending on the area size and the complexity of the chosen pattern. For those requiring significant excavation and drainage work, it may take longer, depending on the driveway installation time.

Block Paving Driveway

When You Should Call a Professional 

Laying a block-paving driveway is achievable as a DIY project for smaller areas, particularly for those with some groundwork experience, provided time and care are taken during the groundwork stages. However, getting the sub-base compaction, drainage falls, and edge restraints right is critical to the long-term performance of the driveway, and small errors at this stage often only become apparent months or years later, once the surface begins to shift or settle unevenly.

At First4 Paving, as professional driveway installers, we provide block paving services in Enfield and the surrounding areas, with experience handling projects of all sizes, from smaller domestic driveways to larger, more complex layouts. Working with an established local installer helps ensure your block paving is laid correctly from the groundwork up, using the right materials and techniques at each stage, so the finished driveway performs well and keeps its appearance for years to come.

Conclusion

Laying a block paving driveway involves far more than simply arranging blocks on the surface. From accurate excavation and sub-base compaction to correct drainage falls and careful jointing, each stage plays a part in how well the finished driveway performs over time. Taking the process step by step, and paying close attention to the groundwork in particular, helps ensure a durable, attractive result that lasts for years to come.

If you are considering a block paving driveway for your property, First4 Paving can help bring your project to life with expert installation from start to finish. Contact us today to discuss your requirements and get a personalised quote.

FAQs

Can the Same Process Be Used for a Block Paving Path?

Yes, the same foundational principles apply when laying a block paving path, though the excavation depth and sub-base thickness can often be reduced slightly, since paths carry foot traffic rather than vehicle loads.

What type of sand is used in block paving?

Two types of sand are typically used: sharp sand for the bedding layer beneath the blocks, and kiln-dried sand for filling the joints once the blocks are laid.

How long does a block paving driveway last?

With proper installation and regular maintenance, a block paving driveway can last between 20 and 25 years.

Can I lay a block paving driveway myself?

It is possible to lay a block paving driveway yourself, particularly for smaller areas, but getting the sub-base compaction, drainage falls, and edge restraints right is essential for the driveway to perform well over the long term.

How Much Does a Gravel Driveway Cost

How Much Does a Gravel Driveway Cost in Enfield? Prices & Key Factors Explained

Gravel driveways have become a popular choice for homeowners in Enfield looking for an affordable and attractive alternative to block paving or tarmac. They are quick to install, low maintenance, and available in a range of styles, from natural pea shingle to decorative self-binding gravel, making them suitable for a wide variety of property types across the borough. The overall cost of a gravel driveway, however, depends on several factors, including the area size, the type of gravel chosen, and the groundwork required to prepare the site. 

This article breaks down how much a gravel driveway costs in Enfield, along with the key factors that affect your final quote, so you can budget accurately before requesting a quote from a local paving specialist.

Average Gravel Driveway cost in Enfield

On average, a gravel driveway in Enfield costs between £50 and £70 per m² when professionally installed, depending on the type of gravel and the condition of the existing surface. For a standard three-car driveway of around 40m², homeowners can expect to pay between £2,000 and £2,800, including materials, labour, and basic groundwork. Larger driveways or those needing extensive excavation and drainage work may cost more. Properties in Greater London, including Enfield, tend to sit at the higher end of the UK price range compared to northern regions, mainly due to labour and delivery costs.

Cost Breakdown

Driveway Size

Estimated Cost Range

Average Completion Time

Small (up to 20m²)

£1,000 to £1,600

1 day

Medium (20m² to 40m²)

£1,600 to £2,8001 to 2 days

Large (40m² and above)

£2,800 to £4,600+

2 to 3 days

Cost of Different Gravel Types

Different gravel types have varying price points and are typically sold by the tonne. The type you choose affects not only the cost, but also the finish, durability, and maintenance needs of your driveway.

Crushed Rock

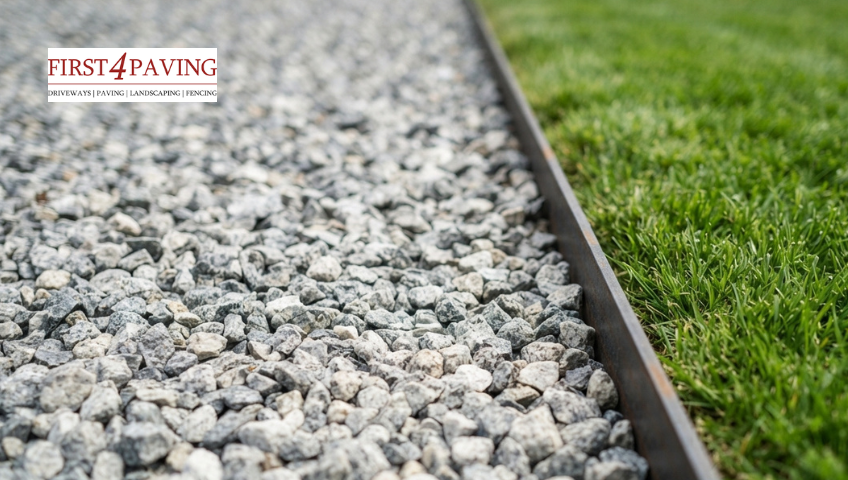
A close-up of grey angular crushed rock aggregate, commonly used as a sub-base layer for driveways.

Crushed Rock

Crushed rock is one of the most affordable gravel options, typically costing £50£55 per tonne. Its angular shape allows it to compact tightly, making it well-suited for sub-base or structural layers where a smooth, decorative finish is less important.

River Rock

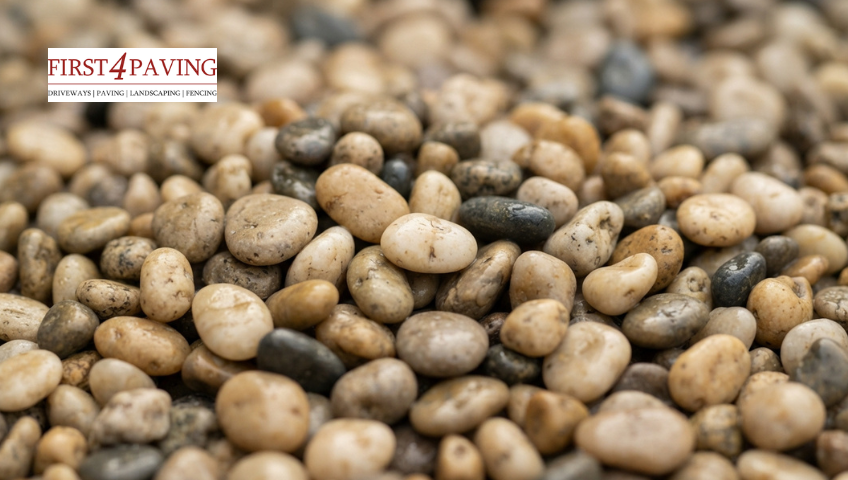
Smooth, rounded river rock gravel in mixed grey and beige tones, often used for driveway surfaces and borders.

River Rock

River rock costs around £55£60 per tonne. Its naturally smooth, rounded texture gives a softer appearance than crushed rock, though it compacts less densely, making it more suitable for surface layers or decorative borders rather than heavy structural use.

Self-Binding Gravel

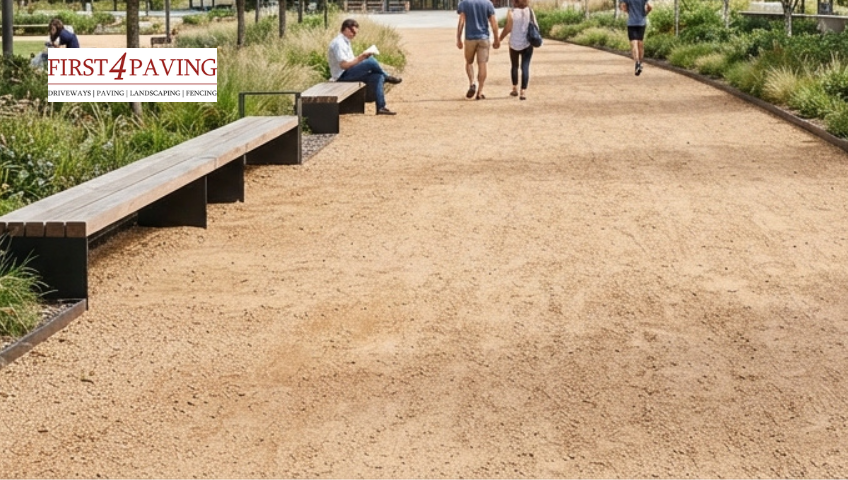
A fine, sandy texture makes self-binding gravel ideal for creating a firm, level driveway surface once laid and compacted.

Self-Binding Gravel

Sometimes it is called hoggin; it costs approximately £90£95 per tonne. It is made up of stone particles, sand, and clay, which bind together tightly when compacted to form a solid, stable surface. This makes it a popular choice for driveways that need a firmer finish underfoot and for vehicles.

Pea Gravel

Small, rounded pea gravel in natural stone tones, forming a dense, decorative top layer on a residential driveway.

Pea Gravel

Pea gravel typically costs £100 to £110 per tonne. Its small, rounded stones pack densely together, creating a smooth, stable surface that works well as a decorative top layer, particularly when paired with a cellular grid system to prevent migration.

Marble Chips

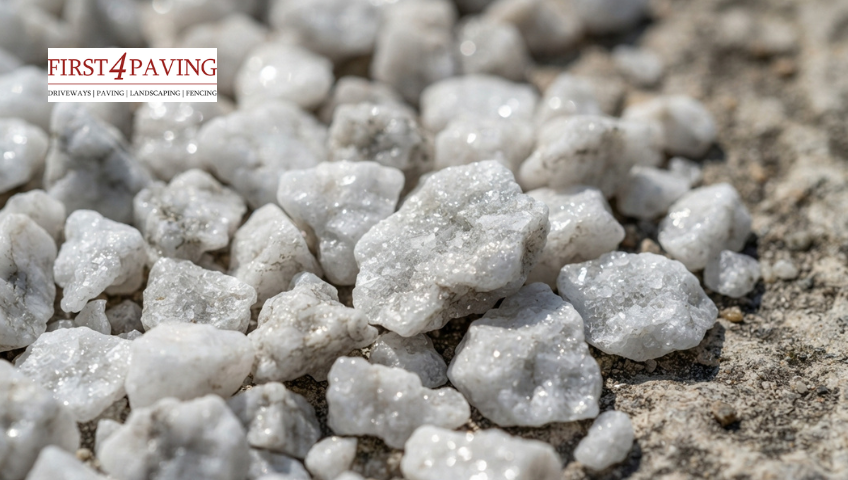
Polished white and grey marble chips laid as a premium decorative driveway surface.

Marble Chips

Marble chips sit at the higher end of the price range, costing around £150£160 per tonne. Sourced from specific quarries, they are chosen primarily for their appearance rather than durability, giving driveways a bright, premium finish.

Key Factors That Affect the Gravel Driveway Cost

Crushed rock and river rock are commonly used for sub-base or structural layers, where appearance matters less. Pea gravel and self-binding gravel are popular top-layer choices, as they compact more densely and create a firmer, more stable surface. Marble chips and other decorative aggregates sit at the higher end, chosen mainly for their appearance rather than durability. Driveway experts in Enfield can help you choose the right combination of gravel types to balance cost, appearance, and long-term durability for your specific driveway.

Driveway Size

The larger the driveway, the more materials and labour are required, which directly increases the overall cost. Most paving contractors quote on a per m² basis, so an accurate measurement of the area is the first step to getting a realistic price.

Cellular Grid System

Many installers recommend using a cellular grid, a plastic honeycomb layer placed beneath the decorative gravel. This system holds the gravel in place, providing a more level, stable finish and preventing it from migrating or forming bald patches over time. A quality grid system typically adds around £15-£20 per m² to the overall cost, but it significantly extends the driveway’s lifespan and appearance, making it a worthwhile investment for most homeowners.

Excavation Depth and Waste Disposal

A driveway gravel installed with a cellular grid system typically requires excavation of around 230mm below the finished surface level, comprising a free-draining sub-base, a sand-laying course, the grid layer itself, and the decorative gravel on top. Without a grid system, the excavation depth is reduced to around 190mm, which can lower waste disposal costs, though it comes at the expense of long-term stability. Waste disposal is often one of the higher hidden costs in a driveway project, as the volume of material removed directly affects the final price.

Drainage Requirements

Proper drainage is essential to prevent gravel from shifting or to prevent water from pooling after rainfall. Adding a permeable sub-base or drainage channels increases the cost but helps the driveway last longer and perform better in wet conditions.

Edging and Border Materials

Edging keeps gravel contained and prevents it from spreading onto lawns or pathways. Options range from simple timber or plastic edging to more premium materials like brick, granite setts, or stone borders, each affecting the final price differently.

Site Access

Good access for delivery vehicles makes installation more cost-effective, as materials can be tipped directly and waste removed efficiently. Where access is restricted, such as in narrow side passages or sloped driveways, contractors may need smaller equipment or additional labour to move materials manually, which can increase the overall cost.

Existing Driveway Removal

If an old driveway is already in place, whether concrete, tarmac, or block paving, it will need to be broken up and removed before the new gravel surface can be laid. This removal and disposal process is typically costed separately from the main installation and can be one of the more significant hidden expenses in a driveway project.

Weed Membrane and Ground Preparation

A weed-suppressant membrane is usually laid beneath the sub-base to stop weeds growing up through the gravel over time. While this adds a small amount to the overall cost, it significantly reduces future maintenance and helps keep the driveway looking neat for longer.

Vehicle Use and Sub-Base Strength

Driveways that will regularly support car weight need a more heavily compacted and thicker sub-base to prevent the gravel from shifting or rutting under load. This added structural requirement increases both material and labour costs compared to a purely decorative, foot-traffic-only area.

Labour Rates and Seasonal Demand

Local labour rates in Enfield, along with contractor availability, can influence the final quote. Costs tend to be higher during peak periods, such as spring and summer, when demand for driveway installations rises.

Planning Permission and Drainage Regulations

In certain cases, particularly for front gardens near a public road, local drainage regulations may require permeable surfacing or, in some instances, planning permission. Checking these requirements early on can help avoid delays and unexpected costs later in the project.

DIY vs Professional Installation Cost

AspectDIY InstallationProfessional Installation
Upfront CostMaterials only, typically £800-£1,600 for a medium drivewayMaterials plus labour, typically £1,600-£2,800
Time Required2-3 days, depending on experience1-2 days, completed by a trained team
Risk of ErrorsHigher, particularly with sub-base depth and compactionLower, with correct groundwork and drainage from the start
Long-Term CostMay require early repairs if sub-base or drainage is done incorrectlyReduced risk of sinking, shifting, or drainage issues later

Installing a gravel driveway yourself can reduce upfront costs, since labour charges are avoided. However, getting the sub-base depth, compaction, and drainage right is critical, as mistakes here often lead to sinking or shifting gravel within the first year. Professional installation costs more upfront but reduces the risk of costly repairs later, particularly for driveways with poor ground conditions or drainage issues.

Tips to Save Money on Your Gravel Driveway

  • Choose a cost-effective gravel type: Choose a cost-effective gravel type: Crushed rock or river rock cost less than decorative options like marble chips or premium coloured aggregates, while still performing well as a base or top layer. If you’re comparing all driveway materials, read the guide on the cheapest driveway option to see how gravel stacks up.
  • Get multiple quotes: Prices can vary among contractors in the same area, so comparing at least 2 or 3 quotes helps ensure a fair price.
  • Plan around existing ground conditions: If the current surface is level and in reasonable condition, less excavation and waste removal is needed, which can reduce labour costs.
  • Consider a smaller decorative top layer: Using a cheaper aggregate for the sub-base and a thinner layer of premium gravel on top can reduce material costs without compromising the finished look.
  • Book installation outside peak season: Driveway installers are often busier in spring and summer, so scheduling work in autumn or winter may result in more competitive pricing.
  • Maintain your driveway regularly: Occasional raking and topping up small areas prevents the need for a full re-gravel, which is a more costly job.

Working with a trusted paving company in Enfield also helps keep costs down in the long run. An experienced paving contractor, First4 Paving understands the groundwork, drainage, and material choices needed for a driveway to perform well over time, helping you avoid the kind of mistakes that lead to costly repairs later. We provide professional Gravel services across Enfield and the surrounding areas.

Contact us for a free, no-obligation quote and let our team help you find the right gravel driveway solution for your Enfield home.

Conclusion

A gravel driveway remains one of the most cost-effective and versatile options for homeowners in Enfield, with prices typically ranging from £1,000 for smaller driveways to over £4,600 for larger, more complex installations. Beyond the initial cost, gravel driveways also offer great long-term value thanks to low maintenance needs, natural drainage, and the ease of repairing or topping up sections without a full replacement.

Final costs depend on factors such as driveway size, gravel type, required groundwork, and drainage needs, so properties with sloped access or larger surface areas tend to fall at the higher end. Getting an accurate quote comes down to assessing these factors for your specific property, so it’s worth arranging a site visit for a tailored price.

FAQs

What is the cheapest type of gravel for a driveway? 

Crushed rock and river rock are among the cheapest options, typically used for sub-base or structural layers rather than the visible top surface.

Does the size of the driveway affect the price per m²? 

Yes, smaller driveways often cost more per m² than larger ones, as fixed costs like site setup and equipment hire are spread across a smaller area.

Are there hidden costs in a gravel driveway installation? 

Waste disposal, sub-base materials, and site access requirements can all add to the final cost if not accounted for in an initial quote.

How long does a gravel driveway last? 

With proper installation and occasional maintenance, a gravel driveway can last between 15 and 20 years.

Can I lay a gravel driveway myself? 

While it is possible to install a gravel driveway as a DIY project, professional installation ensures proper groundwork and drainage, which affects the driveway’s long-term performance and reduces the risk of additional repair costs later.

How long do resin driveways last

How Long Do Resin Driveways Last in Enfield? Complete Lifespan Guide

If you’re a homeowner in Enfield considering a driveway upgrade, resin driveways have likely caught your attention. Known for their sleek, modern finish and excellent drainage properties, resin driveways have become one of the most popular choices across Enfield in recent years. But one question homeowners ask most often is: how long do resin driveways actually last?

On average, a well-installed resin driveway can last between 15 and 25 years, depending on the type of resin used, installation quality, and maintenance. In this guide, we’ll break down everything you need to know about the lifespan of resin driveways in Enfield, the factors that affect durability, and how to make your driveway last even longer.

What Are Resin Driveways?

Resin driveways are surfaces made by mixing natural aggregates (like gravel or stone) with a resin binder to create a smooth, durable finish. There are two main types:

  • Resin Bound: A smooth, permeable surface where aggregate is fully mixed with resin before laying, offering better durability and a more premium finish.
  • Resin Bonded: A rougher, loose-stone finish where resin is applied to the surface first, then stone is scattered on top, generally more affordable but less durable.

How Long Do Resin Driveways Last?

When it comes to driveway investments, lifespan is one of the biggest deciding factors, and resin driveways generally perform very well in this department. On average, a properly installed resin driveway in Enfield can last anywhere between 15 and 25 years, but the exact number depends heavily on the type of resin system used.

Resin Bound Driveways (15–25 years) 

This is the more premium and durable option. Because the aggregate is fully coated and mixed with resin before being laid, the surface is smooth, seamless, and highly resistant to cracking, water damage, and general wear. With proper installation and regular maintenance, resin-bound driveways can comfortably reach and sometimes exceed the 25-year mark.

Resin Bound Driveways

Resin Bonded Driveways (8–12 years) 

This is a more budget-friendly option in which the resin is applied first, with loose stones scattered on top. While it gives a similar textured look, it’s less durable overall. If budget is your main concern, read the guide on how much a gravel driveway costs in Enfield to compare it against resin. Stones can dislodge over time, especially under heavy foot or vehicle traffic, which shortens its overall lifespan compared to resin-bound surfaces.

Resin Bonded Driveways

Type

Average LifespanDurability

Maintenance Level

Resin Bound

15–25 yearsHighLow
Resin Bonded8–12 yearsMedium

Medium

It’s worth noting that these figures represent average lifespans under normal conditions. A resin driveway installed by an experienced, qualified contractor using high-quality, UV-stable resin and a properly compacted sub-base will almost always outlast one that’s been poorly installed or made with cheaper materials. In other words, the numbers above are a realistic benchmark, but actual longevity can vary quite a bit depending on installation quality, local weather exposure, and how well the driveway is cared for over the years, all of which we’ll break down in more detail below.

Factors Affecting Resin Driveway Lifespan in Enfield

Several local and practical factors influence how long your resin driveway will last.

Weather Conditions in Enfield

Enfield experiences a typical UK climate: frequent rain, occasional frost, and seasonal temperature shifts. Resin bound driveways handle this well due to their permeable design, which prevents water pooling and reduces frost damage. However, poor installation can make driveways more vulnerable to cracking during colder months.

Quality of Installation

Professional installation is one of the biggest factors in driveway longevity. A poorly mixed resin ratio or uneven application can lead to premature cracking, discolouration, or surface breakdown within just a few years.

Sub-base Preparation

A strong, well-compacted sub-base is essential. Without it, the surface can shift, crack, or develop potholes over time regardless of how good the resin itself is.

Material & Resin Quality

Not all resins are equal. UV-stable, high-grade resins resist yellowing and degradation far better than cheaper alternatives, especially under prolonged sun exposure.

Traffic & Usage

Driveways that regularly handle heavy vehicles or are used frequently may show wear sooner than those with lighter, occasional use.

Maintenance Routine

Routine cleaning and periodic resealing significantly extend a resin driveway’s life, keeping it looking newer for longer.

Warning Signs Your Resin Driveway Needs Attention

Watch out for these common warning signs:

  • Visible cracks or surface splitting
  • Fading or discolouration from UV exposure
  • Weeds or moss growing through the surface
  • Poor drainage or water pooling
  • Loose stones or a “crumbly” texture

If you notice any of these, it may be time for repairs or resurfacing.

How to Extend Your Resin Driveway’s Lifespan

  • Clean regularly: Sweep debris and pressure-wash occasionally to prevent buildup.
  • Reseal every 5–7 years: To restore UV protection and surface strength.
  • Avoid harsh chemicals: Stick to mild cleaning solutions to prevent resin breakdown.
  • Limit heavy vehicle use: Avoid parking excessively heavy vehicles for prolonged periods.
  • Address cracks early: Small repairs now prevent bigger, costlier problems later.

Is a Resin Driveway Worth It for Enfield Homeowners?

Given its 15–25 year lifespan, low maintenance needs, and attractive appearance, a resin driveway is a solid long-term investment. It can also boost curb appeal and property value — an important consideration in Enfield’s competitive housing market.

That’s exactly why so many local homeowners trust First4 Paving, a leading driveway company in Enfield, to deliver high-quality resin Driveway services that stand the test of time. Whether you’re upgrading your existing driveway or starting fresh, our experienced team ensures a finish that’s built to last.

Conclusion

Resin driveways offer an excellent balance of durability, low maintenance, and modern style, making them a popular choice for homeowners across Enfield. With proper installation and regular care, a resin-bound driveway can easily last 15 to 25 years, while resin-bonded options typically last 8 to 12 years.

If you’re considering a new driveway, contact us today for a free, no-obligation quote and let Enfield’s trusted resin driveway experts bring your vision to life.

FAQs

Do resin driveways crack in cold weather? 

Resin bound driveways are designed to be permeable and frost-resistant, but poor installation can increase the risk of cracking in freezing temperatures.

How often should resin driveways be resealed? 

Most experts recommend resealing every 5–7 years to maintain UV protection and surface strength.

Can a damaged resin driveway be repaired? 

Yes, minor cracks and surface damage can often be repaired without needing a full replacement, especially if addressed early.

Is a resin driveway suitable for Enfield’s climate? 

Yes, resin-bound driveways, in particular, handle Enfield’s variable, rainy weather well thanks to their permeable, frost-resistant design.

how to seal a driveway in Enfield

How to Seal a Driveway in Enfield and Make It Last for Years

Most driveways in Enfield are silently deteriorating and the owners have no idea. A few hairline cracks here, some fading colour there, weeds pushing through the joints. It looks like normal wear and tear. But underneath, water is working its way in, freezing in winter and slowly breaking the surface apart from within.

The fix is simpler than you think. A quality driveway sealer, applied correctly, creates a protective barrier that stops water, blocks stains, prevents weeds, and keeps your driveway looking its best for years. If you’re wondering how to seal a driveway in Enfield, this step-by-step guide explains everything you need to know to achieve a long-lasting finish.

Why Sealing a Driveway Matters

The benefits of sealing a driveway go well beyond appearance. A quality driveway sealer creates a protective barrier that helps protect your driveway from the weather, vehicle traffic, and everyday wear.

  • Water penetration: Water seeping into cracks can freeze and expand in winter, worsening existing damage over time.
  • Oil and fuel stains: Unsealed surfaces absorb spills quickly, often leaving permanent marks. A sealed driveway makes stains much easier to clean, but if you’re already dealing with a stubborn mark, here’s how to remove an oil stain from a driveway.
  • Weed growth: Sealer helps lock in jointing sand, reducing gaps where weeds can take root, particularly on block-paving driveways.
  • UV fading: Prolonged exposure to sunlight can cause tarmac, concrete, and resin surfaces to fade. Sealing helps preserve their appearance for longer.
  • General surface wear: Daily vehicle and foot traffic gradually wear down driveway surfaces. A protective sealant adds an extra layer of durability.

For homeowners in Enfield, regular driveway sealing is one of the most cost-effective ways to extend a driveway’s lifespan and reduce the likelihood of costly repairs.

Signs Your Driveway Needs Sealing

Not sure if it is time to seal your driveway? Here are some of the most common warning signs:

  • The surface has lost its original colour and appears faded or dull
  • Water absorbs into the surface rather than beading on top
  • Weeds are growing through block paving joints
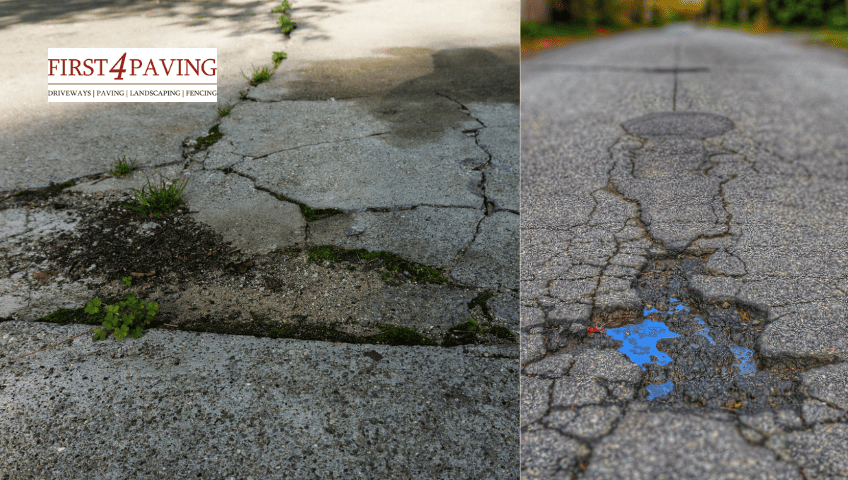
  • Small cracks are beginning to appear
  • Oil, dirt, and tyre marks are becoming difficult to remove
  • Jointing sand is washing out between paving blocks

cracked driveways in Enfield

Spotting these signs early can prevent expensive repairs later on. If you’re seeing more than one or two of these on your driveway, it’s worth speaking to a professional before the damage gets worse. A quick inspection from an experienced driveway contractor in Enfield can save you a lot of money down the line.

How to Seal a Driveway in Enfield Step by Step

Whether you are tackling this as a DIY project or preparing for a professional visit, understanding how to seal a driveway step by step helps you get the best possible result.

What You Will Need

  • Pressure washer or stiff brush and hosepipe
  • Weed killer (if required)
  • Crack filler suitable for your surface type
  • Kiln-dried sand (for block paving joints)
  • Appropriate driveway sealer for your surface
  • Long-handled squeegee, brush, or roller
  • Protective gloves and old clothing

Step 1 — Choose the Right Conditions

Sealing driveway surfaces is weather-dependent. You need at least two dry days and a temperature above 10°C. Avoid sealing in direct summer sun as the product can dry too quickly. Late summer or early autumn is ideal for UK homes.

Step 2 — Clear and Clean the Surface

Remove all vehicles and debris. Sweep the driveway, then pressure wash the entire surface. If your driveway has stubborn dirt or grime buildup, read this guide on cleaning a tarmac driveway before you begin sealing. Use a specialist driveway degreaser on oil stains and allow it to work before rinsing. Treat any weeds with weed killer and sweep out dead growth from the joints. Allow the surface to dry fully, typically 24 to 48 hours.

Step 3 — Repair Cracks and Damage

Fill any cracks using a suitable filler for your surface type. Never seal over existing damage it hides the problem but does not fix it. For block paving, re-brush kiln-dried sand into the joints at this stage.

Step 4 — Apply the Driveway Sealer

To seal a driveway like a professional, preparation is everything, but application technique matters just as much. Shake or stir the sealer well before opening. Work from the furthest point back towards the street to avoid walking on wet sealer. Apply thin, even coats rather than one thick application. Thick coats take longer to cure, are more likely to streak, and can leave a tacky finish.

Step 5 — Second Coat and Curing

Many sealers benefit from a second coat once the first has dried; check the manufacturer’s instructions. Foot traffic can usually resume after a few hours. Keep vehicles off for at least 24 to 48 hours.

Can You Seal a Driveway Yourself?

If you’re planning how to seal a driveway in Enfield yourself, it is possible, but it is not as simple as it looks. Sealing a driveway yourself is achievable, though the results depend almost entirely on preparation. Many homeowners underestimate this part. Skipping a proper clean, missing cracks, or applying sealer in the wrong conditions can leave a finish that peels or wears away within months.

DIY sealants are also less concentrated than trade-grade products, and a domestic pressure washer rarely matches the performance of professional equipment. For a small driveway in good condition, results can be acceptable. For anything larger or more damaged, the gap between DIY and a professional finish becomes difficult to close.

Professional help is worth considering when there is significant cracking, weed damage, or when a long-lasting result is the priority. 

How Long Does Driveway Sealer Last?

Surface TypeTypical Sealer Lifespan
Tarmac / Asphalt2–4 years
Block Paving3–5 years
Concrete2–5 years
Resin Bound5–10 years

For most residential driveways in Enfield, resealing every 2 to 3 years is the right routine. Block paving may need more frequent attention as jointing sand washes out over time.

Common Driveway Sealing Mistakes to Avoid

Even with good intentions, these common driveway sealing mistakes reduce the effectiveness of the sealant:

  • Sealing over a dirty surface: Dirt and oil trapped under sealer prevent proper adhesion and cause peeling.
  • Applying in cold or wet conditions: Below 10°C or in damp weather leads to poor bonding and an uneven finish.
  • Coats that are too thick: Thick coats streak, stay tacky, and wear unevenly.
  • Ignoring cracks before sealing: Always repair first, never seal over damage.
  • Using the wrong product: Always match the sealer to your specific surface type.

Driveway Maintenance Tips for Enfield Homeowners

After sealing, regular care preserves the finish and extends the time before your next reseal is needed. These driveway maintenance tips are especially relevant for UK homes, where wet winters and temperature changes put outdoor surfaces under constant pressure.

  • Sweep leaves and debris regularly
  • Clean oil spills as soon as they happen
  • Avoid harsh chemicals such as bleach or solvents
  • Use sand or driveway-safe grit in winter instead of salt-based deicers
  • Reapply sealer when you notice protection starting to fade

Knowing how to maintain a sealed driveway is the simplest way to avoid unnecessary repairs and keep your driveway looking its best year-round.

At First 4 Paving, we have years of experience caring for driveways across Enfield and the surrounding areas. Whether you have block paving, tarmac, resin, or concrete, our team provides expert cleaning, repairs, and sealing to keep your driveway protected and looking great. Contact our team today for a free driveway assessment and no-obligation quote.

how to seal a driveway in Enfield

Conclusion

Knowing how to seal a driveway in Enfield is one of the most effective ways to protect it from the UK’s wet winters, frost, and everyday wear. Clean the surface properly, use the right sealer for your surface type, and stick to a regular maintenance routine and your driveway will stay in great condition for years to come.

If you are based in Enfield and need a professional finish, the team at First 4 Paving specialises in driveways Enfield homeowners trust. Get in touch, and we will be happy to help.

FAQ

How long does driveway sealer last?

Between 2 and 5 years depending on the surface type, product quality, and traffic levels.

Does sealing prevent weeds?

It significantly reduces weed growth by locking in jointing sand, though annual maintenance is still recommended.

Does driveway sealer protect against rain?

Yes. A quality driveway sealer creates a protective barrier that helps prevent water from soaking into the surface, reducing the risk of cracks, erosion, and frost damage.

How often should you seal a driveway?

Most driveways should be resealed every 2 to 5 years, depending on the type of surface, weather conditions, and the amount of traffic they receive.


A smooth concrete driveway features a curved brick border that separates it from dark grey river stones and a neat green lawn in front of a traditional stone house

10 Driveway Edging Ideas to Improve Kerb Appeal

Most homeowners spend thousands on a new driveway surface, but overlook the one detail that keeps everything looking neat. Without proper edging, even a high-quality block paving or tarmac driveway can start to lose its appearance within a short time. Gravel spreads onto the lawn, paving blocks move out of line, and grass slowly creeps in around the edges.

The right driveway edging can make a noticeable difference without the expense of a full redesign. A well-chosen border helps keep the surface tidy, reduces movement around the edges, and improves the overall appearance of your entrance.

In this guide, you’ll discover practical and stylish driveway edging ideas for both modern and traditional UK homes, along with advice on which materials work best, what to avoid, and how to choose the right option for your property.

Why Driveway Edging Matters

A driveway without proper edging can quickly start to look messy. Gravel spreads across the lawn, paving blocks shift out of place, and grass begins creeping into the sides. Over time, these small issues can make the whole front garden look untidy.

Adding strong driveway borders helps keep everything neat and easier to manage. It also gives the driveway a cleaner and more finished appearance.

Good edging offers several benefits, including:

  • Better kerb appeal
  • Cleaner and sharper driveway edges
  • Improved drainage during wet weather
  • Reduced weed growth around the borders
  • Extra support for paving, gravel, and tarmac surfaces

The right edging choice depends on your driveway material, budget, and the overall style of your property. Some homeowners prefer modern concrete driveway edging, while others choose natural stone or classic brick borders for a more traditional look.

If you are unsure where to start, a trusted driveway contractor can help you find the right fit for your property.

1. Brick Driveway Edging for a Classic Look

Brick edging along a gravel driveway in a UK home creating a clean border.

Brick edging is one of the most popular choices in the UK, and for good reason. It is durable, widely available, and suits almost every type of property from Victorian terraces to modern semis.

Laid in a simple soldier course (bricks stood upright end-to-end), brick edging creates a clean, defined line along the driveway. It pairs especially well with gravel, since the firm border stops stones from spreading onto paths and lawns.

Why homeowners choose brick borders:

  • Strong and weather-resistant handles freeze-thaw cycles well
  • Easy to match with existing paving or brickwork on the home
  • Creates a clear, defined edge without looking harsh
  • Suits curved as well as straight driveways

Common styles: Soldier course, herringbone pattern, double brick line, curved edging

2. Stone Driveway Edging for a Natural Appearance

A gravel driveway lined with cobblestone borders curves toward a charming stone cottage with lush gardens.

Stone driveway edging is a great choice if you want a soft, natural look that blends into your garden. It suits rural homes, cottages, and properties with lots of greenery, giving the driveway a more organic finish.

Natural stone also adds strength and structure, helping to keep the driveway edges firm and tidy, even with regular vehicle use.

Best Types of Driveway Edging Stones

Common options for driveway edging stones include:

  • Granite setts: premium appearance, extremely durable, and ideal for traditional driveways
  • Sandstone blocks: warm natural colour with a timeless and elegant finish
  • Limestone kerbs: smooth texture, modern look, and easy to maintain
  • Cobblestones: classic character, strong durability, and perfect for rustic designs 

These materials are strong, weather-resistant, and designed to handle heavy traffic without losing their shape.

Stone edging also works beautifully with driveway border landscaping, especially when combined with flower beds, shrubs, or grass borders. It creates a balanced look between hard surfaces and natural outdoor space.

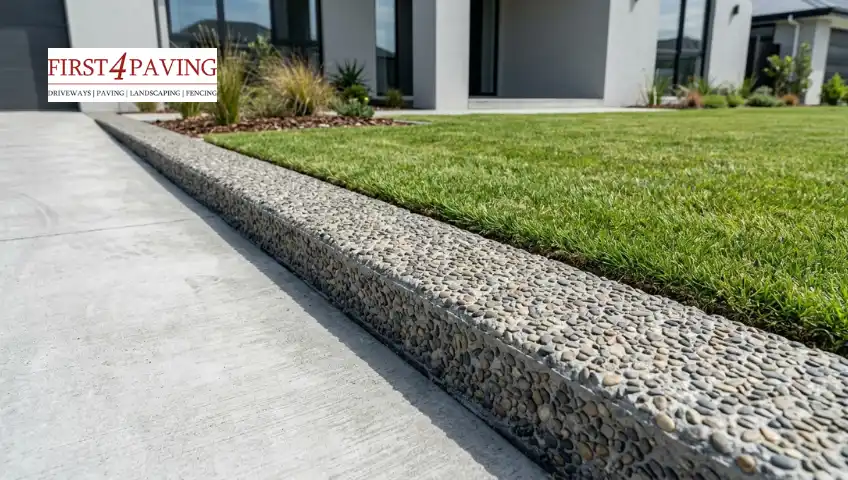
3. Concrete Driveway Edging for Modern Homes

An exposed aggregate concrete edge separates a smooth concrete driveway from a neat green lawn in front of a modern house

Concrete edging suits modern homes well because it creates sharp, clean lines with very little visual fuss. It is a practical choice for large driveways and minimalist garden designs where a simple, tidy finish is the goal.

Standard concrete edging is grey and smooth, but there are also textured and stamped options that replicate the look of stone or brick at a lower price point. This makes it a useful middle-ground option for homeowners who want a premium appearance without the cost of natural materials.

Benefits:

  • One of the most affordable edging options available
  • Very low maintenance with no sealing or treatment needed
  • Long-lasting when properly installed
  • Can be tinted or textured to match surrounding surfaces

Decorative note: Exposed aggregate concrete edging adds texture and visual interest while remaining affordable. It works well alongside brushed or stamped concrete driveways.

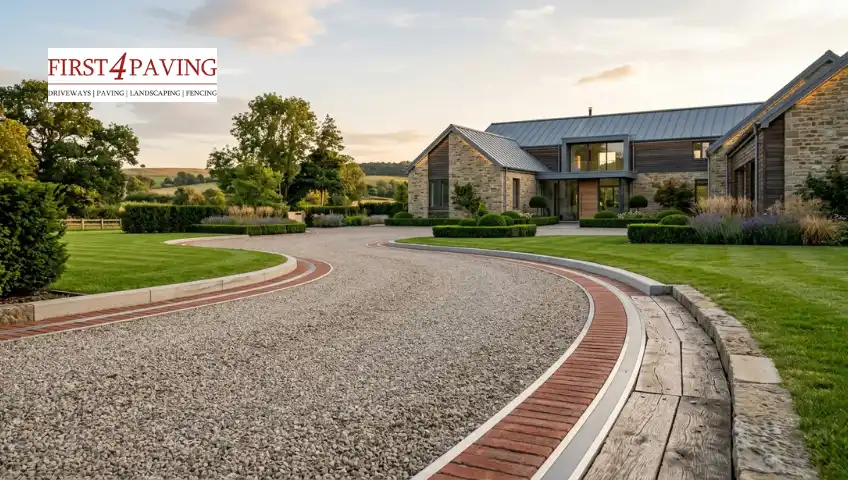
4. Gravel Driveway Edging for Better Containment

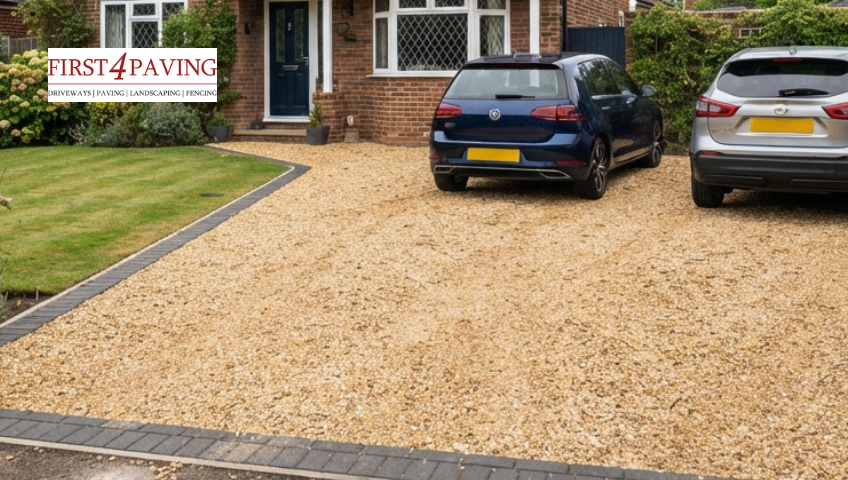
A winding gravel driveway featuring a red brick border leads toward a large, modern stone estate at sunset

Gravel driveway edging is important because loose gravel can easily spread onto lawns, paths, and roads. Good edging keeps everything in place and helps the gravel driveway stay clean and organised.

The most effective edging for gravel driveways uses rigid, stable materials that sit flush with or slightly above the surface level:

  • Brick: durable, attractive, and widely available
  • Steel or aluminium strips: slim profile, very effective at containment
  • Concrete kerbs: strong and low-maintenance
  • Timber sleepers: suit rural and cottage-style homes
  • Stone blocks: natural look with good durability

For most UK driveways, brick or metal edging gives the best combination of practicality and appearance. The border needs to be set deep enough (at least 150mm) to stay firm under the weight of vehicles turning near the edges.

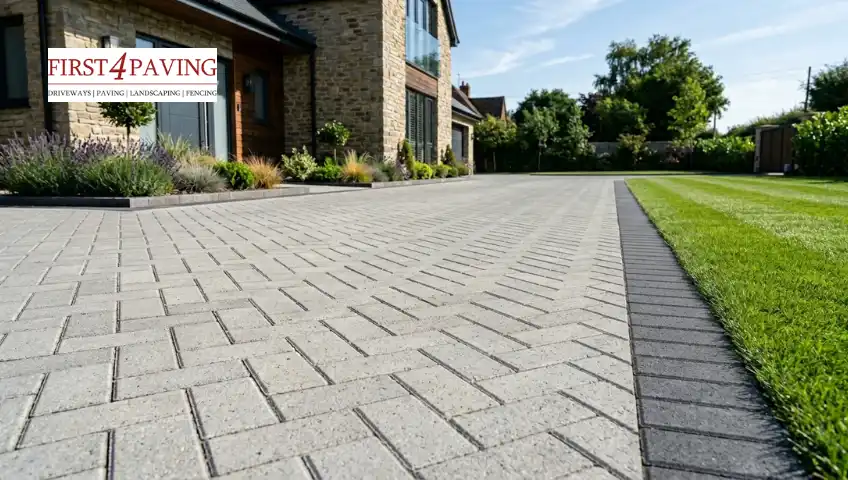
5. Block Paving Borders for a Premium Finish

A light grey block paving driveway in a herringbone pattern features a contrasting dark charcoal border alongside a green lawn.

Block paving is one of the most popular driveway choices in the UK, and adding a contrasting border takes the finish from standard to premium. If you’re planning the full installation, read the guide on how to lay a block paving driveway before choosing your border style. A well-chosen border creates definition, adds depth, and helps the main paving stay locked in place over time.

Popular border styles:

  • Dark border blocks around lighter paving (e.g. charcoal blocks around silver-grey)
  • Contrasting textures with a smooth border against a textured main body
  • Raised edging for a more structured, architectural look
  • Curved edge designs that follow the shape of the driveway

Colour matching tip: When choosing border colours, look at the existing materials on the house, including roof tiles, window frames, and brickwork, and try to echo one of those tones. This creates a more cohesive exterior rather than a driveway that looks disconnected from the property

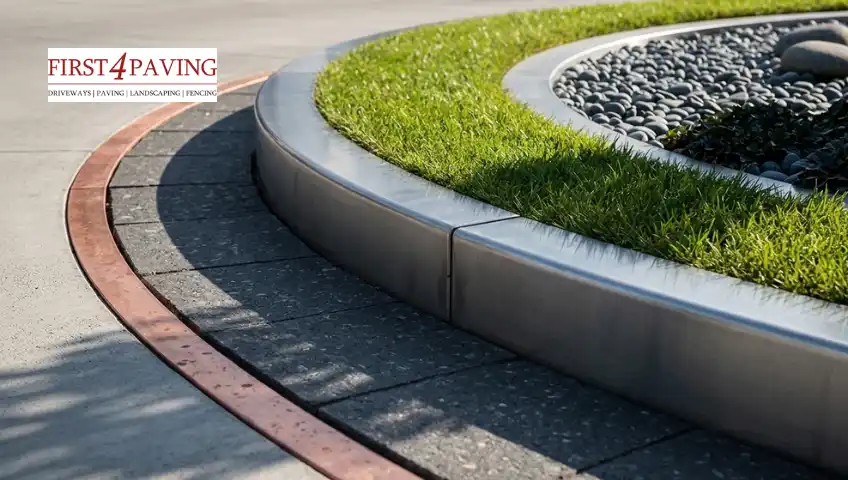
6. Metal Driveway Edging for Contemporary Look

A close-up shot of a modern, curved driveway edging design with stainless steel borders, a grass strip, and dark pebbles.

Metal driveway edging is a modern choice used in many UK homes today. Steel or aluminium strips create very clean, sharp lines that give the driveway a smart and organised finish.It works especially well in minimalist garden designs and adds a neat architectural feel to the outdoor space.

Benefits of Metal Edging

  • Slim and discreet look
  • Rust-resistant options available
  • Easy to shape around curves
  • Works well with gravel and paving

Metal edging is often used in modern driveway border ideas for homeowners who want simple, strong, low-maintenance edges.

7. Timber Driveway Edging for Rustic Charm

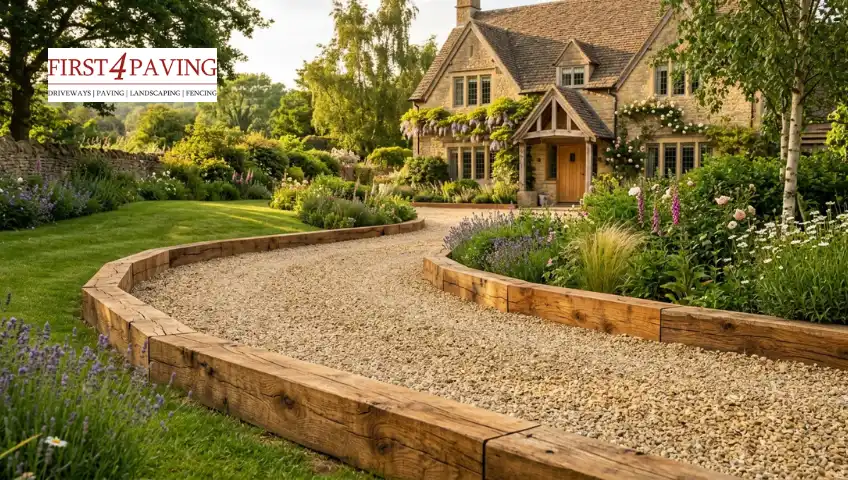
A curved gravel path edged with wooden beams snakes through blooming gardens up to a historic stone cottage

Timber driveway edging provides a warm, natural finish that suits countryside and cottage-style homes. Made from railway sleepers or treated wood, it creates a soft border that blends nicely with gardens, grass, and gravel driveways.

It works well for rural properties, sloped driveways, and natural driveway-border landscaping ideas, where a simple, relaxed look is preferred.

To make it last longer, pressure-treated timber is best as it protects against moisture and rot, helping the edging stay strong for years.

8. Tarmac Driveway Edging for Cleaner Lines

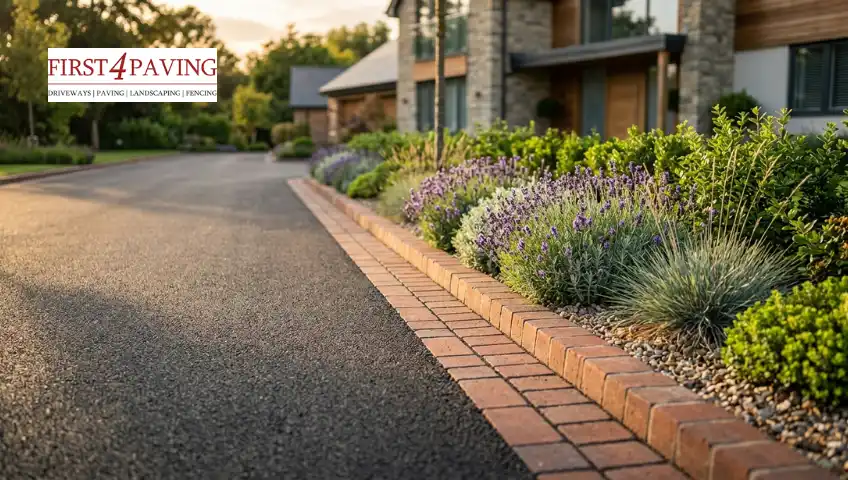
An asphalt driveway with a neat brick paver border runs alongside lush flower beds filled with purple lavender

Plain tarmac driveway surfaces are one of the most practical choices, but they can look flat and unfinished without a border to frame them. Adding edging creates a clear line between the tarmac and the surrounding garden, and also protects the edges from crumbling, which is one of the most common ways tarmac surfaces deteriorate over time.

Best border options for tarmac:

  • Brick: the most popular choice, adds colour and texture against the dark surface
  • Stone kerbs: a classic look that suits traditional properties
  • Concrete edges: clean and affordable
  • Block paving trims: adds a premium feel

Soft landscaping: One of the most effective ways to improve the appearance of a tarmac driveway is to add planted borders alongside the edging. Low-growing plants, ornamental grasses, or lavender alongside a brick border softens the dark surface and creates a more welcoming entrance.

9. Raised Edging for Extra Definition

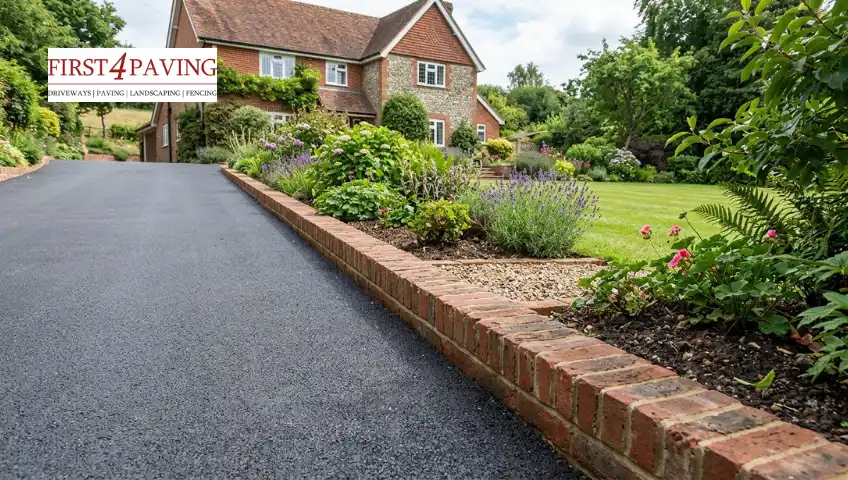
A smooth asphalt driveway with a low brick retaining wall leads up to a large brick and stone country house

Raised edging is a great way to create a clear, well-defined boundary between your driveway and the surrounding landscape. It adds structure, improves visual appeal, and helps keep everything neatly in place.

This type of edging is particularly effective for sloped driveways or properties with large front gardens, where natural movement of materials can be an issue.

Practical benefits:

  • Prevents gravel and loose materials from spreading, even on a slope
  • Improves drainage by directing water away from the surface
  • Protects adjacent flower beds and lawns from vehicle encroachment
  • Adds visible structure that enhances the overall design

You can build raised edging using a range of materials such as bricks, concrete blocks, or natural stone, depending on the style and finish you want to achieve. It also works particularly well when combined with a professionally designed patio, creating a seamless transition between your driveway and outdoor living area. 

10. Decorative Driveway Edging for a Stylish Finish

A herringbone brick driveway with cobblestone trim features an integrated stone curb light beside a green lawn

Decorative driveway edging is perfect for homeowners who want their driveway to stand out while still keeping a clean and organised appearance. It combines practical borders with visual design features to create a more attractive entrance.

Popular decorative edging ideas include:

  • Patterned brick borders for added texture
  • Cobblestone edging for a traditional UK look
  • LED lighting along driveway edges for modern homes
  • Mixed stone and gravel borders for contrast
  • Decorative kerbs with planted flower strips

These edging styles work well for both modern and traditional properties and can instantly improve kerb appeal without changing the entire driveway surface.

How to Choose the Best Driveway Edging

The best driveway edging depends on several factors.

Consider Your Driveway Material

Different edging styles suit different surfaces.

For example:

  • Gravel works well with brick and metal
  • Block paving suits contrasting borders
  • Tarmac looks cleaner with stone or brick edging
  • Concrete pairs nicely with modern kerbs

Think About Maintenance

Some materials need more care than others.

  • Timber may require treatment
  • Gravel needs occasional levelling
  • Concrete and stone usually need less upkeep

Match the Style of Your Home

Traditional homes often suit brick and natural stone. Modern properties usually look better with sleek concrete or metal edging.

Choosing matching materials helps create a more balanced exterior design.

Common Mistakes to Avoid

Here are some key mistakes homeowners often make when installing driveway edging:

  • Weak Foundations: Poor or shallow installation can cause the edging to shift, sink, or crack over time, reducing both strength and appearance.
  • Ignoring Drainage: Failing to plan proper drainage can lead to water pooling, puddles, and long-term surface damage around the driveway edges.
  • Choosing the Wrong Materials: Not all edging materials are suitable for every driveway. Some may not withstand heavy vehicle pressure or steep gradients.
  • Poor Installation Quality: Uneven placement or lack of alignment can make the edging look untidy and reduce its effectiveness.
  • Overlooking Durability Needs: Always select strong, weather-resistant materials designed for outdoor and long-term use to avoid early wear and replacement issues.

Ready to upgrade your driveway? As experienced driveway contractors in Enfield, we can help you choose the right edging and materials for a finish that lasts. Contact us today for a free quote.

Conclusion

The right driveway edging can completely change the look and feel of your outdoor space. From classic brick borders to modern concrete and natural stone finishes, there are plenty of driveway edging ideas that improve both appearance and practicality. Strong edging helps keep your driveway neat, supports the surface, and adds long-lasting curb appeal to your property. By choosing materials that match your home style and driveway surface, you can create a cleaner, more organised, and more attractive entrance that stands out for years to come.

FAQ’S

1. What is driveway edging, and why do I need it?

Driveway edging is a border that defines the edges of your driveway and keeps the surface in place. It is needed because it improves appearance, prevents the spreading of materials, and adds long-term strength to the driveway.

2. How do I choose the right driveway edging material?

You should choose the material based on your driveway type, style, and budget. For example, stone and brick work well for durability, while metal or concrete suits modern designs.

3. Does driveway edging help with drainage?

Yes, driveway edging can improve drainage by guiding water away from the surface. It helps reduce water pooling and keeps the edges stable during heavy rain.

4. What is the best material for durable driveway edging?

Stone, brick, and concrete are the most durable options for driveway edging. They can handle heavy traffic and weather conditions without getting damaged easily.

5. Can I install driveway edging myself?

Yes, simple edging like bricks or pavers can be installed as a DIY project with basic tools. However, complex or heavy materials are better installed by professionals for long-lasting results.

How long will a new driveway take to install?

Installing a new driveway is one of the most impactful improvements you can make to your property’s curb appeal, but if you’re planning the work around a busy schedule, timing matters. On average, a new driveway takes anywhere from 2 to 7 days to install in Enfield, depending on the size, material, and condition of your existing surface. 

In this guide, we’ll walk you through everything that influences how long a driveway installation takes, from the size and material you choose to ground conditions and weather. We’ll also break down the entire installation process, stage by stage, so you know exactly what happens on-site and how long each part typically takes, along with tips for keeping your project on schedule and questions to ask before hiring an installer.

How Long Does Each Driveway Type Take To Install?

Installation time varies significantly depending on the material you choose. Below is a breakdown of how long each driveway type typically takes, based on real-world timelines from driveway experts in Enfield.

Block Paving Driveways

Block paving is one of the most popular driveway choices in the UK, known for its durability and range of design options. Because each block is laid and cut by hand, installation typically takes 3–5 days for an average-sized driveway. Larger or more intricate patterns can extend this timeframe further.

Block Paving Driveways

Resin Bound Driveways

Resin bound surfaces offer a smooth, modern finish and are laid relatively quickly compared to block paving. Installation usually takes 2–3 days, but the surface needs an additional 24–48 hours of curing time before it’s ready for vehicle use.
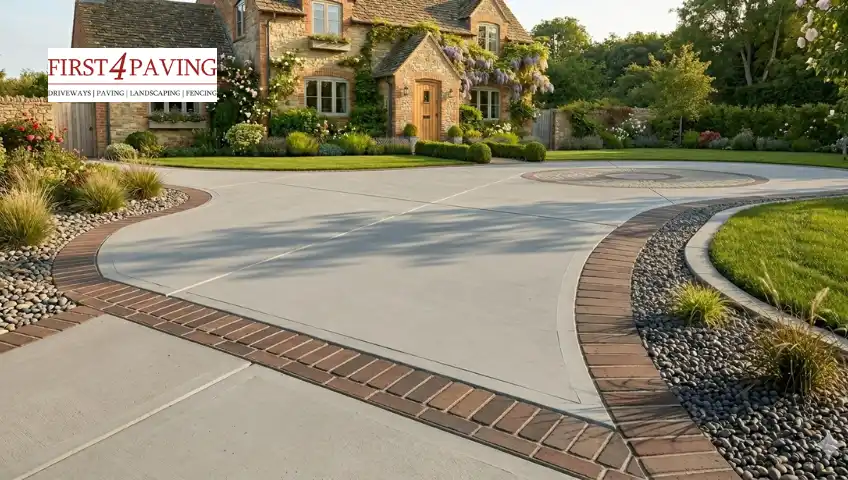
Resin Bound Driveways

Concrete / Pattern Imprinted Driveways

Concrete and pattern imprinted driveways involve pouring, levelling, and often stamping a design into the surface before it sets. This process typically takes 3–5 days, plus additional curing time before the driveway is ready for regular use.

Concrete Pattern Imprinted Driveways

Tarmac Driveways

A tarmac driveway is one of the fastest driveway materials to install, as it’s poured and rolled directly onto the prepared base. Most tarmac driveways are completed within 1–2 days, making them a popular choice for homeowners seeking a quicker turnaround.

Tarmac Driveways

Gravel Driveways

Gravel driveways are among the simplest and quickest to install, since they don’t require extensive laying or curing time. On average, installation takes 1–2 days, though proper edging and drainage work can add a little extra time.

Gravel Driveways

How To Get Your Driveway Installed Faster?

Choose Your Material Carefully

Tarmac and gravel install faster than block paving or resin, making them ideal choices if speed is a priority for your project.

Clear Site Access in Advance

Make sure vehicles and equipment can reach the site easily. Poor access on the day can cause delays before work even begins.

Schedule During Drier Months

Spring and summer generally offer more predictable weather for groundwork and curing, reducing the risk of weather-related setbacks.

Hire Experienced Contractors

A skilled team works more efficiently and avoids costly delays caused by mistakes, keeping your project on schedule.

Get All Decisions Finalised Before Work Starts

Confirm your material, design, and colour choices in advance so the team isn’t waiting on approvals mid-project.

What Are The Factors That Affect Driveway Installation Time?

Size and Shape of the Driveway

Larger driveways naturally take longer to prepare and lay than smaller, single-car spaces. Irregular shapes or curved layouts also add time, as they require more precise cutting and fitting of materials.

Type of Material Used

Different surfaces have different installation timelines. Block paving, for example, takes longer to lay by hand than tarmac, which can be poured and rolled more quickly. Resin bound driveways require a specific curing window before they can be walked or driven on.

Ground Conditions and Preparation Work

If the ground is uneven, poorly drained, or has a high clay content, extra groundwork will be needed before the base layer is laid. This can add a day or more to the overall project.

Weather Conditions

Rain, frost, and extreme heat can all delay driveway installation. Excavation and sub-base work are particularly weather-sensitive, and materials such as resin and concrete require dry, stable conditions to cure properly.

Access to the Site

Driveways with limited access, such as narrow side entrances or restricted parking for machinery, can slow material delivery and equipment use, extending the timeline.

New Install vs. Replacement

If you’re replacing an old driveway, the team will first need to break up and remove the existing surface. This takes longer than installing a driveway on a completely clear plot.

How Long Will A New Driveway Take to Install

What Could Be The Warning Signs of a Poorly Installed Driveway?

A driveway installed too quickly may show signs of trouble down the line, including:

  • Uneven or sinking surfaces due to inadequate sub-base compaction
  • Poor drainage leading to pooling water, especially after rainfall
  • Cracking in concrete or resin surfaces from insufficient curing time
  • Loose or shifting block paving, particularly around edges
  • Weeds or grass growing through joints, often a sign of poor jointing or missing weed-suppression membrane
  • Visible gaps between blocks or pavers, indicating rushed or inconsistent laying
  • Uneven colour or patchy finish on resin or tarmac surfaces, often caused by mixing or application errors
  • Edging stones or curbs coming loose, suggesting they weren’t properly bedded or secured
  • Cracks appearing within the first few months, a common sign the sub-base wasn’t compacted properly or given enough time to settle
  • Water pooling near the house or boundary instead of draining away, which can point to incorrect surface gradient

A reputable installer will never skip stages like sub-base preparation or curing time, even if it means the project takes a day or two longer. That’s why it’s worth taking the time to hire an experienced driveway company in Enfield rather than opting for the cheapest or fastest quote available. At First4 Paving, we provide expert driveway installation services such as Resin and take every stage of the process seriously, from groundwork to finishing touches 

If you’re planning a new driveway in Enfield or Hertfordshire, contact us for expert advice and a free

Conclusion

Driveway installation time depends on the material, size, and ground conditions of your project, ranging from just a day for tarmac or gravel to several days for block paving, resin, or concrete once curing is factored in. Knowing what to expect at each stage helps you plan with confidence and avoid rushed, poor-quality work. Choosing an experienced installer also plays a big role in keeping your project on schedule while ensuring the finished result stands the test of time. Whether you’re upgrading your existing driveway or starting from scratch, a little planning ahead goes a long way toward a smooth installation.

FAQs

How long does a block paving driveway take to dry or cure? 

Block paving doesn’t require curing like resin or concrete, but it’s best to avoid heavy vehicle traffic for the first 24–48 hours to allow the joints to settle.

Can I walk on my new driveway straight away? 

This depends on the material. Block paving and gravel can usually be walked on almost immediately, while resin and concrete typically need at least 24 hours.

How soon can I drive on it? 

Most driveways need 48–72 hours to settle before they can support vehicle weight, though this varies by material; always check with your installer.

Does rain delay driveway installation? 

Yes. Rain can affect excavation, sub-base compaction, and the curing of materials like resin and concrete, often pushing the timeline back by a day or more.

When is the best time of year to install a driveway?

Late spring through early autumn (April to September) is generally the best time, as drier ground and warmer temperatures help with excavation and curing. Winter installation is possible, but frost and rain can extend timelines and affect the finish.
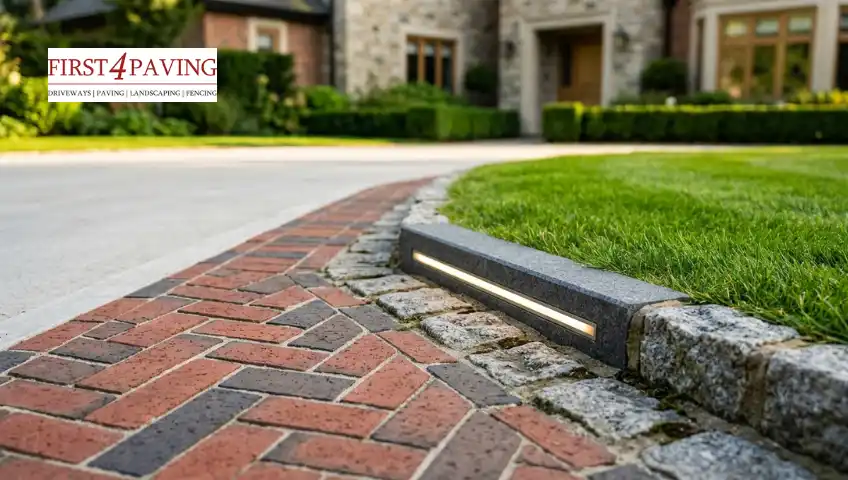
 

How to Seal Block Paving to Stop Weeds

How to Seal Block Paving to Stop Weeds?

Block paving is one of the most popular driveway and patio surfaces in the UK, but the small joints between each block are also the perfect place for weeds to take hold. Left untreated, weeds don’t just look untidy, they force joints apart, wash out jointing sand, and can eventually cause blocks to rock or sink under vehicle weight.

Sealing block paving is the most reliable, long-term fix. Done properly, it locks the jointing sand solid, closes off the surface to airborne seeds, and repels the moisture weeds need to germinate. This guide covers exactly how to do it, from clearing existing growth through to choosing a sealant, applying it correctly, and maintaining the surface afterwards, along with the mistakes that cause most sealing jobs to fail early.

Why Weeds Grow in Block Paving

Block paving is laid with sand-filled joints rather than solid mortar, so it’s never fully sealed against the outside world by default. Three conditions combine to let weeds establish:

  • Porous, unsealed jointing sand. Kiln-dried sand stabilises the blocks but has no binding agent, so it stays loose and open to seeds and moisture.
  • Moisture retention in the joints. Rain, condensation, and shade keep the sand damp long enough for seeds to germinate and roots to establish.
  • Organic debris build-up. Leaves, dust, moss spores, and grass clippings collect in joints over time, effectively “feeding” a compost-like layer for weeds to root into.

Common Weeds and Growth Found on Block Paving

Not every patch of green on a driveway is the same problem, and knowing what you’re dealing with helps you treat it correctly before sealing:

GrowthAppearanceTypical Location
DandelionsDeep taproot, yellow flower, regrows if root is leftSunny, open joints
CloverLow, spreading, three-leaf clustersSunlit joints and edges
ChickweedDense mat, small white flowersDamp, shaded joints
MossGreen, cushion-like, no visible rootsShaded, north-facing, poorly drained areas
AlgaeDark green or black slime, no leaf structureConstantly damp or shaded patches


Deep-rooted weeds like dandelions need the root removed or killed, not just the visible growth, or they will push straight back through a new seal within weeks.

What You’ll Need to Seal Block Paving

  • Stiff outdoor broom and/or pressure washer (fan nozzle)
  • Weed killer suitable for hard surfaces (for existing growth)
  • Kiln-dried or polymeric jointing sand
  • Block paving sealant (see selection guide below)
  • Roller, pump sprayer, or soft-bristle brush for application
  • Squeegee (optional, for even sealant distribution on larger areas)

How to Seal Block Paving to Stop Weeds: Step-by-Step

Step 1: Remove Existing Weeds — Root and All

Pull visible weeds by hand where possible, making sure the root comes with it; snapping off the top growth of a dandelion or similar taproot weed leaves it able to regrow within days. For widespread or stubborn growth, apply a hard-surface weed killer 3–5 days before cleaning, giving it time to kill the root system fully. Never seal over live weeds; sealant will not stop something that’s already rooted, and it will simply grow straight through the new coating.

Step 2: Deep Clean and Fully Dry the Surface

Pressure wash the entire area using a fan nozzle held at a slight angle, rather than pointing the jet straight down into the joints. A direct, close jet can blast out too much jointing sand or even erode the joint edges, creating deeper gaps than you started with. Work in sections, clearing dirt, moss, algae, and any oil or organic staining as you go.

Drying time matters more than most guides admit: residual moisture trapped deep in the joints, not just on the surface, is one of the most common causes of sealant failure, showing up as patchy whitening or peeling later. Allow at least 24 hours to dry in mild weather, and up to 48 hours in cooler or damp conditions, before moving on.

Step 3: Resand the Joints

Sweep new sand into every joint until it’s packed level, or up to roughly 1cm below the block surface to give the sealant room to bond without pooling on top. Two sand options are worth weighing up:

  • Kiln-dried sand — cheaper, easy to apply, but stays loose and can still wash out over time.
  • Polymeric sand — costs more, but contains a binder that hardens when activated with water, forming a semi-rigid joint that resists both weed growth and washout far better than kiln-dried sand alone.

For weed prevention specifically, polymeric sand gives a noticeably better long-term result, especially on driveways exposed to regular rainfall and vehicle weight.

Brush off every trace of excess sand dust from the block surfaces afterwards, leftover dust will cloud or discolour the finished sealant. 

Step 4: Choose the Right Sealant

Not all sealants behave the same way once applied, and the wrong choice for your paving type or usage can lead to whitening, poor adhesion, or a surface that looks glossy but offers little real weed resistance.

Sealant TypeWeed ResistanceBest Suited ToTypical Coverage
Acrylic (water or solvent-based)GoodPatios, light-use paths5–7m² per litre
Polyurethane (PU)ExcellentHigh-traffic driveways4–6m² per litre
Resin-basedVery goodWider joints, older paving4–6m² per litre

PU and resin-based sealants penetrate deeper into the joint itself, which is where the actual weed-blocking work happens, a glossy surface coating alone does little if the joint underneath stays porous.

Step 5: Apply the Sealant Correctly

Apply in thin, even coats — two thin coats consistently outperform one thick one, since a single heavy application can pool in low spots, over-saturate the sand, and cause it to lift rather than harden. Work in manageable sections using a roller, sprayer, or brush, paying particular attention to fully saturating the joints themselves rather than just the block faces. Let each coat go touch-dry before applying the next.

paver applying clear sealant to a block paving driveway

Step 6: Respect the Cure Time

Most sealants are touch-dry within a few hours but need considerably longer to cure fully:

  • Foot traffic: typically safe after 12–24 hours
  • Vehicle traffic: typically 48–72 hours, sometimes longer in cold or humid weather
  • Full hardness: up to two weeks in some products

Always check the specific product’s datasheet, as cure times vary noticeably among acrylic, PU, and resin formulations.

If the process feels too time-consuming or complex, hiring a trusted paving company in Enfield can help ensure your block paving is cleaned, re-sanded, and sealed correctly for long-lasting protection against weeds and weather damage.

What Sealing Actually Does to Block Paving

A block paving sealant works in three ways, and understanding each helps explain why proper preparation matters as much as the product itself:

  1. Hardens the joint sand. Sealant soaks into the top layer of jointing sand and binds the grains together, turning a loose, seed-friendly gap into a solid, weed-resistant strip.
  2. Repels water. Most sealants create a hydrophobic surface — water beads and runs off rather than soaking into the joints, cutting off the moisture supply weeds rely on.
  3. Blocks light and reduces organic build-up. A sealed surface sheds dust, leaves, and debris more easily during routine sweeping or rinsing, so less organic matter accumulates to feed new growth.

Common Mistakes That Cause Sealing to Fail

MistakeWhat HappensFix
Sealing over damp jointsTrapped moisture causes whitening, bubbling, or peelingWait a full 24–48 hours of dry weather before sealing
Applying too much sealant at onceSand lifts, joints soften, surface pools unevenlyApply two thin coats instead of one thick one
Using traffic too soonTyre or footprints mark the surface and break the sealFollow the product’s specific cure times before use
Wrong sealant for the paving/jointing typeWhitening, poor adhesion, or surface damageMatch sealant chemistry to your paving and jointing product
Sealing over live weedsWeeds push straight through the new coatingRemove and treat all weeds fully before starting

How Long Does Sealing Keep Weeds Away?

A correctly applied and maintained seal typically lasts 3 to 5 years before resealing is needed, though this depends heavily on traffic, sun exposure, and product quality. Shaded, damp, or heavily used driveways tend to need resealing closer to the 3-year mark; lightly used patios can often go the full 5 years or more.

Watch for these signs it’s time to reseal:

  • Water no longer beads on the surface
  • Colour looks dull, faded, or patchy
  • The first few weeds start reappearing in the joints

Ongoing Tips & Maintenance To Control Weed From Block Paving

  • Sweep regularly to stop leaves, dust, and organic debris settling in joints
  • Rinse off moss, algae, or bird droppings promptly rather than letting them sit
  • Top up jointing sand in any areas that start to look low, even on sealed paving
  • Spot-treat individual joints where weeds reappear, rather than waiting to reseal the whole surface
  • Avoid aggressive, close-range jet washing directly into joints during routine cleaning, as this strips sand and sealant prematurely

DIY vs Professional Sealing

Sealing block paving is a realistic DIY job for most homeowners provided the surface is properly cleaned, resanded, and fully dried first, the process itself isn’t complicated, but it is unforgiving of shortcuts. Professional application tends to make more sense for larger driveways, surfaces with extensive existing weed damage, or where a perfectly even, streak-free finish is a priority, since professional equipment and experience reduce the risk of pooling, patchiness, or missed joints.

Conclusion

Weeds in block paving are rarely a one-off problem; they’re a symptom of open, unsealed joints and moisture that keeps coming back until the underlying gaps are properly closed off. Removing existing growth, resanding correctly, and applying a suitable sealant addresses the root cause rather than just the visible symptom, which is why a properly sealed driveway can stay weed-free for 3 to 5 years rather than needing constant spot-treatment.

The steps themselves aren’t complicated, but the results depend heavily on getting the preparation right: a fully dried surface, properly packed joints, and the correct sealant for your paving type will always outperform rushing straight to application.

If you’d rather leave the preparation, product selection, and application to professionals, at First4Paving our driveway contractors in Enfield can handle the full process for you, from initial clean through to sealing and aftercare advice.

FAQs

Does sealing block paving actually stop weeds?

Yes. Sealing hardens the jointing sand and closes off the moisture and light that weed seeds need to germinate, which significantly reduces regrowth for several years. It won’t guarantee zero weeds forever, but it removes the conditions weeds rely on.

How often should block paving be resealed to stop weeds?

Most block paving needs resealing every 3 to 5 years, depending on foot and vehicle traffic, sun and shade exposure, and the quality of the sealant used.

What’s the best sealant for stopping weeds on a driveway?

Polyurethane and resin-based sealants generally offer the strongest weed resistance and durability for driveways, as they penetrate deeper into the joints than standard acrylic sealants.

Can you seal block paving over existing weeds?

No. Weeds should always be removed, including the root, and treated before sealing. Sealing over live weeds will not stop them growing straight through the new coating.

How long does block paving sealant take to cure?

Most sealants allow foot traffic after 12–24 hours and vehicle traffic after 48–72 hours, though full hardness can take up to two weeks depending on the product and weather conditions.

How wide should a block paving driveway be?

A block paving driveway should ideally be 10ft to 12ft wide. Anything narrower can make it genuinely difficult for drivers to manoeuvre, enter, exit, or park comfortably.

Is kiln-dried sand or polymeric sand better for stopping weeds?

Polymeric sand offers better long-term weed resistance than kiln-dried sand, as it hardens once activated with water, forming a more solid barrier that resists both weed growth and washout.