
Patio drainage channel with gravel border in a wet UK garden

The Complete Guide to Patio Drainage in the UK

Standing water on a patio is not just something that looks bad. It can quickly turn into a real problem. Surfaces become slippery, moss and algae start to grow, and over time, the paving can begin to shift or crack. In some cases, poor drainage can even put extra pressure on nearby structures. With how often it rains in the UK, even a slightly uneven patio can start showing issues sooner than expected. 
The positive side is that these drainage problems are usually both preventable and fixable. Whether you are planning a new patio or dealing with an existing one that holds water, the right drainage setup can completely improve how it performs and lasts over time. 

In this guide, we will look at how patio drainage works, which systems actually perform well in UK conditions, the common mistakes people make, and simple ways to improve water flow around your outdoor space.

What Is Patio Drainage?

Patio drainage refers to the system of slopes, channels, pipes, and permeable surfaces that work together to move rainwater away from your patio and prevent it from pooling. Without a proper drainage setup, water has nowhere to go after rainfall; it sits on the surface, seeps beneath slabs, or runs toward your house walls.

Good drainage keeps patios safer, cleaner, and helps protect nearby walls and garden spaces from water damage. Since the UK gets regular rainfall, many homeowners now add patio drainage solutions during patio installation or renovation projects.

Common Patio Drainage Problems in the UK 

1. Water Pooling on the Surface

A wet stone patio with large puddles reflecting a cloudy sky, surrounded by lush green plants.

Standing water is one of the most common signs of poor patio drainage in UK systems. After heavy rain, puddles often appear in low areas of the patio. This usually happens when the surface slope is uneven or too flat.

2. Slippery Moss and Algae

Green moss and algae growing between wet stone patio flags in front of a modern stone house.

Wet patios can quickly attract moss and algae growth. These slippery green patches not only affect the look of the patio but also create safety risks during rainy and winter months.

3. Cracked or Loose Paving

Excess moisture under paving slabs can slowly weaken the patio base. Over time, this may cause cracked paving, loose stones, or sinking slabs.

4. Water Near House Walls

Poor drainage around patios near the house can direct rainwater toward walls and doors. If ignored for too long, this may lead to damp patches or damage around the property’s foundations. Pairing good drainage with well-designed front door steps keeps your entrance both stylish and protected.
Why Proper Patio Drainage Matters

Many people think patio drainage is only about appearance, but it plays a far more important role in protecting your property and keeping your outdoor space safe all year round.
In the UK, where rain is a regular occurrence throughout every season, even a small drainage issue can quickly turn into a costly problem. A well-designed drainage system for patios near the house helps in several important ways:

  • Reduce water damage: Standing water near walls and foundations can slowly cause dampness, cracks, and long-term structural issues that are expensive to repair.
  • Prevent slippery surfaces: Wet patios attract moss and algae growth, which create genuine safety risks for children, elderly family members, and anyone using the space during wet weather.
  • Extend patio life: Excess moisture weakens the base beneath paving slabs, leading to sinking, cracking, and loose stones that need costly repairs or full replacement.
  • Lower maintenance needs: A patio that drains well stays cleaner for longer, meaning less frequent pressure washing, moss treatment, and joint repairs.
  • Improve outdoor comfort: A well-drained patio dries out quickly after rain, so you can use your outdoor space far sooner rather than waiting days for puddles to clear.

Good drainage also benefits the surrounding garden. When rainwater is directed properly through channels, soakaways, or permeable surfaces, your soil stays balanced rather than waterlogged for days after a heavy downpour, helping plants thrive and reducing the risk of lawn damage close to the patio edge.

Types of Patio Drainage Systems

Different patio drainage systems are used across UK homes to manage rainwater and prevent surface flooding. The right option depends on your patio size, layout, and soil type.

1. Channel Drains

A modern linear drainage channel installed in a sleek, wet grey stone patio next to bi-fold doors.

Channel drains are narrow drains fitted along patio edges or near doors. They collect rainwater and direct it into underground pipes. A patio drainage channel is a popular choice for modern patios because it handles heavy rainfall well.

2. French Drains

A gravel-filled French drain border collecting rainwater runoff next to a wet flagstone patio.

French drains use gravel and underground pipes to move water away from wet areas. They work especially well in gardens with clay soil where water drains slowly.

3. Soakaways

Cross-section diagram of a patio drainage system showing runoff water flowing into an underground soakaway crate

A soakaway is an underground drainage area filled with stones or drainage crates. Water slowly filters into the soil, making it a common choice in many patio drainage UK projects.

4. Gravel Drainage Areas

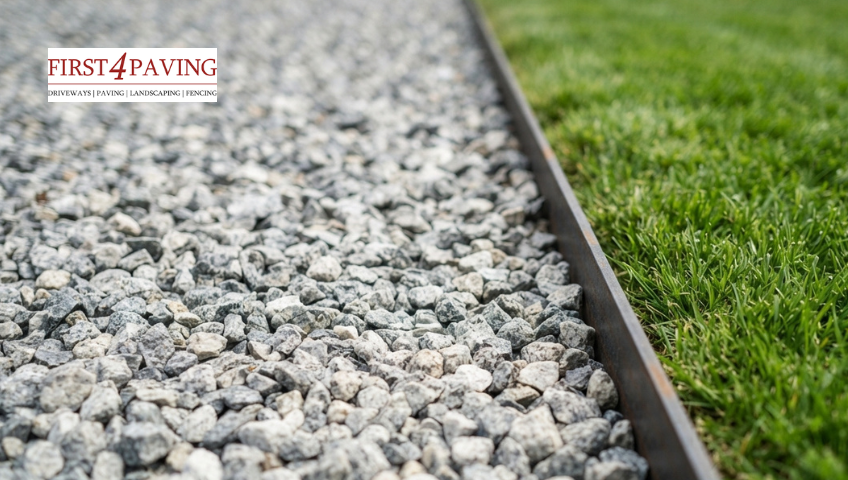
Gravel helps absorb rainwater naturally and reduces puddles on patio surfaces. It also adds a clean and decorative finish to outdoor spaces.

5. Permeable Paving

Permeable paving patio drainage system

Permeable paving lets water pass through small gaps between blocks or stones instead of collecting on the surface. It is one of the most effective patio water drainage ideas for eco-friendly patios.

How to Improve Patio Drainage

Fixing drainage problems does not always mean rebuilding the entire patio. A few smart changes can greatly improve water flow and reduce standing water.

  • Create the Right Patio Slope: A patio should slightly slope away from the house so rainwater can flow toward drains or garden areas. Even a small adjustment can improve patio drainage performance in the UK.
  • Install Drainage Channels: Adding a patio drainage channel near doors, walls, or low areas helps collect rainwater before puddles form. Modern drainage channels are available in different styles to match patio designs.
  • Use Permeable Materials: Permeable paving, gravel joints, and porous surfaces allow water to drain naturally through the patio instead of sitting on top.
  • Add Gravel Borders: Gravel borders around patios help absorb extra water and reduce runoff. They also give outdoor spaces a cleaner and more decorative finish.
  • Improve Soil Drainage: Heavy clay soil often traps water for long periods. Mixing compost or organic material into the soil can improve drainage over time.

Best Patio Materials for Drainage

The right paving material plays a big role in controlling rainwater and improving patio drainage solutions.

  • Porcelain Paving: A strong, low-maintenance option that looks smart and performs well when laid with the correct slope to help water run off properly.
  • Natural Stone: A classic choice that gives a premium finish. Some types can naturally absorb a small amount of water, which helps reduce surface pooling.
  • Resin-Bound Surfaces: A modern, permeable solution that allows rainwater to drain through the surface rather than sitting on top, keeping the area clearer during wet weather.
  • Permeable Block Paving: Designed with small gaps that let water pass through into the ground below, making it one of the most effective options for managing patio drainage in the UK.

Patio Drainage Installation

A successful patio drainage installation starts with proper planning, the correct materials, and a layout that allows water to flow away from the surface efficiently. A well-installed drainage system helps prevent standing water, slippery areas, and long-term patio damage. For best results, it is always worth working with an experienced paving contractor who understands local drainage requirements and soil conditions. 

Step 1: Check the Patio Slope 

Start by checking how rainwater currently moves across the patio. The surface should have a slight slope that directs water away from the house and toward a suitable drainage point. This step helps identify low spots where water may collect after heavy rain.

Step 2: Choose the Right Drainage System

The best drainage setup depends on the patio size, surface material, and water runoff levels. Large patios often need channel drains or soakaways, while smaller patios may only require gravel borders, drainage gaps, or permeable paving to improve water flow.

Step 3: Prepare a Solid Sub-Base

Preparing a patio sub-base with crushed stone for drainage

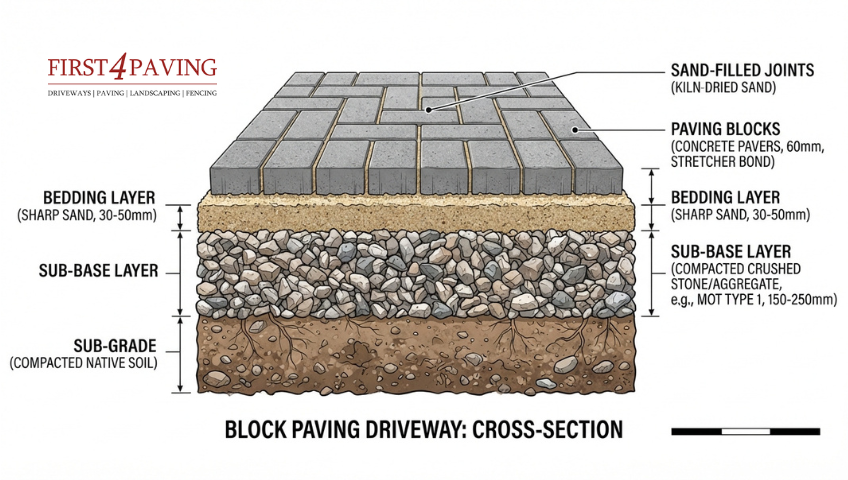
A strong sub-base is important for both stability and drainage. Crushed stone or MOT Type 1 is commonly used beneath patios because it allows water to drain through the foundation while supporting the surface above.

Step 4: Install Drains and Pipework

A landscaper installing an underground drainage pipe connected to a patio channel drain.

Once the base is prepared, the drainage system can be installed. This may include fitting channel drains, underground pipes, soakaways, or drainage grates, depending on the patio design and property layout.

Step 5: Test the Water Flow

Before finishing the installation, test the patio with water to make sure it drains correctly. This final check helps confirm that water flows smoothly into the drainage system without pooling on the surface.

Patio Drainage Maintenance Tips

Even the best patio drainage systems need regular maintenance to work properly and prevent water problems.

  • Clean drains regularly: Remove leaves, dirt, and moss from drainage channels every few months to keep water flowing smoothly.
  • Remove moss and algae: Use a patio cleaner or stiff brush to clean slippery green patches, especially during wet weather.
  • Check for cracks in paving: Repair small cracks early before they turn into bigger patio damage.
  • Inspect drainage after heavy rain: After storms or long rainy periods, check if water drains properly across the patio surface.
  • Keep drainage channels clear: Blocked patio drainage channel systems can quickly lead to standing water and puddles.
  • Watch for sinking slabs: Uneven or loose paving may be a sign of hidden drainage issues underneath the patio.
  • Trim nearby plants regularly: Overgrown plants and roots can block drains and affect water flow around the patio.
  • Check gravel areas: Rake and refresh gravel drainage zones when needed to help maintain proper drainage.

How Much Does Patio Drainage Cost in the UK?

The cost of patio drainage UK projects depends on the patio size, drainage system, and installation work needed. This is usually just one part of your overall budget alongside new patio installation costs.. Simple fixes like a patio drainage channel may cost a few hundred pounds, while larger drainage projects can cost more.

Drainage TypeEstimated Cost (UK)
Gravel border / simple fix£150 – £400
Patio drainage channel (single run)£300 – £800
French drain installation£500 – £1,200
Soakaway system£1,000 – £2,500
Full permeable paving (per m²)£60 – £120 per m²

Factors that push costs higher:

  • Heavy clay soil requires extra excavation
  • Large patios needing multiple drain runs
  • Access difficulties (narrow side gates, raised patios)
  • Premium materials like porcelain or natural stone

While professional drainage installation adds to upfront costs, it is worth comparing it against the price of repairing damp walls (£500–£3,000+), replacing sunken paving, or treating foundation damp, all of which become real risks when drainage is ignored.

Conclusion

Effective patio drainage is not just a finishing touch; it is a long-term protection system for your outdoor space and your home. In a country like the UK, where rainfall is frequent and often heavy, ignoring drainage can quickly lead to slippery surfaces, structural damage, and costly repairs. On the other hand, a well-planned system ensures that water is controlled, directed, and safely absorbed without affecting your patio or nearby foundations.

Whether you choose channel drains, soakaways, permeable paving, or simple slope adjustments, the key is to match the solution to your garden’s conditions and maintain it regularly. Investing in proper patio drainage UK solutions today not only improves safety and appearance but also extends the life of your patio for many years to come.

FAQS

1. What is the best drainage option for a patio in the UK?

The best patio drainage option in the UK depends on your garden layout and soil type, but channel drains, soakaways, and permeable paving are among the most effective solutions for managing heavy rainfall.

2. What are the rules for patio drainage?

UK patio drainage rules generally require rainwater to drain into permeable ground, soakaways, or proper drainage systems rather than flowing directly into public drains or neighbouring properties.

3. What causes water to pool on a patio?

Water usually pools on a patio because of poor drainage, blocked channels, or an incorrect slope that stops rainwater from flowing away properly.

4. How much does patio drainage cost in the UK?

Patio drainage costs in the UK can range from around £150 for simple gravel drainage fixes to over £2,500 for larger soakaway or full drainage systems.

5. Can poor patio drainage damage my house?

Yes, poor patio drainage can direct water toward walls and foundations, which may lead to damp problems, cracked paving, and long-term structural damage.

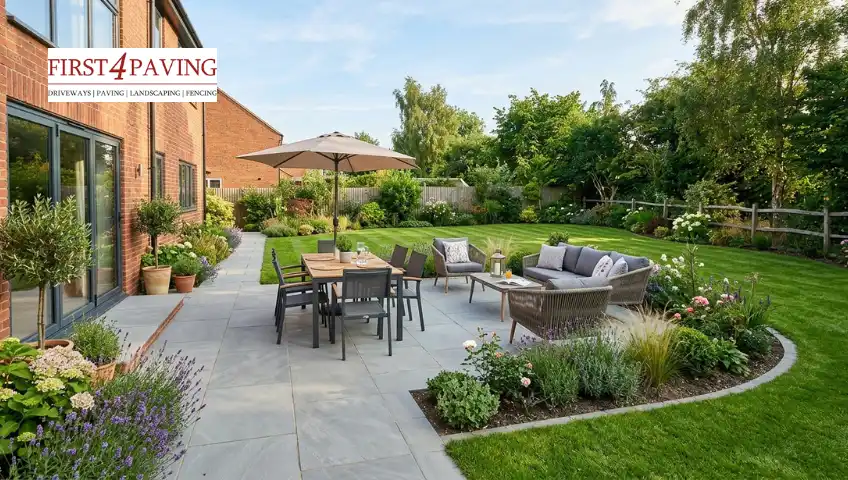
A beautiful stone slab patio with premium outdoor dining furniture and integrated garden borders, showcasing a high-end finish that impacts a new patio cost.

How Much Does a New Patio Cost in the UK?

A new patio can completely change the way you use your garden. Whether you want a quiet corner for your morning coffee or a proper space for summer get-togethers, it is one of the best investments you can make at home.

Before anything else, most homeowners want a straight answer: what will this actually cost me? And that is a fair question. Prices vary quite a bit depending on the size of your space, the materials you choose, and who you hire to do the work. A small, simple patio will look very different on your invoice compared to a larger, premium design.

In this guide, we break down every factor that affects the price, from materials and labour to the smaller costs that are easy to overlook. By the end, you will have a clear and realistic budget in mind, with no surprises along the way.

What Factors Affect the Overall Price?

When you start planning your patio installation, it helps to understand what drives costs up or down. The total price of a patio project is usually made up of these key elements:

  • Size of the Area: A larger space needs more materials and takes longer to build, which increases both material and labour expenses.
  • Choice of Materials: Basic concrete slabs are far cheaper than Indian sandstone or porcelain tiles. Your material choice has the single biggest impact on the final bill.
  • Ground Preparation: A flat, grassy garden is straightforward to clear. An uneven or sloped garden, or one with old concrete to remove, will require extra preparation work and add to costs.
  • Location and Labour: Hiring tradespeople in London and the South East typically costs more than in northern England or other regions.

Average Installation Cost by Patio Size

The table below gives a rough guide to what you might spend on a typical patio, including both materials and professional labour:

Patio SizeApproximate DimensionsEstimated Cost Range
Small3m x 3m (9 sq metres)£800 – £1,800
Medium5m x 4m (20 sq metres)£2,000 – £4,500
Large6m x 5m (30 sq metres)£3,500 – £7,000+

If your budget is tight, a smaller project is much easier to manage. For a larger garden with premium finishes, total costs can climb above £8,000.

Breaking Down the Cost of Patio Materials

The material you choose is the biggest factor in the final price tag. Let’s look at the most common options for a new patio cost so you can find the right match for your budget.

1. Concrete Slabs (Low Cost)

Concrete slab patio for affordable outdoor spaces

If you want a low-cost patio, standard concrete flags are your best bet. They are tough, practical, and budget-friendly. While they might look a bit plain compared to stone, they do the job perfectly.

  • Estimated price: £35 to £60 per square metre.

2. Block Paving (Mid-Range)

Block paving patio with herringbone pattern design

Choosing block paving gives you lots of design options. You can lay them in different patterns, like herringbone, making it a popular choice for both patios and block paving driveways. If budget is a concern, it’s worth comparing this against the cheapest driveway options available.

  • Estimated price: £50 to £90 per square metre.

3. Natural Stone (Premium)

Natural stone patio with premium garden paving

Materials like Indian sandstone, limestone, or slate offer a beautiful, high-end finish. The cost of garden paving using natural stone is higher, but every single slab looks unique, which adds a lot of charm to your home.

  • Estimated price: £75 to £130 per square metre.

4. Porcelain Tiles (Luxury)

Modern luxury porcelain tiles with a sleek patio drainage system.

Porcelain is highly fashionable right now. It looks incredibly modern, is scratch-resistant, and does not absorb water, making it easy to clean. However, the patio paving cost for porcelain is top-tier because it requires special tools to cut and lay.

  • Estimated price: £90 to £150+ per square metre.

Labour Costs: How Much to Get a Patio Laid?

Unless you are a DIY expert, you will likely need to hire someone experienced who can handle everything from ground preparation to the final finish. But how much does it cost to build a patio when you factor in the workforce?

On average, a landscape gardener or builder charges between £150 and £250 per day per person. Most jobs require at least two workers. Therefore, the daily patio installation cost for labour alone will sit around £300 to £500.

  • A small patio usually takes 1 to 2 days.
  • A medium patio takes about 3 to 4 days.
  • A large or complex patio can take a week or more.

When you ask for patio quotes, always check if the price includes digging up the ground, removing the old waste (like skip hire), and supplying the hardcore base materials.

Hidden or Additional Costs to Consider 

When working out the cost of patio installation, it is easy to forget about the extra details. Here are a few things that can alter your final bill:

  • Drainage: Water must flow away from your house. If your garden retains water, you might need to install extra patio drainage channels.
  • Steps and Walling: If your garden slopes, you may need steps or retaining walls, which is where professional landscaping work comes in and adds to the overall cost.
  • Skip Hire and Waste Removal: Digging up your garden creates a surprising amount of waste. If your contractor does not include skip hire in their quote, you may need to arrange and pay for it separately, which can add to your overall bill.

How to Save Money on Your Patio

If you are worried about the cost of laying a patio, there are a few clever ways to keep expenses down:

  • Clear the Area Yourself: You can lower the patio laying cost by doing the hard work early. Dig up the old grass and clear away plants before the workers arrive.
  • Choose Simple Shapes: Avoid curves or weird angles. Square or rectangular designs mean fewer cuts, less waste, and lower costs.
  • Buy Materials in Bulk: If you are buying your own patio supplies, look for trade discounts or end-of-season sales at local builders’ merchants.

Conclusion 

Planning a patio does not need to be complicated, but understanding what drives the cost will help you budget realistically and avoid surprises. Material choice is the biggest variable, while ground conditions, garden size, and location all play a role in the final figure.

The best approach is to get a proper quote from an experienced paving contractor, ask exactly what is covered, and decide on your materials before work begins. With a little preparation, you can create a stylish, long-lasting outdoor space that adds real value to your home.

FAQS

1. How much does it cost to lay a patio in the UK?

 Professional patio installation in the UK generally costs between £50 and £150 per square metre, depending on the material chosen and the job’s complexity. Concrete is at the lower end, while natural stone and porcelain sit at the higher end. Your location and the amount of ground preparation needed will also affect the final price.

2. Which patio materials are the most affordable? 

Concrete slabs are the most budget-friendly option, offering durability at a low cost. Gravel is another economical choice, though it requires more maintenance over time. Block paving sits in the mid-range and offers a good balance between cost and appearance. Natural stone and porcelain are the most expensive materials.

3. Can I install a patio myself to save money?

 Yes, a DIY installation can save a significant amount on labour. However, it requires careful planning, the right tools, and a properly compacted base to avoid uneven settling over time. If the groundwork is not done correctly, the surface may shift or crack within a few seasons.

4. How long does it take to lay a new patio?

 A small patio laid by professionals typically takes one to two days. Medium-sized projects usually take three to four days, while larger or more detailed designs may take a week or longer. DIY installations will generally take more time, particularly if you are new to the process.

5. Can I use a patio cost calculator? 

Yes, an online cost calculator can give you a useful starting estimate based on your size, chosen material, and location. Keep in mind that these figures are approximate. A proper quote from a contractor after a site visit will always be more accurate, as it accounts for ground conditions and any specific requirements of your project.

A smooth concrete driveway features a curved brick border that separates it from dark grey river stones and a neat green lawn in front of a traditional stone house

10 Driveway Edging Ideas to Improve Kerb Appeal

Most homeowners spend thousands on a new driveway surface, but overlook the one detail that keeps everything looking neat. Without proper edging, even a high-quality block paving or tarmac driveway can start to lose its appearance within a short time. Gravel spreads onto the lawn, paving blocks move out of line, and grass slowly creeps in around the edges.

The right driveway edging can make a noticeable difference without the expense of a full redesign. A well-chosen border helps keep the surface tidy, reduces movement around the edges, and improves the overall appearance of your entrance.

In this guide, you’ll discover practical and stylish driveway edging ideas for both modern and traditional UK homes, along with advice on which materials work best, what to avoid, and how to choose the right option for your property.

Why Driveway Edging Matters

A driveway without proper edging can quickly start to look messy. Gravel spreads across the lawn, paving blocks shift out of place, and grass begins creeping into the sides. Over time, these small issues can make the whole front garden look untidy.

Adding strong driveway borders helps keep everything neat and easier to manage. It also gives the driveway a cleaner and more finished appearance.

Good edging offers several benefits, including:

  • Better kerb appeal
  • Cleaner and sharper driveway edges
  • Improved drainage during wet weather
  • Reduced weed growth around the borders
  • Extra support for paving, gravel, and tarmac surfaces

The right edging choice depends on your driveway material, budget, and the overall style of your property. Some homeowners prefer modern concrete driveway edging, while others choose natural stone or classic brick borders for a more traditional look.

If you are unsure where to start, a trusted driveway contractor can help you find the right fit for your property.

1. Brick Driveway Edging for a Classic Look

Brick edging along a gravel driveway in a UK home creating a clean border.

Brick edging is one of the most popular choices in the UK, and for good reason. It is durable, widely available, and suits almost every type of property from Victorian terraces to modern semis.

Laid in a simple soldier course (bricks stood upright end-to-end), brick edging creates a clean, defined line along the driveway. It pairs especially well with gravel, since the firm border stops stones from spreading onto paths and lawns.

Why homeowners choose brick borders:

  • Strong and weather-resistant handles freeze-thaw cycles well
  • Easy to match with existing paving or brickwork on the home
  • Creates a clear, defined edge without looking harsh
  • Suits curved as well as straight driveways

Common styles: Soldier course, herringbone pattern, double brick line, curved edging

2. Stone Driveway Edging for a Natural Appearance

A gravel driveway lined with cobblestone borders curves toward a charming stone cottage with lush gardens.

Stone driveway edging is a great choice if you want a soft, natural look that blends into your garden. It suits rural homes, cottages, and properties with lots of greenery, giving the driveway a more organic finish.

Natural stone also adds strength and structure, helping to keep the driveway edges firm and tidy, even with regular vehicle use.

Best Types of Driveway Edging Stones

Common options for driveway edging stones include:

  • Granite setts: premium appearance, extremely durable, and ideal for traditional driveways
  • Sandstone blocks: warm natural colour with a timeless and elegant finish
  • Limestone kerbs: smooth texture, modern look, and easy to maintain
  • Cobblestones: classic character, strong durability, and perfect for rustic designs 

These materials are strong, weather-resistant, and designed to handle heavy traffic without losing their shape.

Stone edging also works beautifully with driveway border landscaping, especially when combined with flower beds, shrubs, or grass borders. It creates a balanced look between hard surfaces and natural outdoor space.

3. Concrete Driveway Edging for Modern Homes

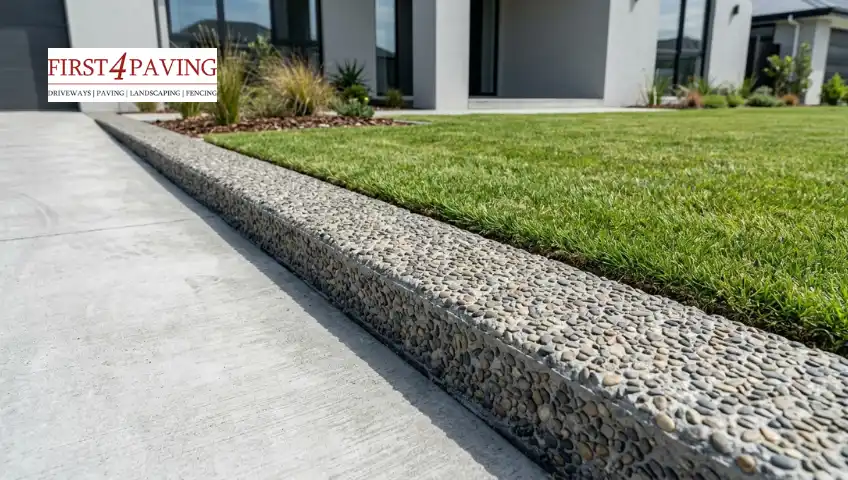
An exposed aggregate concrete edge separates a smooth concrete driveway from a neat green lawn in front of a modern house

Concrete edging suits modern homes well because it creates sharp, clean lines with very little visual fuss. It is a practical choice for large driveways and minimalist garden designs where a simple, tidy finish is the goal.

Standard concrete edging is grey and smooth, but there are also textured and stamped options that replicate the look of stone or brick at a lower price point. This makes it a useful middle-ground option for homeowners who want a premium appearance without the cost of natural materials.

Benefits:

  • One of the most affordable edging options available
  • Very low maintenance with no sealing or treatment needed
  • Long-lasting when properly installed
  • Can be tinted or textured to match surrounding surfaces

Decorative note: Exposed aggregate concrete edging adds texture and visual interest while remaining affordable. It works well alongside brushed or stamped concrete driveways.

4. Gravel Driveway Edging for Better Containment

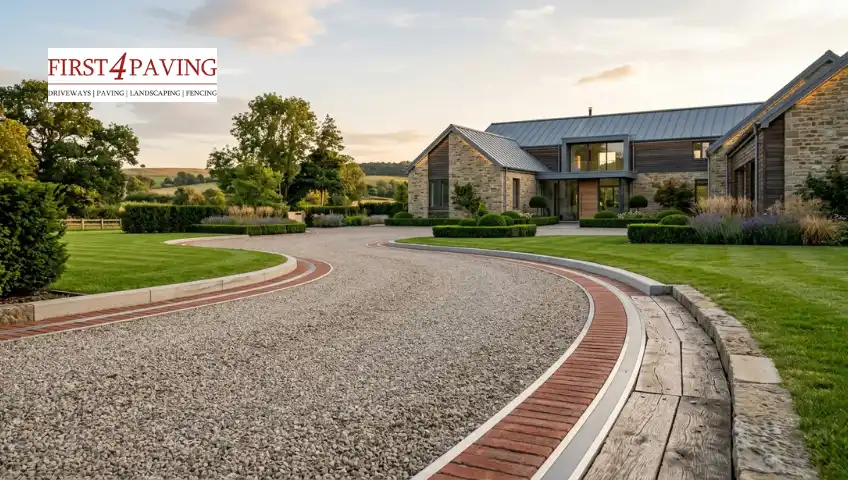
A winding gravel driveway featuring a red brick border leads toward a large, modern stone estate at sunset

Gravel driveway edging is important because loose gravel can easily spread onto lawns, paths, and roads. Good edging keeps everything in place and helps the gravel driveway stay clean and organised.

The most effective edging for gravel driveways uses rigid, stable materials that sit flush with or slightly above the surface level:

  • Brick: durable, attractive, and widely available
  • Steel or aluminium strips: slim profile, very effective at containment
  • Concrete kerbs: strong and low-maintenance
  • Timber sleepers: suit rural and cottage-style homes
  • Stone blocks: natural look with good durability

For most UK driveways, brick or metal edging gives the best combination of practicality and appearance. The border needs to be set deep enough (at least 150mm) to stay firm under the weight of vehicles turning near the edges.

5. Block Paving Borders for a Premium Finish

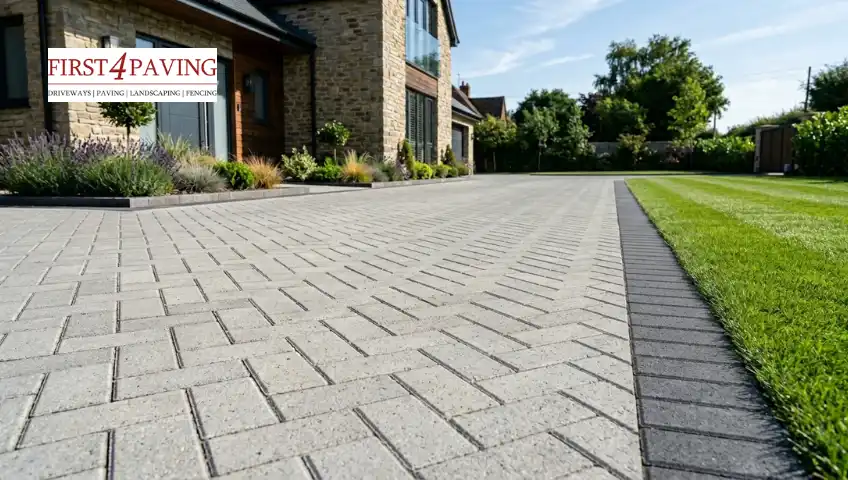
A light grey block paving driveway in a herringbone pattern features a contrasting dark charcoal border alongside a green lawn.

Block paving is one of the most popular driveway choices in the UK, and adding a contrasting border takes the finish from standard to premium. If you’re planning the full installation, read the guide on how to lay a block paving driveway before choosing your border style. A well-chosen border creates definition, adds depth, and helps the main paving stay locked in place over time.

Popular border styles:

  • Dark border blocks around lighter paving (e.g. charcoal blocks around silver-grey)
  • Contrasting textures with a smooth border against a textured main body
  • Raised edging for a more structured, architectural look
  • Curved edge designs that follow the shape of the driveway

Colour matching tip: When choosing border colours, look at the existing materials on the house, including roof tiles, window frames, and brickwork, and try to echo one of those tones. This creates a more cohesive exterior rather than a driveway that looks disconnected from the property

6. Metal Driveway Edging for Contemporary Look

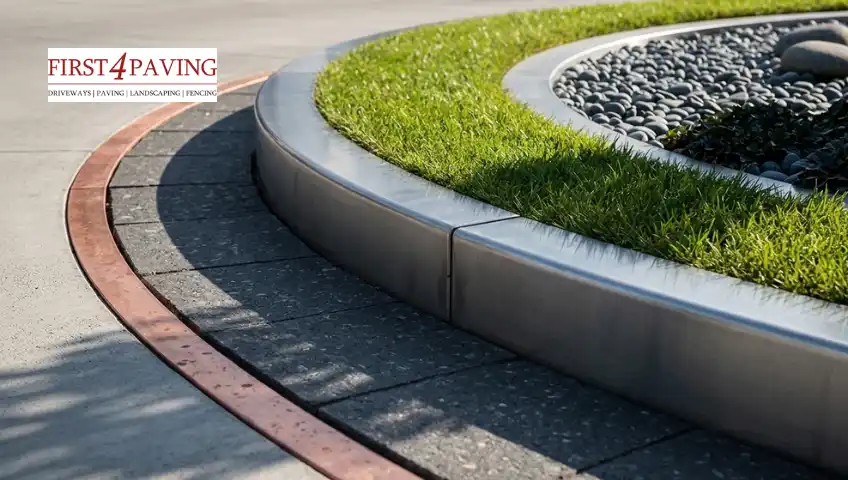
A close-up shot of a modern, curved driveway edging design with stainless steel borders, a grass strip, and dark pebbles.

Metal driveway edging is a modern choice used in many UK homes today. Steel or aluminium strips create very clean, sharp lines that give the driveway a smart and organised finish.It works especially well in minimalist garden designs and adds a neat architectural feel to the outdoor space.

Benefits of Metal Edging

  • Slim and discreet look
  • Rust-resistant options available
  • Easy to shape around curves
  • Works well with gravel and paving

Metal edging is often used in modern driveway border ideas for homeowners who want simple, strong, low-maintenance edges.

7. Timber Driveway Edging for Rustic Charm

A curved gravel path edged with wooden beams snakes through blooming gardens up to a historic stone cottage

Timber driveway edging provides a warm, natural finish that suits countryside and cottage-style homes. Made from railway sleepers or treated wood, it creates a soft border that blends nicely with gardens, grass, and gravel driveways.

It works well for rural properties, sloped driveways, and natural driveway-border landscaping ideas, where a simple, relaxed look is preferred.

To make it last longer, pressure-treated timber is best as it protects against moisture and rot, helping the edging stay strong for years.

8. Tarmac Driveway Edging for Cleaner Lines

An asphalt driveway with a neat brick paver border runs alongside lush flower beds filled with purple lavender

Plain tarmac driveway surfaces are one of the most practical choices, but they can look flat and unfinished without a border to frame them. Adding edging creates a clear line between the tarmac and the surrounding garden, and also protects the edges from crumbling, which is one of the most common ways tarmac surfaces deteriorate over time.

Best border options for tarmac:

  • Brick: the most popular choice, adds colour and texture against the dark surface
  • Stone kerbs: a classic look that suits traditional properties
  • Concrete edges: clean and affordable
  • Block paving trims: adds a premium feel

Soft landscaping: One of the most effective ways to improve the appearance of a tarmac driveway is to add planted borders alongside the edging. Low-growing plants, ornamental grasses, or lavender alongside a brick border softens the dark surface and creates a more welcoming entrance.

9. Raised Edging for Extra Definition

A smooth asphalt driveway with a low brick retaining wall leads up to a large brick and stone country house

Raised edging is a great way to create a clear, well-defined boundary between your driveway and the surrounding landscape. It adds structure, improves visual appeal, and helps keep everything neatly in place.

This type of edging is particularly effective for sloped driveways or properties with large front gardens, where natural movement of materials can be an issue.

Practical benefits:

  • Prevents gravel and loose materials from spreading, even on a slope
  • Improves drainage by directing water away from the surface
  • Protects adjacent flower beds and lawns from vehicle encroachment
  • Adds visible structure that enhances the overall design

You can build raised edging using a range of materials such as bricks, concrete blocks, or natural stone, depending on the style and finish you want to achieve. It also works particularly well when combined with a professionally designed patio, creating a seamless transition between your driveway and outdoor living area. 

10. Decorative Driveway Edging for a Stylish Finish

A herringbone brick driveway with cobblestone trim features an integrated stone curb light beside a green lawn

Decorative driveway edging is perfect for homeowners who want their driveway to stand out while still keeping a clean and organised appearance. It combines practical borders with visual design features to create a more attractive entrance.

Popular decorative edging ideas include:

  • Patterned brick borders for added texture
  • Cobblestone edging for a traditional UK look
  • LED lighting along driveway edges for modern homes
  • Mixed stone and gravel borders for contrast
  • Decorative kerbs with planted flower strips

These edging styles work well for both modern and traditional properties and can instantly improve kerb appeal without changing the entire driveway surface.

How to Choose the Best Driveway Edging

The best driveway edging depends on several factors.

Consider Your Driveway Material

Different edging styles suit different surfaces.

For example:

  • Gravel works well with brick and metal
  • Block paving suits contrasting borders
  • Tarmac looks cleaner with stone or brick edging
  • Concrete pairs nicely with modern kerbs

Think About Maintenance

Some materials need more care than others.

  • Timber may require treatment
  • Gravel needs occasional levelling
  • Concrete and stone usually need less upkeep

Match the Style of Your Home

Traditional homes often suit brick and natural stone. Modern properties usually look better with sleek concrete or metal edging.

Choosing matching materials helps create a more balanced exterior design.

Common Mistakes to Avoid

Here are some key mistakes homeowners often make when installing driveway edging:

  • Weak Foundations: Poor or shallow installation can cause the edging to shift, sink, or crack over time, reducing both strength and appearance.
  • Ignoring Drainage: Failing to plan proper drainage can lead to water pooling, puddles, and long-term surface damage around the driveway edges.
  • Choosing the Wrong Materials: Not all edging materials are suitable for every driveway. Some may not withstand heavy vehicle pressure or steep gradients.
  • Poor Installation Quality: Uneven placement or lack of alignment can make the edging look untidy and reduce its effectiveness.
  • Overlooking Durability Needs: Always select strong, weather-resistant materials designed for outdoor and long-term use to avoid early wear and replacement issues.

Ready to upgrade your driveway? As experienced driveway contractors in Enfield, we can help you choose the right edging and materials for a finish that lasts. Contact us today for a free quote.

Conclusion

The right driveway edging can completely change the look and feel of your outdoor space. From classic brick borders to modern concrete and natural stone finishes, there are plenty of driveway edging ideas that improve both appearance and practicality. Strong edging helps keep your driveway neat, supports the surface, and adds long-lasting curb appeal to your property. By choosing materials that match your home style and driveway surface, you can create a cleaner, more organised, and more attractive entrance that stands out for years to come.

FAQ’S

1. What is driveway edging, and why do I need it?

Driveway edging is a border that defines the edges of your driveway and keeps the surface in place. It is needed because it improves appearance, prevents the spreading of materials, and adds long-term strength to the driveway.

2. How do I choose the right driveway edging material?

You should choose the material based on your driveway type, style, and budget. For example, stone and brick work well for durability, while metal or concrete suits modern designs.

3. Does driveway edging help with drainage?

Yes, driveway edging can improve drainage by guiding water away from the surface. It helps reduce water pooling and keeps the edges stable during heavy rain.

4. What is the best material for durable driveway edging?

Stone, brick, and concrete are the most durable options for driveway edging. They can handle heavy traffic and weather conditions without getting damaged easily.

5. Can I install driveway edging myself?

Yes, simple edging like bricks or pavers can be installed as a DIY project with basic tools. However, complex or heavy materials are better installed by professionals for long-lasting results.

Luxury modern front door steps with LED lighting and landscaped UK home entrance

10 Gorgeous Front Door Step Ideas to Boost Your UK Home’s Kerb Appeal

Your front door steps are the first thing anyone sees when they visit your home. Before they ring the bell, before they step inside, they have already formed an opinion. And for most UK homeowners, those steps are cracked, stained, or just painfully plain because there is always something more urgent to spend money on. Sound familiar?

Fixing it does not have to cost a fortune or take weeks. The right front door step design can completely transform how your home looks, boost your curb appeal, and even add value to your property.

As a trusted driveway contractor in Enfield, we are sharing our experience to help you find the best front door step ideas for your property. Whether you have a red brick terrace in Manchester, a period cottage in the Cotswolds, or a modern new build on a new estate, these designs are built to look great and survive everything a British winter throws at them. 

Why Your Front Entrance Deserves an Upgrade

Before looking at the designs, let’s talk about why this project is worth your time. Your front doorstep is more than just a way to enter your home; it plays a big role in how your property looks and feels from the outside.

  • Kerb Appeal: Stylish front steps instantly make your home look cleaner, more welcoming, and well cared for.
  • Safety: Old or uneven steps can become slippery and unsafe, especially during rainy and frosty weather.
  • Property Value: A smart, well-designed entrance can leave a strong first impression and even increase your home’s value over time.

The right front door step design should not only look attractive but also stay durable throughout the changing UK seasons. Let’s explore some of the best ideas that combine style, comfort, and practicality.

1. Traditional Red Brick Borders

 Traditional red brick front steps of a UK home with warm and welcoming entrance

For a truly classic British look, brick is a fantastic choice. You can use engineering bricks to build a solid base and frame the edges of your path. Leaving the red brick exposed gives a warm, rustic feeling that pairs beautifully with a black or deep green front door. It is a timeless, reliable choice that never goes out of style.

Using brick allows you to match the exact age of your property. If your home has traditional red brickwork, continuing that theme onto your steps creates a smooth, unified look. It is simple to build, highly durable, and very easy to maintain over the years.

2. Elegant Indian Sandstone

Elegant Indian sandstone front door steps with warm tones and natural texture in a UK home entrance

Indian sandstone is incredibly popular across the UK right now. It comes in gorgeous, warm tones like autumn brown, mint, and grey. It is naturally slip-resistant when wet, making it perfect for our rainy climate. Using wide slabs creates a premium, spacious look for your ideas for front door steps.

Because each slab of sandstone has unique patterns and tones, your entrance will have a completely custom look. This material is excellent for creating a smooth transition from a front garden patio installation or path right up to your threshold. Pairing this with the right driveway edging creates a seamless, unified entrance.

3. Floating Concrete Slabs

Modern floating concrete front steps with LED lighting, creating a stylish hovering effect at night

For an ultra-modern look, consider a modern concrete front steps design ideas layout. Instead of a solid block of stone, you can create layered, “floating” concrete steps. By leaving a small gap under the lip of each step, the structure feels light and stylish.

To make this design even better, you can install hidden, waterproof LED strip lights under each overhang. When night falls, your steps will look like they are hovering in the air, creating a beautiful path that safely guides your guests toward the doorway.

4. Dark Slate Styling

Dark slate front door steps with natural texture, creating a sleek modern entrance for a UK home

Slate offers a brilliant contrast, especially if your house has light-coloured brick or smooth render. Dark grey or black slate steps look sleek, expensive, and incredibly sharp. Just make sure the slate has a natural, cleft surface so it does not get slippery when it rains, making it a top choice for any modern home entrance. 

Slate holds up incredibly well against frost and heavy rain, meaning it won’t lose its deep colour or split apart over time. It is an excellent way to give an older house a clean, contemporary update without looking out of place.

5. Victorian Geometric Tiles

Victorian geometric tiled front door steps with classic black and white patterns on a UK terrace home

Walk around any historic UK town, and you will see stunning geometric tiled pathways leading to period homes. Bringing those classic black-and-white patterns right up onto your front door step tiles creates an instant wow factor. It is the perfect way to respect the history of an older Victorian or Edwardian terrace.

These tiles are fired at incredibly high temperatures, making them dense and resistant to water. While they require a bit of patience to lay perfectly, the final look is completely timeless and adds immense historic charm to your property.

6. Large Porcelain Paving

Large porcelain paving front door steps with sleek, minimal design and clean modern finish

Porcelain isn’t just for luxury kitchens anymore. Outdoor-grade porcelain tiles are perfect for front door steps. They don’t absorb water at all, meaning they won’t crack during severe winter frosts, and they come in realistic wood, marble, or limestone finishes that look incredibly clean.

Because porcelain slabs can be made very large, you can often cover a whole step with just one or two pieces. This reduces the number of grout lines, leaving you with a sleek, premium finish that needs nothing more than a quick wipe down with soapy water to look brand new.

If your porcelain or stone surface ever needs a deeper refresh, our professional driveway and patio cleaning service will restore it to its original finish without any hassle. 

7. The Wide Single Step

Wide single front door step platform creating a spacious and practical entrance for a small UK home


When space is tight, don’t try to squeeze in multiple small, steep steps. Instead, build a single, wide, generous platform. A larger platform makes the entrance feel much bigger than it actually is and gives your entryway a grander presence, making it perfect for small front door step ideas.

A wide single platform is also incredibly practical. It gives you plenty of room to stand comfortably while you look for your house keys in the rain, and it offers just enough space to place a small potted tree or seasonal flower display next to the frame.

8. Curved Brick Semis

Curved brick semi-circular front steps creating a soft and welcoming entrance to a UK home

If you need to change direction quickly from a side garden path to your front door, a curved steps to the front door design works wonders. A semi-circular step built from brick gently guides you to the door from any angle, softening the sharp corners of a small front yard and creating a beautiful, welcoming entrance. 

Curved steps look softer and more organic than harsh squares. They draw the eye directly to the center of your house, creating a welcoming flow that works beautifully for both country cottages and grand suburban detached houses.

9. Rustic Wooden Sleepers

For a more natural and countryside-inspired look, wooden sleeper steps are becoming increasingly popular across UK homes. They create a warm, relaxed entrance that works beautifully with cottage style properties, garden pathways, and rural homes.

Timber sleepers pair especially well with gravel paths, greenery, and traditional brickwork. Pressure-treated wood can handle the damp UK climate surprisingly well when properly sealed, making this a stylish yet practical option for homeowners who want something softer and more organic than stone or concrete.

10. Built-In Planters and Greenery

Modern front steps with built-in planters filled with greenery creating a fresh and elegant entrance

If you want your entrance to feel more welcoming and luxurious, consider adding built-in planters beside your front steps. Combining greenery with stone, brick, or concrete steps instantly softens the entrance and adds colour throughout the year.

This idea works especially well for modern UK homes and smaller entrances that need extra character without major construction. Low-maintenance plants like lavender, small shrubs, or evergreen grasses can handle the British weather while giving your front entrance a fresh, stylish appearance.

Built-in planters also help frame the doorway beautifully, making the entire entrance feel more balanced, elegant, and inviting from the street.

Choosing the Best Materials for the UK Climate

When looking through different front entrance steps design ideas in UK galleries, it is easy to fall in love with how a material looks online. However, the UK’s damp and unpredictable weather can be tough on outdoor materials. Winters are often cold, wet, and prone to sudden frosts, so choosing the right material matters just as much as the design.

Here is a quick breakdown of how common materials perform:

  • Natural Stone: Offers beautiful natural variations and lasts a lifetime with great natural grip. It can be a bit expensive to buy initially, but it looks amazing on traditional and country homes.
  • Porcelain Tiles: Completely frost-proof and zero maintenance with a highly modern look. Just ensure you choose an R11 anti-slip rating for outdoor safety.
  • Brick: Highly affordable, easy to build with, and offers a classic look. However, moss can grow on it over time in damp, shaded areas, so it needs a wash once a year.
  • Concrete: Strong, long-lasting, and highly customisable. It can look a bit dull if left completely plain, so it works best when paired with modern outdoor lighting.

Top Tips for Designing Your New Front Steps

  • Keep the step height comfortable between 150mm and 170mm so it feels easy and safe to walk up every day.
  • This helps make your front-door step design more practical for all ages, especially children and elderly visitors.
  • Ensure every step is even and properly aligned to avoid uneven walking or slipping.
  • A balanced layout improves safety and gives your entrance a clean look.
  • Add a slight slope away from the house to allow rainwater to drain properly. This prevents water pooling and protects your doorway from damp issues, which is very important in the UK weather. Getting patio drainage right nearby matters just as much for keeping the whole entrance dry.
  • This prevents water pooling and protects your doorway from damp issues, which is very important in the UK weather.

If you are ready to transform your front entrance, get in touch with our driveway contractors in Enfield for a free quote and let our team help you get started.

Conclusion

Your front entrance is one of the most important parts of your home; it’s the first thing people see and the last thing they remember. With the right design, your front steps can completely change the look and feel of your property. From traditional brick to modern porcelain or stylish slate, there is an option for every home style and budget.

The key is to balance design with practicality, especially in the UK’s changing weather. When done right, your entrance becomes more than just steps; it becomes a statement.

FAQs

1. What are the best materials for front door steps?

 Concrete, stone, and brick are the most durable materials for front door steps. Wood and tiles are also used for decorative or covered entrances. The choice depends on durability, style, and maintenance needs.

2. How do I choose the right front door step design?

 The right design depends on your home’s architecture, available space, and budget. Safety and practicality should also be considered along with aesthetics. A balanced design improves both appearance and function.

3. Can I install the front door steps myself?

 Yes, simple wooden or small concrete steps can be installed as DIY projects. However, stone or complex designs require professional installation for safety and long-term stability. Poor installation can lead to structural issues.

4. What are the trending front door step designs?

 Popular trends include floating stone steps, LED-lit edges, and minimalist concrete finishes. These designs focus on clean lines and modern appeal. They also improve both style and visibility.

5. Can small entrances have stylish steps?

 Yes, even small entrances can look stylish with smart designs. Single platform steps or narrow deep steps work well in limited spaces. Adding planters can also enhance the overall look.

How long will a new driveway take to install?

Installing a new driveway is one of the most impactful improvements you can make to your property’s curb appeal, but if you’re planning the work around a busy schedule, timing matters. On average, a new driveway takes anywhere from 2 to 7 days to install in Enfield, depending on the size, material, and condition of your existing surface. 

In this guide, we’ll walk you through everything that influences how long a driveway installation takes, from the size and material you choose to ground conditions and weather. We’ll also break down the entire installation process, stage by stage, so you know exactly what happens on-site and how long each part typically takes, along with tips for keeping your project on schedule and questions to ask before hiring an installer.

How Long Does Each Driveway Type Take To Install?

Installation time varies significantly depending on the material you choose. Below is a breakdown of how long each driveway type typically takes, based on real-world timelines from driveway experts in Enfield.

Block Paving Driveways

Block paving is one of the most popular driveway choices in the UK, known for its durability and range of design options. Because each block is laid and cut by hand, installation typically takes 3–5 days for an average-sized driveway. Larger or more intricate patterns can extend this timeframe further.

Block Paving Driveways

Resin Bound Driveways

Resin bound surfaces offer a smooth, modern finish and are laid relatively quickly compared to block paving. Installation usually takes 2–3 days, but the surface needs an additional 24–48 hours of curing time before it’s ready for vehicle use.

Resin Bound Driveways

Concrete / Pattern Imprinted Driveways

Concrete and pattern imprinted driveways involve pouring, levelling, and often stamping a design into the surface before it sets. This process typically takes 3–5 days, plus additional curing time before the driveway is ready for regular use.

Concrete Pattern Imprinted Driveways

Tarmac Driveways

A tarmac driveway is one of the fastest driveway materials to install, as it’s poured and rolled directly onto the prepared base. Most tarmac driveways are completed within 1–2 days, making them a popular choice for homeowners seeking a quicker turnaround.

Tarmac Driveways

Gravel Driveways

Gravel driveways are among the simplest and quickest to install, since they don’t require extensive laying or curing time. On average, installation takes 1–2 days, though proper edging and drainage work can add a little extra time.

Gravel Driveways

How To Get Your Driveway Installed Faster?

Choose Your Material Carefully

Tarmac and gravel install faster than block paving or resin, making them ideal choices if speed is a priority for your project.

Clear Site Access in Advance

Make sure vehicles and equipment can reach the site easily. Poor access on the day can cause delays before work even begins.

Schedule During Drier Months

Spring and summer generally offer more predictable weather for groundwork and curing, reducing the risk of weather-related setbacks.

Hire Experienced Contractors

A skilled team works more efficiently and avoids costly delays caused by mistakes, keeping your project on schedule.

Get All Decisions Finalised Before Work Starts

Confirm your material, design, and colour choices in advance so the team isn’t waiting on approvals mid-project.

What Are The Factors That Affect Driveway Installation Time?

Size and Shape of the Driveway

Larger driveways naturally take longer to prepare and lay than smaller, single-car spaces. Irregular shapes or curved layouts also add time, as they require more precise cutting and fitting of materials.

Type of Material Used

Different surfaces have different installation timelines. Block paving, for example, takes longer to lay by hand than tarmac, which can be poured and rolled more quickly. Resin bound driveways require a specific curing window before they can be walked or driven on.

Ground Conditions and Preparation Work

If the ground is uneven, poorly drained, or has a high clay content, extra groundwork will be needed before the base layer is laid. This can add a day or more to the overall project.

Weather Conditions

Rain, frost, and extreme heat can all delay driveway installation. Excavation and sub-base work are particularly weather-sensitive, and materials such as resin and concrete require dry, stable conditions to cure properly.

Access to the Site

Driveways with limited access, such as narrow side entrances or restricted parking for machinery, can slow material delivery and equipment use, extending the timeline.

New Install vs. Replacement

If you’re replacing an old driveway, the team will first need to break up and remove the existing surface. This takes longer than installing a driveway on a completely clear plot.

How Long Will A New Driveway Take to Install

What Could Be The Warning Signs of a Poorly Installed Driveway?

A driveway installed too quickly may show signs of trouble down the line, including:

  • Uneven or sinking surfaces due to inadequate sub-base compaction
  • Poor drainage leading to pooling water, especially after rainfall
  • Cracking in concrete or resin surfaces from insufficient curing time
  • Loose or shifting block paving, particularly around edges
  • Weeds or grass growing through joints, often a sign of poor jointing or missing weed-suppression membrane
  • Visible gaps between blocks or pavers, indicating rushed or inconsistent laying
  • Uneven colour or patchy finish on resin or tarmac surfaces, often caused by mixing or application errors
  • Edging stones or curbs coming loose, suggesting they weren’t properly bedded or secured
  • Cracks appearing within the first few months, a common sign the sub-base wasn’t compacted properly or given enough time to settle
  • Water pooling near the house or boundary instead of draining away, which can point to incorrect surface gradient

A reputable installer will never skip stages like sub-base preparation or curing time, even if it means the project takes a day or two longer. That’s why it’s worth taking the time to hire an experienced driveway company in Enfield rather than opting for the cheapest or fastest quote available. At First4 Paving, we provide expert driveway installation services such as Resin and take every stage of the process seriously, from groundwork to finishing touches 

If you’re planning a new driveway in Enfield or Hertfordshire, contact us for expert advice and a free

Conclusion

Driveway installation time depends on the material, size, and ground conditions of your project, ranging from just a day for tarmac or gravel to several days for block paving, resin, or concrete once curing is factored in. Knowing what to expect at each stage helps you plan with confidence and avoid rushed, poor-quality work. Choosing an experienced installer also plays a big role in keeping your project on schedule while ensuring the finished result stands the test of time. Whether you’re upgrading your existing driveway or starting from scratch, a little planning ahead goes a long way toward a smooth installation.

FAQs

How long does a block paving driveway take to dry or cure? 

Block paving doesn’t require curing like resin or concrete, but it’s best to avoid heavy vehicle traffic for the first 24–48 hours to allow the joints to settle.

Can I walk on my new driveway straight away? 

This depends on the material. Block paving and gravel can usually be walked on almost immediately, while resin and concrete typically need at least 24 hours.

How soon can I drive on it? 

Most driveways need 48–72 hours to settle before they can support vehicle weight, though this varies by material; always check with your installer.

Does rain delay driveway installation? 

Yes. Rain can affect excavation, sub-base compaction, and the curing of materials like resin and concrete, often pushing the timeline back by a day or more.

When is the best time of year to install a driveway?

Late spring through early autumn (April to September) is generally the best time, as drier ground and warmer temperatures help with excavation and curing. Winter installation is possible, but frost and rain can extend timelines and affect the finish.


How to Seal Block Paving to Stop Weeds

How to Seal Block Paving to Stop Weeds?

Block paving is one of the most popular driveway and patio surfaces in the UK, but the small joints between each block are also the perfect place for weeds to take hold. Left untreated, weeds don’t just look untidy, they force joints apart, wash out jointing sand, and can eventually cause blocks to rock or sink under vehicle weight.

Sealing block paving is the most reliable, long-term fix. Done properly, it locks the jointing sand solid, closes off the surface to airborne seeds, and repels the moisture weeds need to germinate. This guide covers exactly how to do it, from clearing existing growth through to choosing a sealant, applying it correctly, and maintaining the surface afterwards, along with the mistakes that cause most sealing jobs to fail early.

Why Weeds Grow in Block Paving

Block paving is laid with sand-filled joints rather than solid mortar, so it’s never fully sealed against the outside world by default. Three conditions combine to let weeds establish:

  • Porous, unsealed jointing sand. Kiln-dried sand stabilises the blocks but has no binding agent, so it stays loose and open to seeds and moisture.
  • Moisture retention in the joints. Rain, condensation, and shade keep the sand damp long enough for seeds to germinate and roots to establish.
  • Organic debris build-up. Leaves, dust, moss spores, and grass clippings collect in joints over time, effectively “feeding” a compost-like layer for weeds to root into.

Common Weeds and Growth Found on Block Paving

Not every patch of green on a driveway is the same problem, and knowing what you’re dealing with helps you treat it correctly before sealing:

GrowthAppearanceTypical Location
DandelionsDeep taproot, yellow flower, regrows if root is leftSunny, open joints
CloverLow, spreading, three-leaf clustersSunlit joints and edges
ChickweedDense mat, small white flowersDamp, shaded joints
MossGreen, cushion-like, no visible rootsShaded, north-facing, poorly drained areas
AlgaeDark green or black slime, no leaf structureConstantly damp or shaded patches


Deep-rooted weeds like dandelions need the root removed or killed, not just the visible growth, or they will push straight back through a new seal within weeks.

What You’ll Need to Seal Block Paving

  • Stiff outdoor broom and/or pressure washer (fan nozzle)
  • Weed killer suitable for hard surfaces (for existing growth)
  • Kiln-dried or polymeric jointing sand
  • Block paving sealant (see selection guide below)
  • Roller, pump sprayer, or soft-bristle brush for application
  • Squeegee (optional, for even sealant distribution on larger areas)

How to Seal Block Paving to Stop Weeds: Step-by-Step

Step 1: Remove Existing Weeds — Root and All

Pull visible weeds by hand where possible, making sure the root comes with it; snapping off the top growth of a dandelion or similar taproot weed leaves it able to regrow within days. For widespread or stubborn growth, apply a hard-surface weed killer 3–5 days before cleaning, giving it time to kill the root system fully. Never seal over live weeds; sealant will not stop something that’s already rooted, and it will simply grow straight through the new coating.

Step 2: Deep Clean and Fully Dry the Surface

Pressure wash the entire area using a fan nozzle held at a slight angle, rather than pointing the jet straight down into the joints. A direct, close jet can blast out too much jointing sand or even erode the joint edges, creating deeper gaps than you started with. Work in sections, clearing dirt, moss, algae, and any oil or organic staining as you go.

Drying time matters more than most guides admit: residual moisture trapped deep in the joints, not just on the surface, is one of the most common causes of sealant failure, showing up as patchy whitening or peeling later. Allow at least 24 hours to dry in mild weather, and up to 48 hours in cooler or damp conditions, before moving on.

Step 3: Resand the Joints

Sweep new sand into every joint until it’s packed level, or up to roughly 1cm below the block surface to give the sealant room to bond without pooling on top. Two sand options are worth weighing up:

  • Kiln-dried sand — cheaper, easy to apply, but stays loose and can still wash out over time.
  • Polymeric sand — costs more, but contains a binder that hardens when activated with water, forming a semi-rigid joint that resists both weed growth and washout far better than kiln-dried sand alone.

For weed prevention specifically, polymeric sand gives a noticeably better long-term result, especially on driveways exposed to regular rainfall and vehicle weight.

Brush off every trace of excess sand dust from the block surfaces afterwards, leftover dust will cloud or discolour the finished sealant. 

Step 4: Choose the Right Sealant

Not all sealants behave the same way once applied, and the wrong choice for your paving type or usage can lead to whitening, poor adhesion, or a surface that looks glossy but offers little real weed resistance.

Sealant TypeWeed ResistanceBest Suited ToTypical Coverage
Acrylic (water or solvent-based)GoodPatios, light-use paths5–7m² per litre
Polyurethane (PU)ExcellentHigh-traffic driveways4–6m² per litre
Resin-basedVery goodWider joints, older paving4–6m² per litre

PU and resin-based sealants penetrate deeper into the joint itself, which is where the actual weed-blocking work happens, a glossy surface coating alone does little if the joint underneath stays porous.

Step 5: Apply the Sealant Correctly

Apply in thin, even coats — two thin coats consistently outperform one thick one, since a single heavy application can pool in low spots, over-saturate the sand, and cause it to lift rather than harden. Work in manageable sections using a roller, sprayer, or brush, paying particular attention to fully saturating the joints themselves rather than just the block faces. Let each coat go touch-dry before applying the next.

paver applying clear sealant to a block paving driveway

Step 6: Respect the Cure Time

Most sealants are touch-dry within a few hours but need considerably longer to cure fully:

  • Foot traffic: typically safe after 12–24 hours
  • Vehicle traffic: typically 48–72 hours, sometimes longer in cold or humid weather
  • Full hardness: up to two weeks in some products

Always check the specific product’s datasheet, as cure times vary noticeably among acrylic, PU, and resin formulations.

If the process feels too time-consuming or complex, hiring a trusted paving company in Enfield can help ensure your block paving is cleaned, re-sanded, and sealed correctly for long-lasting protection against weeds and weather damage.

What Sealing Actually Does to Block Paving

A block paving sealant works in three ways, and understanding each helps explain why proper preparation matters as much as the product itself:

  1. Hardens the joint sand. Sealant soaks into the top layer of jointing sand and binds the grains together, turning a loose, seed-friendly gap into a solid, weed-resistant strip.
  2. Repels water. Most sealants create a hydrophobic surface — water beads and runs off rather than soaking into the joints, cutting off the moisture supply weeds rely on.
  3. Blocks light and reduces organic build-up. A sealed surface sheds dust, leaves, and debris more easily during routine sweeping or rinsing, so less organic matter accumulates to feed new growth.

Common Mistakes That Cause Sealing to Fail

MistakeWhat HappensFix
Sealing over damp jointsTrapped moisture causes whitening, bubbling, or peelingWait a full 24–48 hours of dry weather before sealing
Applying too much sealant at onceSand lifts, joints soften, surface pools unevenlyApply two thin coats instead of one thick one
Using traffic too soonTyre or footprints mark the surface and break the sealFollow the product’s specific cure times before use
Wrong sealant for the paving/jointing typeWhitening, poor adhesion, or surface damageMatch sealant chemistry to your paving and jointing product
Sealing over live weedsWeeds push straight through the new coatingRemove and treat all weeds fully before starting

How Long Does Sealing Keep Weeds Away?

A correctly applied and maintained seal typically lasts 3 to 5 years before resealing is needed, though this depends heavily on traffic, sun exposure, and product quality. Shaded, damp, or heavily used driveways tend to need resealing closer to the 3-year mark; lightly used patios can often go the full 5 years or more.

Watch for these signs it’s time to reseal:

  • Water no longer beads on the surface
  • Colour looks dull, faded, or patchy
  • The first few weeds start reappearing in the joints

Ongoing Tips & Maintenance To Control Weed From Block Paving

  • Sweep regularly to stop leaves, dust, and organic debris settling in joints
  • Rinse off moss, algae, or bird droppings promptly rather than letting them sit
  • Top up jointing sand in any areas that start to look low, even on sealed paving
  • Spot-treat individual joints where weeds reappear, rather than waiting to reseal the whole surface
  • Avoid aggressive, close-range jet washing directly into joints during routine cleaning, as this strips sand and sealant prematurely

DIY vs Professional Sealing

Sealing block paving is a realistic DIY job for most homeowners provided the surface is properly cleaned, resanded, and fully dried first, the process itself isn’t complicated, but it is unforgiving of shortcuts. Professional application tends to make more sense for larger driveways, surfaces with extensive existing weed damage, or where a perfectly even, streak-free finish is a priority, since professional equipment and experience reduce the risk of pooling, patchiness, or missed joints.

Conclusion

Weeds in block paving are rarely a one-off problem; they’re a symptom of open, unsealed joints and moisture that keeps coming back until the underlying gaps are properly closed off. Removing existing growth, resanding correctly, and applying a suitable sealant addresses the root cause rather than just the visible symptom, which is why a properly sealed driveway can stay weed-free for 3 to 5 years rather than needing constant spot-treatment.

The steps themselves aren’t complicated, but the results depend heavily on getting the preparation right: a fully dried surface, properly packed joints, and the correct sealant for your paving type will always outperform rushing straight to application.

If you’d rather leave the preparation, product selection, and application to professionals, at First4Paving our driveway contractors in Enfield can handle the full process for you, from initial clean through to sealing and aftercare advice.

FAQs

Does sealing block paving actually stop weeds?

Yes. Sealing hardens the jointing sand and closes off the moisture and light that weed seeds need to germinate, which significantly reduces regrowth for several years. It won’t guarantee zero weeds forever, but it removes the conditions weeds rely on.

How often should block paving be resealed to stop weeds?

Most block paving needs resealing every 3 to 5 years, depending on foot and vehicle traffic, sun and shade exposure, and the quality of the sealant used.

What’s the best sealant for stopping weeds on a driveway?

Polyurethane and resin-based sealants generally offer the strongest weed resistance and durability for driveways, as they penetrate deeper into the joints than standard acrylic sealants.

Can you seal block paving over existing weeds?

No. Weeds should always be removed, including the root, and treated before sealing. Sealing over live weeds will not stop them growing straight through the new coating.

How long does block paving sealant take to cure?

Most sealants allow foot traffic after 12–24 hours and vehicle traffic after 48–72 hours, though full hardness can take up to two weeks depending on the product and weather conditions.

How wide should a block paving driveway be?

A block paving driveway should ideally be 10ft to 12ft wide. Anything narrower can make it genuinely difficult for drivers to manoeuvre, enter, exit, or park comfortably.

Is kiln-dried sand or polymeric sand better for stopping weeds?

Polymeric sand offers better long-term weed resistance than kiln-dried sand, as it hardens once activated with water, forming a more solid barrier that resists both weed growth and washout.

Which Type of Driveway Will Last the Longest in Hertfordshire

Which Type of Driveway Will Last the Longest? 2026 Hertfordshire Guide

Quick answer: Natural stone and clay pavers last the longest, 30 to 60+ years, followed by block paving (20–30 years), tarmac (15–25 years) and resin-bound surfaces (15–25 years). Gravel is the cheapest driveway to lay, but, despite popular claims, is usually the shortest-lived option, lasting 5–15 years before it needs topping up or full replacement. On Hertfordshire’s heavy clay ground, the sub-base and drainage matter as much as the surface material itself.

If you searched this because you’re planning a driveway installation in Hertfordshire, St Albans, Watford, Hemel Hempstead, Hitchin, Hertford, Welwyn Garden City, Bishop’s Stortford, Borehamwood or Potters Bar, here’s the full picture, including the SUDS drainage rules that apply across Hertfordshire in 2026.

Driveway lifespan at a glance

Driveway typeTypical lifespanCost per m² (2026)MaintenancePermeable?
Natural stone (granite, sandstone)30–60+ years£130–£250LowDepends on laying method
Block paving20–30 years£40–£134Medium (re-sanding, weeding)Yes, if permeable blocks used
Resin bound15–25 years£40–£100LowYes (resin-bound only, not resin-bonded)
Tarmac15–25 years£44–£107Medium (resealing every 3–5 years)No, unless porous tarmac
Concrete20–30+ years£50–£90Very lowNo, unless permeable concrete
Gravel5–15 years£15–£40High (regular raking, topping up)Yes

So, Does a Gravel Driveway Really Last a Lifetime in Hertfordshire?

It’s a common claim, and gravel does have real advantages: it’s the cheapest driveway surface to install, it’s naturally permeable (which helps comply with Hertfordshire’s SUDS drainage rules), and there is no cracking or resurfacing to worry about. But “lasting a lifetime” only really applies to the sub-base underneath; the loose stone on top migrates, scatters onto lawns and paths, and needs regular topping up every few years. Most independent comparisons put gravel’s practical lifespan at 5–15 years before a full refresh, making it one of the shorter-lived options rather than the longest, unless you’re comparing purely on cost rather than years of service.

If genuine longevity with minimal top-ups is the priority, block paving and natural stone are the materials that consistently outperform gravel over a 20-plus year horizon.

The Driveway Materials Compared

1. Natural stone and clay pavers — longest lifespan

Granite setts, Indian sandstone, and clay pavers are among the most durable driveway surfaces available, often lasting 30–60 years or more. Granite is the toughest and least porous; sandstone is popular and slightly more affordable but needs gentler, low-pressure cleaning to avoid surface wear. It’s also the highest upfront cost, so it suits homeowners prioritising longevity and kerb appeal over initial spend.

2. Block paving — the durability all-rounder

Block paving typically lasts 20–30 years and is one of the easiest surfaces to repair — a cracked or oil-stained block can be lifted and replaced individually without disturbing the rest of the drive. It needs periodic re-sanding of the joints and occasional weed control, and permeable block paving systems can meet Hertfordshire’s drainage requirements without extra soakaways. This is why block paving remains the most requested driveway type across Hertfordshire towns like St Albans and Hertford, where period and new-build properties alike suit its design flexibility.

3. Resin bound driveways — low maintenance, modern finish

Resin bound surfaces last 15–25 years with proper installation and need little more than an annual pressure wash. Because resin-bound surfacing is naturally permeable, it typically complies with SUDS drainage guidance without requiring planning permission. Lifespan depends heavily on installation quality — a poorly prepared base is the most common cause of early resin failure.

4. Tarmac — the practical, budget-friendly workhorse

Tarmac driveways last 15–25 years on a well-prepared sub-base and are the quickest to install, often in a day or two. Resealing every 3–5 years extends the surface life significantly. Tarmac is not permeable, so on a front driveway over 5m², it usually requires either planning permission or drainage to a permeable area.

5. Concrete — durable but less common on Hertfordshire drives

Plain or patterned concrete can last 20–30+ years with virtually no maintenance, but it’s less frequently chosen for UK driveways than block paving or tarmac, and standard concrete is impermeable, bringing it under the same SUDS considerations as tarmac.

6. Gravel — cheapest, most flexible, shortest-lived

Best suited to low-traffic drives, rural or period properties, and homeowners who want a permeable surface without extra drainage work. Expect to rake and top up every few years, with a full refresh needed roughly every 5–15 years.

Which Type of Driveway Will Last the Longest in Hertfordshire

What Actually Determines How Long a Driveway Lasts in Hertfordshire?

Material choice is only part of the story. Across Hertfordshire, three factors matter just as much:

  • The sub-base. Hertfordshire sits largely on chalk with clay-rich topsoil in many areas, particularly around Hertford, Ware and the Lea Valley. Clay holds water, swells in wet weather and shrinks in dry spells, which can crack a thin or poorly compacted sub-base within a few winters regardless of the surface material.
  • Drainage and SUDS compliance. Since 2008, any new or replacement front driveway in England over 5m² must either use a permeable surface (gravel, permeable block paving, resin bound) or drain rainwater to a lawn, border or soakaway rather than onto the road. Hertfordshire district and borough councils — including St Albans City & District Council, Watford Borough Council and Dacorum Borough Council — do enforce breaches, usually following runoff complaints.
  • Installation quality. A correctly excavated and compacted sub-base is consistently cited as the single biggest factor in whether a driveway reaches the top or bottom of its expected lifespan range.

Do I need Planning Permission for a Driveway in Hertfordshire?

Most Hertfordshire homeowners will not need planning permission for a driveway, provided:

  • the surface is permeable (gravel, permeable block paving, or resin bound)
  • rainwater drains naturally to a garden, border or soakaway rather than onto the public highway.

You will usually need separate approval, a dropped kerb licence from Hertfordshire County Council, if you’re creating new vehicle access onto a road, and this should be arranged before installation begins. Extra rules can apply to listed buildings or properties in a conservation area, so it’s worth checking with your local planning department first if you’re in one of Hertfordshire’s historic town centres such as St Albans or Hertford.

Which driveway is right for your Hertfordshire property?

  • Want maximum lifespan and don’t mind the higher cost? Natural stone or granite setts.
  • Want the best balance of durability, repairability and kerb appeal? Block paving.
  • Want a modern, low-maintenance, permeable finish? Resin bound.
  • Want the most budget-friendly, fastest install for a larger drive? Tarmac.
  • Want the cheapest option and don’t mind periodic top-ups? Gravel.

Conclusion:

When it comes to the longest-lasting driveway Hertfordshire homeowners can invest in, natural stone and clay pavers remain the clear winners, often providing 30–60 years or more of reliable performance. However, lifespan is only part of the decision. Factors such as budget, maintenance requirements, drainage compliance, and the condition of the sub-base can have just as much impact on long-term value.

For many Hertfordshire properties, block paving offers the best balance of durability, appearance, and repairability, while resin-bound surfaces provide a modern, low-maintenance alternative that also meets current SUDS drainage requirements. Whatever material you choose, investing in proper ground preparation and professional installation will do more to extend the life of your driveway than the surface material alone.

If you’re planning a new driveway in Hertfordshire, seeking expert advice before installation can help ensure it remains attractive, compliant, and durable for decades to come.

FAQs

Is block paving or tarmac better for a Hertfordshire driveway?

Block paving generally lasts longer (20–30 years vs. 15–25 for tarmac) and is easier to repair individual sections of, while tarmac installs faster and costs less upfront — a good fit for larger, budget-conscious drives.

Do I need planning permission for a new driveway in Hertfordshire?

Only if the surface is over 5m², impermeable, and rainwater can’t drain naturally to a lawn, border or soakaway. Permeable surfaces like gravel, permeable block paving and resin bound are generally exempt.

What’s the most durable driveway for clay soil?

Any surface can perform well on clay soil provided the sub-base is excavated deep enough and properly compacted with adequate drainage — this matters more than the surface material itself in clay-heavy parts of Hertfordshire.