Block Paving vs Tarmac Driveway: Cost, Durability & Which Lasts Longer?

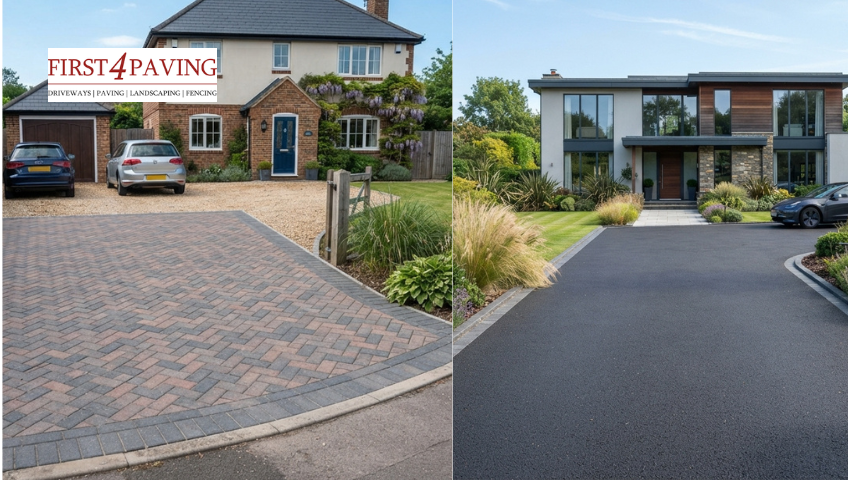
When it comes to choosing a new driveway, block paving vs tarmac is one of the most common comparisons homeowners across the UK make. Block paving is made from interlocking concrete or clay blocks, offering a decorative, customisable finish, while tarmac is a smooth asphalt surface known for quick installation and budget-friendly cost. Both handle daily vehicle use well but differ significantly in cost, durability, and longevity.

Block paving generally lasts longer (20–30+ years) and offers more design flexibility, but it costs more upfront. Tarmac is cheaper to install and quicker to lay, but it typically lasts 15–20 years and requires more frequent resealing. If budget is your main priority, tarmac wins. If you want a driveway that lasts decades and boosts kerb appeal, block paving is the better long-term investment.

Choosing between block paving and tarmac is one of the biggest decisions homeowners face when planning a new driveway. Both are popular across the UK, both handle daily traffic well, and both come with their own trade-offs in cost, durability, and lifespan. This guide breaks down exactly how they compare, so you can decide which one is right for your home.

What Is Block Paving?

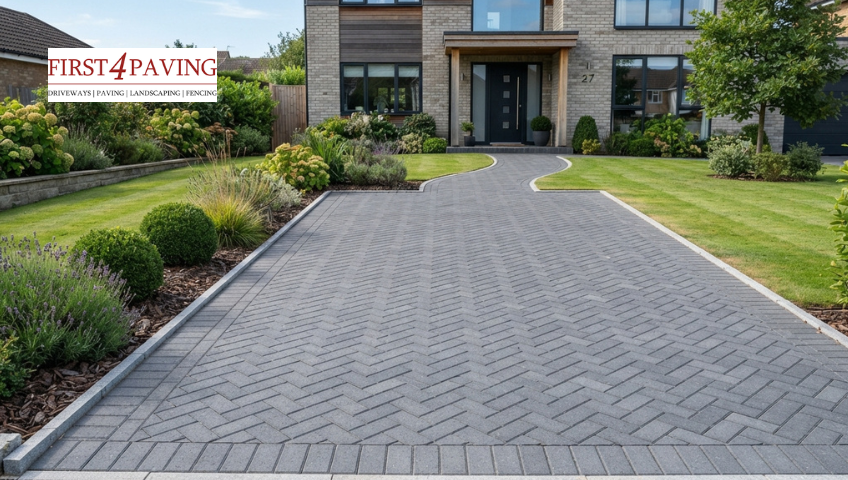
Block paving is a driveway surface made from individual concrete or clay blocks, laid by hand in an interlocking pattern. Because each block is separate, they can be arranged in different layouts herringbone, basketweave, stack bond and come in a wide range of colours and finishes, from charcoal and buff to brindle and silver grey.

This flexibility is what makes block paving so popular for homeowners who want their driveway to complement the look of their house, rather than serve a functional purpose.

What Is a Tarmac Driveway?

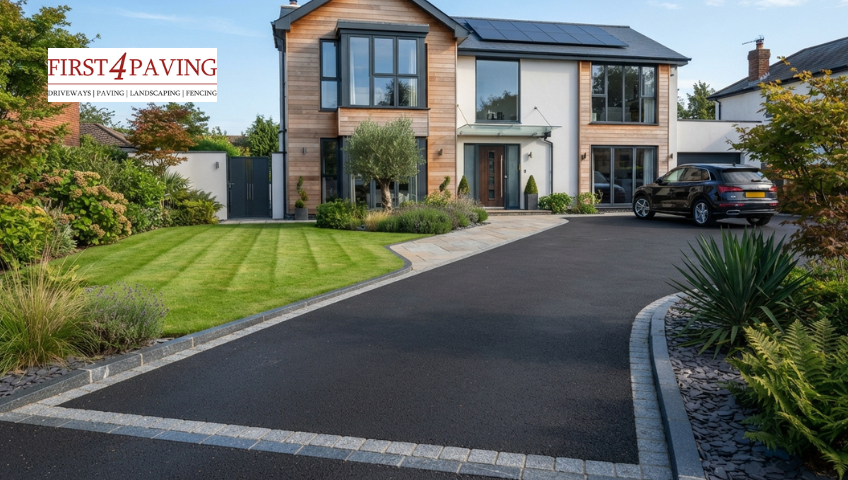
A tarmac driveway is made from asphalt, a mixture of aggregate and bitumen, laid as a single continuous surface and compacted while hot. It creates a smooth, uniform finish and is one of the fastest driveway surfaces to install, which is why it’s often the more budget-friendly option.

Tarmac doesn’t offer the same design variety as block paving, but it’s a practical, hard-wearing choice, especially for larger driveways or commercial areas.

Which Is More Durable, Block Paving or Tarmac?

Both surfaces are built to handle daily vehicle use, but they respond differently to weather, weight, and wear.

Block paving 

It handles heavy loads well because the weight is distributed across individual blocks rather than across a single continuous surface. It’s also less prone to cracking under pressure, since a single damaged block can be lifted and replaced without affecting the rest of the driveway. However, without proper edge restraints, blocks can shift or sink over time.

Tarmac Driveway

 It performs well under consistent daily use and resists water pooling when laid correctly with proper drainage. But because it’s a single solid surface, it’s more vulnerable to cracking during extreme temperature changes, and oil or fuel spills can soften and permanently stain the surface.

For most UK driveways, block paving slightly edges out tarmac in terms of durability, mainly due to its ability to withstand localised damage and to be repaired.

Block Paving

Which Driveway Needs Less Maintenance?

Maintenance is often the deciding factor for homeowners choosing between the two surfaces. For driveway experts in Enfield, this is one of the most common questions asked before installation, so here’s how the upkeep compares.

Block Paving Maintenance

Block paving needs a bit more regular, hands-on upkeep to keep it looking its best:

  • Re-sanding the joints: over time, the sand between blocks washes away with rain, so it needs topping up to keep the blocks locked in place and stop weeds taking hold
  • Re-levelling sunken blocks: if the ground beneath shifts or settles unevenly, individual blocks can sink slightly and need to be lifted, re-based, and relaid.
  • Weed and moss control: gaps between blocks can allow weeds and moss to grow, so regular sweeping, brushing, or treatment is essential to keep the surface tidy.
  • Periodic sealing: applying a sealant every couple of years helps protect the blocks from staining, fading, and water damage and makes cleaning easier.
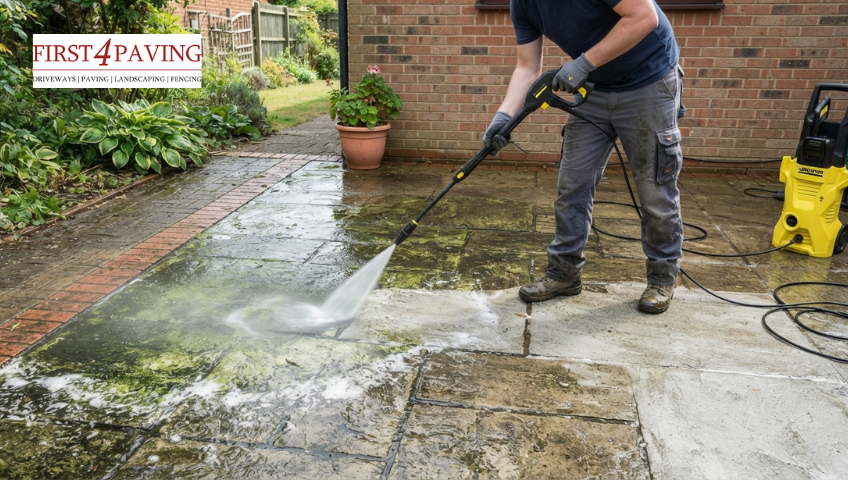
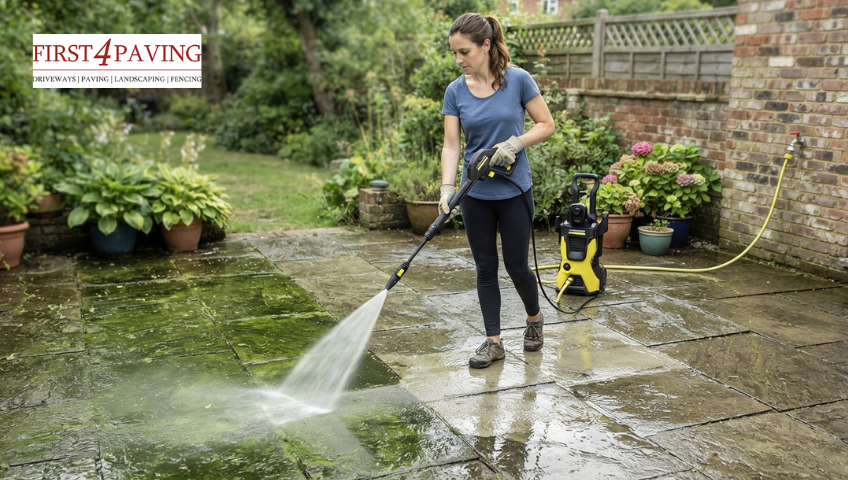
  • Regular pressure washing: an occasional deep clean helps lift dirt, oil marks, and algae buildup from the block surface and joints.
  • Replacing damaged blocks: if a block cracks or becomes stained beyond repair, it can be lifted out and replaced with a new one without disturbing the rest of the driveway.
  • Checking edge restraints: the borders or edging that hold the blocks in place should be checked periodically to ensure they haven’t loosened or shifted.

Tarmac Driveway Maintenance

Tarmac needs less frequent attention, but the repairs tend to be bigger when they’re needed:

  • Sealing every few years:  a sealant coat helps prevent water from seeping into the surface, which reduces the risk of cracking and frost damage over time
  • Filling cracks and potholes: small cracks should be patched early before they widen, and potholes should be filled promptly to prevent further deterioration.
  • Full resurfacing:  once the surface has worn down significantly or developed widespread cracking, a full resurfacing is usually needed to restore it properly
  • Removing oil and fuel stains: spills should be cleaned quickly, as tarmac can absorb and soften from prolonged contact with oil or fuel.
  • Clearing debris and standing water:  keeping the surface free of leaves, moss, and puddles helps prevent long-term surface damage.
  • Line and edge maintenance: if the driveway has painted lines or borders, these may need repainting or edge repair as they wear down over time.

Tarmac requires less day-to-day attention, but when it does need work, repairs are often more noticeable (patchwork sections can look different from the original surface). Block paving requires more regular small maintenance tasks, but repairs blend in seamlessly since individual blocks can be swapped out.

Block Paving or Tarmac Driveway: Which one is Better for Drainage?

This is an important consideration in the UK, where planning permission rules apply to non-permeable driveways over a certain size.

Permeable Block Paving

Permeable block paving allows water to drain through gaps between the blocks and into the ground below, often helping homeowners avoid the need for planning permission.

Standard Tarmac Driveway

Standard tarmac is non-permeable, meaning water runs off the surface rather than through it, which may require additional drainage solutions (such as soakaways) to remain compliant with UK regulations.

If drainage and planning compliance are a concern, permeable block paving is usually the more straightforward option.

Tarmac Driveway

What Is the Lifespan of Block Paving and Tarmac Driveways?

This is where the two surfaces really start to differ in the long run.

Block Paving Lifespan

Block paving typically lasts 20–30 years or more, provided it’s installed on a proper sub-base and maintained correctly. Because the surface is made up of individual interlocking blocks rather than a single continuous layer, it handles ground movement, weight, and weather far better over time. Any localised damage can be fixed without affecting the rest of the driveway. With regular joint re-sanding, occasional re-levelling, and periodic sealing, a well-installed block paving driveway can comfortably outlast a tarmac surface by a decade or more.

Tarmac driveway Lifespan

Tarmac typically lasts 15–20 years before it needs resurfacing or significant repair. As a single continuous surface, it’s more susceptible to cracking due to temperature changes, ground movement, and heavy or repeated loads at the same spot. While regular sealing and prompt crack repair can help extend its life, tarmac generally reaches the point of full resurfacing sooner than block paving does.

The lifespan of both surfaces depends heavily on installation quality. A poorly laid tarmac driveway can fail within a few years, just as poorly laid block paving can shift and sink prematurely. Choosing an experienced, reputable installer matters as much as the material itself.

Block Paving vs Tarmac: Which One Should You Choose?

FactorBlock PavingTarmac
Upfront costHigherLower
DurabilityVery durable, easy localised repairsDurable, but cracks under solid stress
Lifespan20–30+ years15–20 years
MaintenanceRegular small upkeepLess frequent, larger repairs
Kerb appealHigh  customisableModerate  uniform finish
DrainagePermeable options availableRequires separate drainage planning

Choose tarmac if: you want a lower upfront cost, a quick installation, and a simple, uniform look.

Choose block paving if: you want a driveway that lasts longer, adds kerb appeal, and offers more design flexibility.

Why Choose First4 Paving for Your Driveway?

Whichever option suits your home best, First4 Paving installs both block paving and tarmac driveways, so you get honest, unbiased advice rather than a recommendation pushed toward just one option. As Professional driveway contractors in Enfield, our team takes the time to assess your property, budget, and long-term goals before recommending the surface that’s truly right for you, not just the one that’s easiest to sell. We provide expert block paving and tarmac driveway services, and proudly cover driveway installations across Enfield and Hertfordshire, delivering high-quality artistry on every project. We proudly cover driveway installations across Enfield and Hertfordshire, delivering high-quality artistry on every project. 

Contact us today for a free, no-obligation quote and expert guidance on the best driveway choice for your home.

Conclusion

Both block paving and tarmac are proven, reliable choices for UK driveways, but the right one for you depends on your priorities. If a lower upfront cost and quick installation matter most, tarmac is hard to beat. If you’re after a driveway that lasts decades, adds genuine kerb appeal, and can be styled to match your home, block paving is the stronger long-term investment. Whichever direction you lean, getting it installed properly by an experienced contractor ultimately determines how long it lasts and how well it performs.

If you’re still weighing up your options, First4 Paving is here to help you choose with confidence and get the job done right the first time.

FAQs

How long does a block paving driveway last compared to tarmac? 

Block paving typically lasts 20–30 years or more, while tarmac usually lasts 15–20 years, depending on installation quality and maintenance.

Is tarmac cheaper than block paving in the UK? 

Yes, tarmac is generally cheaper to install per square metre than block paving, mainly due to lower labour requirements.

Does block paving need more maintenance than tarmac? 

Block paving requires more frequent, smaller tasks such as re-sanding and weed control, while tarmac requires less frequent but larger repairs such as resurfacing.

Can a tarmac driveway be repaired as easily as block paving? 

Not quite; block paving repairs are easier to blend in since individual blocks can be replaced, while tarmac patches can be more visible against the original surface.

How to Remove an Oil Stain from a Driveway

How to Remove an Oil Stain from a Driveway (Fast & Effective)

To remove an oil stain from a driveway, first absorb any fresh oil with cat litter or cornstarch, then scrub the area with a baking soda paste or Dawn dish soap using a stiff brush. For old, set-in stains, apply a degreaser or poultice, let it sit for several hours, then scrape and rinse. Repeat as needed, since older stains often take more than one treatment.

A fresh spill or a stain that’s been sitting for months- either way, most driveways can be brought back to looking clean with a few household products and some elbow grease. This guide covers exactly how to remove an oil stain from a driveway, or simply clean oil from one that’s picked up a mark over time, with separate methods for fresh spills and old, set-in stains, and guidance depending on whether your driveway is concrete, asphalt, or block paving.

Why Oil Stains Are Hard to Remove?

Concrete and asphalt are both porous materials, meaning they act like sponges rather than solid, sealed surfaces. When oil spills onto a driveway, it doesn’t just sit on the surface; it seeps into the tiny pores beneath the surface. The longer it sits, the deeper it travels, which is why a fresh spill wiped up in minutes is far easier to deal with than a stain that’s been baking in the sun for weeks or months. This is also why a quick rinse or a single pressure wash often isn’t enough on its own: it can clean the surface while oil trapped underneath slowly resurfaces later.

What things will you need to remove an oil stain from a driveway? 

  • Cat litter, cornstarch, or sawdust (as an absorbent)
  • Baking soda
  • Dawn dish soap or a laundry detergent
  • A stiff-bristled scrub brush
  • A garden hose (or pressure washer, optional)
  • A concrete-safe degreaser (e.g., Zep, Oil Eater, or Purple Power) for tougher stains
  • A plastic scraper
  • Rubber gloves and eye protection, especially if using a degreaser

How to Remove an Oil Stain from a Driveway: Methods That Actually Work

Whether you’re tackling a fresh spill yourself or following the same routine most driveway contractors in Enfield rely on, the methods below cover every stage of oil stain removal, from a same-day spill to a mark that’s been sitting for months.

Remove an Oil Stain from a Driveway

Method 1: Treat Fresh Oil Stains Immediately

If you’ve just noticed the spill, acting fast makes the rest of the process much easier, since fresh oil hasn’t had time to soak deep into the concrete yet.

  1. Pour a generous layer of cat litter, cornstarch, or sawdust directly over the stain.
  2. Let it sit for at least 20–30 minutes to soak up the oil. For a larger spill, leave it overnight.
  3. Sweep up the absorbent material with a broom and dispose of it in the trash. Don’t rinse it down a storm drain, since it now contains oil.
  4. Once the excess oil is absorbed, scrub the remaining residue with dish soap and warm water, then rinse with a hose.

Method 2: Remove Old, Set-In Oil Stains (Baking Soda Paste Method)

Old stains have already soaked into the concrete’s pores, so they need something that can break down the oil rather than just absorb it.

  1. Mix baking soda with a small amount of water into a thick paste (about the consistency of peanut butter, so it stays in place rather than running off)
  2. Spread the paste generously over the stain, covering it completely.
  3. Let it sit for 30 minutes to an hour.
  4. Scrub firmly in a circular motion using a stiff-bristled brush.
  5. Rinse thoroughly with a hose.
  6. Repeat if any discolouration remains; older stains often need two or three treatments.

Method 3: Using Dawn Dish Soap

Dawn is a popular choice for oil stains because it’s specifically formulated to cut through grease (which is also why it’s used to clean oil off wildlife after spills).

  1. Apply Dawn dish soap directly onto the stain.
  2. Add a small amount of warm water and work it into the stain with a stiff brush.
  3. Let it sit for 10–15 minutes; don’t let it dry on the surface.
  4. Scrub again, then rinse thoroughly with water.

This method is gentle enough to use on asphalt as well, unlike stronger chemical degreasers.

Method 4: Using a Concrete Degreaser (For Stubborn Stains)

When baking soda or dish soap isn’t enough, a concrete-safe degreaser is the next step up.

  1. Choose a degreaser made for concrete (e.g., Zep Driveway & Concrete Cleaner or Oil Eater).
  2. Apply per the product label; most recommend diluting for lighter stains.
  3. Let it sit for the recommended time (usually 1–15 minutes; check the label).
  4. Scrub vigorously with a stiff or steel brush.
  5. Rinse away thoroughly with water.

Note: oil that has deeply penetrated the surface can resurface within 24 hours after cleaning. If this happens, simply repeat the process.

Method 5: Remove Oil Stains Without a Pressure Washer

You don’t need a pressure washer to get rid of oil stains; it just takes a bit more manual scrubbing.

  1. Apply your chosen treatment (baking soda paste, dish soap, or degreaser) as described above.
  2. Instead of pressure washing to rinse, use a stiff push broom or scrub brush with a bucket of hot, soapy water.
  3. Rinse using a regular garden hose on a strong spray setting, sweeping water toward a drain or grassy area.
  4. For large or stubborn areas, repeat the scrub-and-rinse cycle two or three times rather than relying on higher pressure.

This approach takes a little more elbow grease, but works just as well for most household-sized stains.

Method Comparison Table

MethodBest ForTime Needed

Cat litter/cornstarch

Fresh spills20–30 min

Baking soda paste

Light to moderate stains30–60 min

Dawn dish soap

Fresh to moderate stains, asphalt-safe10–15 min

Concrete degreaser

Stubborn, older stains

1–15 min + scrubbing

Poultice (degreaser + absorbent)

Deep, long-set stains

5–12 hours

Pressure washing + degreaserLarge or widespread areas

15 min soak + wash

Removing Oil Stains from Concrete and Asphalt

Both surfaces respond to the same core methods covered above, but a few adjustments matter depending on which one you’re working with:

  • Concrete: The most forgiving surface for this job. It tolerates baking soda, dish soap, and most degreasers well and can handle longer dwell times and firmer scrubbing than the other two surfaces without risk of damage. Because concrete is more porous than asphalt, older stains may need two or three repeat treatments before they fully lift.
  •  Asphalt (tarmac): More sensitive to harsh chemicals and high heat, so stick to dish soap and gentler scrubbing; strong solvents can soften or discolour the surface. Avoid scrubbing too aggressively, since this can dislodge the loose stone aggregate on the surface. On a hot day, treat the stain in the shade or during a cooler part of the day, since softened tarmac is easier to mark or dent.
  • For a light or fresh mark on tarmac specifically, plain washing-up liquid diluted in warm water, applied with a soft-bristled broom, is often enough on its own. For an older or greasier mark, the best oil remover for tarmac is typically a dedicated tarmac-safe degreaser rather than a generic concrete product, since it won’t soften or discolour the surface.

How to Remove Oil Stains from Block Paving

Block paving needs a slightly different approach than solid concrete or asphalt. Because it’s made of individual blocks with sand-filled joints between them, oil can spread sideways into the gaps and soak into each block, and overly aggressive scrubbing or jet washing can wash out the joint sand.

Removing Oil Stains from Concrete and Asphalt

  1. Blot immediately if the spill is fresh. Lay paper towels or an absorbent (cat litter, sawdust) over the stain to soak up as much oil as possible before it spreads into the joints.
  2. Apply a cleaning agent and let it work. The best oil remover for block paving is usually a specialist block-paving product, since it’s formulated to work around jointing sand, but a degreasing dish soap or WD-40 can help with lighter stains. Whatever you use, let it sit for at least an hour, since block paving often needs longer dwell time than solid concrete. If you don’t have a pressure washer, this whole method works just as well with a hose and a stiff brush, following the same hand-scrubbing approach described earlier.
  3. Scrub gently with a stiff brush, working in the direction of the joints rather than across them, to avoid disturbing the jointing sand.
  4. Rinse with a hose rather than a pressure washer where possible. Jet washing an untreated stain can drive the oil deeper into the block rather than lifting it out; always treat the stain first, then rinse.
  5. Repeat as needed. Block paving stains, especially older ones, often take two or three treatments before they fully lift.
  6. Top up joint sand and, if any is washed out during cleaning, afterwards.

Will WD-40 Remove Oil Stains from Block Paving?

Yes, to an extent. WD-40 can help loosen and lift oil stains, especially fresh ones, because it’s designed to break down and displace oil. Spray it directly onto the stain, let it sit for 5-10 minutes, then scrub with a stiff brush and rinse with water. However, WD-40 itself contains mineral oil, so avoid overspray onto unaffected areas of the paving, as it can cause its own light staining. For older or more stubborn stains, a dedicated block-paving oil remover will deliver more reliable results than WD-40 alone.

How to Prevent Future Oil Stains

  • Sealing a driveway with a concrete or asphalt sealant creates a barrier that prevents oil from soaking in and is best done right after a deep clean, while the surface is fully dry. 
  • Use a drip pan or absorbent mat under any vehicle known to leak.
  • Clean spills immediately rather than letting them sit; the faster you act, the easier the cleanup.

At First4 Paving, as professional Driveway installers, we know a stained, tired-looking driveway can take the shine off an otherwise great-looking home, and sometimes a clean isn’t enough to fully restore it, especially if the surface is cracked, uneven, or coming to the end of its life. That’s where we can help. We provide driveway services including: Block paving, Resin driveways, Tarmac driveways, Gravel & shingles. Whether you need a stubborn stain sorted or you’re ready for a brand-new driveway altogether, our team covers Enfield and Hertfordshire and is happy to help. Contact us today for a free quote.

Conclusion

Most oil stains, even ones that have been sitting for months, will lift with a bit of patience and the right combination of absorbent, cleaner, and dwell time. If you’ve worked through the steps above two or three times and a faint mark still won’t budge, it’s worth calling in a professional driveway cleaning service rather than reaching for a stronger chemical, since overly harsh products can damage the surface more than the stain itself. And once the driveway’s clean, a coat of sealant ensures the next spill wipes away in minutes instead of turning into another afternoon project.

FAQs

Can I use bleach to remove an oil stain?

Not recommended: bleach doesn’t break down oil effectively and can discolour concrete or damage paving.

Does vinegar work on oil stains?

Yes, for lighter stains. Pour vinegar directly onto the stain, let it fizz and sit for about 15 minutes, then scrub and rinse. It’s a gentler, eco-friendly option, though less effective than a degreaser on older stains.

What PSI pressure washer should I use for oil stains?

Most concrete driveways can handle 2,500–3,000 PSI. Always pre-treat the stain with a degreaser first; full pressure on an untreated stain can drive oil deeper into the surface rather than lifting it out.

Does the type of oil matter (motor oil vs transmission fluid vs diesel)?

Not significantly for the removal method: all petroleum-based fluids respond to the same absorb-then-degrease approach. Diesel and transmission fluid tend to spread and soak in faster than motor oil, though, so treating the spill quickly matters even more. 

Can oil stains permanently damage a driveway?

Not usually structurally, but they can discolour the surface and prevent sealants or paint from bonding properly if not fully removed.

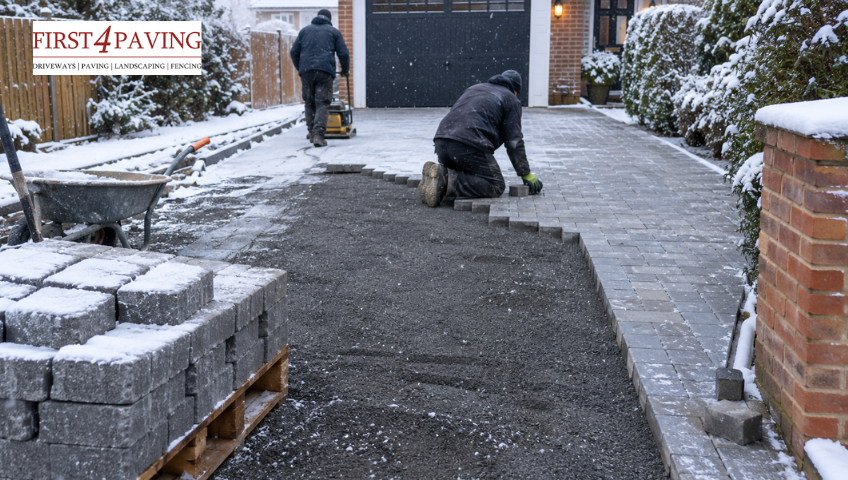
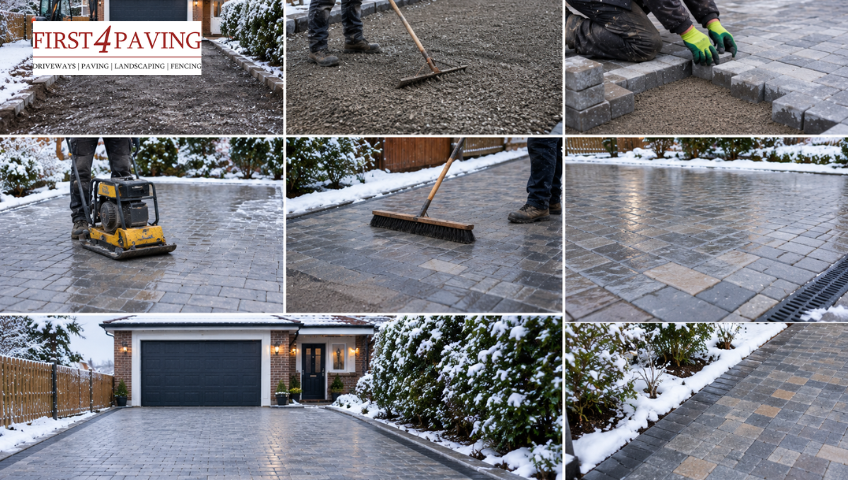
How to Lay a Block Paving Driveway

How to Lay a Block Paving Driveway

A block paving driveway is made up of individual concrete or clay blocks, laid closely together in a chosen pattern to form a strong, durable surface. Unlike a single poured surface such as concrete or tarmac, block paving is built from smaller interlocking units, giving it a distinctive, structured look that many homeowners prefer.

Getting the result right relies on several layers beneath the surface coming together correctly before a single block is laid. Knowing what is block paving? A carefully built system of layers rather than just a decorative top surface- helps explain why even the most attractive pattern will eventually shift, sink, or crack if the foundations are wrong.

This guide walks through the entire process of laying a block-paving driveway from start to finish, covering the required tools, the groundwork, and the steps for laying, cutting, and properly finishing the blocks. Whether you are planning to tackle the project yourself or simply want to understand what a professional installation entails, this breakdown covers everything that goes into building a driveway that lasts.

Tools and Materials You Will Need

  • Block paving units (in your chosen colour and pattern)
  • Type 1 MOT sub-base material
  • Sharp sand for the bedding layer
  • Kiln-dried sand for joint filling
  • Edge restraints (concrete, timber, or block kerbs)
  • Weed membrane
  • Plate compactor
  • Spirit level and string line
  • Rubber mallet
  • Block splitter or angle grinder for cutting

Understanding Block Paving Layers

A block paving driveway is built up of several distinct layers, each playing a specific role in the driveway’s strength and drainage. From the ground up, this typically includes the sub-base, a bedding layer of sharp sand, the paving blocks themselves, and finally the jointing sand that locks everything together. Driveway experts agree that getting the depth and compaction of each layer right is what determines whether the driveway lasts for decades or starts to fail within a few years.

Block Paving Layers

How to Lay a Block Paving Driveway | Step by Step

Following the correct block paving steps in order is essential to achieving a durable, professional finish, from initial planning through to the final compaction and jointing.

Step 1: Planning and Measuring the Area

Start by marking out the full area of the driveway using string lines and pegs. Take accurate measurements of length and width, and decide on a laying pattern- herringbone, basketweave, or stack bond- as this affects how many blocks you will need and how they should be cut at the edges. At this stage, it is also important to plan the fall of the driveway, a slight slope of around 1 in 60 away from the house, to ensure rainwater drains properly rather than pooling on the surface.

Step 2: Excavation

Once the area is marked out, excavate to a depth that accounts for the sub-base, sand bed, and block thickness combined, typically around 200-250mm in total. Before digging, check for any buried services such as gas, water, or electricity lines running through the area. Removing turf, soil, or old paving at this stage also gives a clean base to work from.

Step 3: Installing the Sub-Base

Lay the Type 1 MOT sub-base in layers of no more than 100mm at a time, compacting each layer thoroughly with a plate compactor before adding the next. A well-compacted sub-base is one of the most important factors in preventing the driveway from sinking or shifting later, so this step should not be rushed.

Step 4: Adding Edge Restraints

Install edge restraints along the driveway perimeter to hold the blocks in place and prevent them from spreading sideways over time. Good block paving edging is what keeps the entire surface locked together, so this step should never be skipped, even on smaller driveways. Concrete edging is the most common choice for durability, though timber or block curbs can also work depending on the overall design.

Step 5: Laying the Sand Bed

Spread a layer of sharp sand over the compacted sub-base, screeding it to an even depth of around 30mm to 50mm. Sand in block paving plays two key roles: sharp sand acts as the bedding layer that lets blocks settle evenly, while kiln-dried sand is later used to fill and lock the joints once laying is complete.

Step 6: Laying Block Paving

Begin laying the blocks from a fixed straight edge, working outward in your chosen pattern. Place each block gently onto the sand bed, using a rubber mallet to tap it level with its neighbours. Check levels regularly with a spirit level to ensure the surface stays level and follows the intended fall for drainage.

Step 7: Cutting Blocks for Edges and Borders

As you reach the edges of the driveway, blocks will need to be cut to fit neatly into gaps and corners. A block splitter works well for straight cuts, while an angle grinder is better suited to more intricate shapes. Taking time over these cuts makes a noticeable difference to the finished look of the driveway.

Step 8: Compacting and Jointing

Once all the blocks are laid, run a plate compactor over the entire surface to bed the blocks firmly into the sand below. Afterwards, brush kiln-dried sand into the joints between the blocks, then compact the surface again to help the sand settle fully and lock the blocks together.

Step 9: Final Checks and Clean-Up

Sweep away any excess sand and check the surface for uneven areas or blocks that may need adjusting. It is also worth checking that water flows correctly toward the intended drainage point after a light hose test.

How to Lay a Block Paving Driveway

Common Mistakes to Avoid

Here are the common mistakes u should avoid while laying a block paving Driveway

  • Skipping proper compaction of the sub-base, leading to sinking over time
  • Getting the fall wrong, causing water to pool on the surface
  • Leaving out edge restraints, which allows blocks to shift and spread
  • Rushing the jointing process, leaving blocks loose or prone to movement

How Long Does It Take to Lay Block Paving Driveway?

For a standard driveway, the process typically takes 2 to 4 days, depending on the area size and the complexity of the chosen pattern. For those requiring significant excavation and drainage work, it may take longer, depending on the driveway installation time.

Block Paving Driveway

When You Should Call a Professional 

Laying a block-paving driveway is achievable as a DIY project for smaller areas, particularly for those with some groundwork experience, provided time and care are taken during the groundwork stages. However, getting the sub-base compaction, drainage falls, and edge restraints right is critical to the long-term performance of the driveway, and small errors at this stage often only become apparent months or years later, once the surface begins to shift or settle unevenly.

At First4 Paving, as professional driveway installers, we provide block paving services in Enfield and the surrounding areas, with experience handling projects of all sizes, from smaller domestic driveways to larger, more complex layouts. Working with an established local installer helps ensure your block paving is laid correctly from the groundwork up, using the right materials and techniques at each stage, so the finished driveway performs well and keeps its appearance for years to come.

Conclusion

Laying a block paving driveway involves far more than simply arranging blocks on the surface. From accurate excavation and sub-base compaction to correct drainage falls and careful jointing, each stage plays a part in how well the finished driveway performs over time. Taking the process step by step, and paying close attention to the groundwork in particular, helps ensure a durable, attractive result that lasts for years to come.

If you are considering a block paving driveway for your property, First4 Paving can help bring your project to life with expert installation from start to finish. Contact us today to discuss your requirements and get a personalised quote.

FAQs

Can the Same Process Be Used for a Block Paving Path?

Yes, the same foundational principles apply when laying a block paving path, though the excavation depth and sub-base thickness can often be reduced slightly, since paths carry foot traffic rather than vehicle loads.

What type of sand is used in block paving?

Two types of sand are typically used: sharp sand for the bedding layer beneath the blocks, and kiln-dried sand for filling the joints once the blocks are laid.

How long does a block paving driveway last?

With proper installation and regular maintenance, a block paving driveway can last between 20 and 25 years.

Can I lay a block paving driveway myself?

It is possible to lay a block paving driveway yourself, particularly for smaller areas, but getting the sub-base compaction, drainage falls, and edge restraints right is essential for the driveway to perform well over the long term.

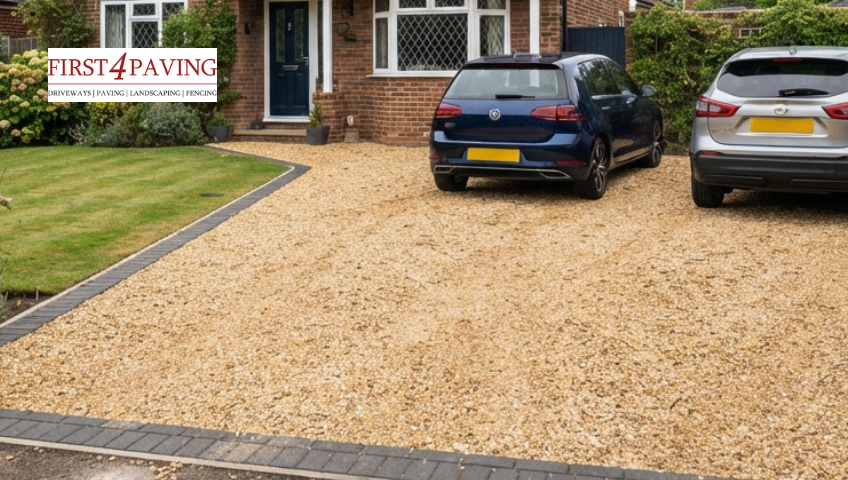
How Much Does a Gravel Driveway Cost

How Much Does a Gravel Driveway Cost in Enfield? Prices & Key Factors Explained

Gravel driveways have become a popular choice for homeowners in Enfield looking for an affordable and attractive alternative to block paving or tarmac. They are quick to install, low maintenance, and available in a range of styles, from natural pea shingle to decorative self-binding gravel, making them suitable for a wide variety of property types across the borough. The overall cost of a gravel driveway, however, depends on several factors, including the area size, the type of gravel chosen, and the groundwork required to prepare the site. 

This article breaks down how much a gravel driveway costs in Enfield, along with the key factors that affect your final quote, so you can budget accurately before requesting a quote from a local paving specialist.

Average Gravel Driveway cost in Enfield

On average, a gravel driveway in Enfield costs between £50 and £70 per m² when professionally installed, depending on the type of gravel and the condition of the existing surface. For a standard three-car driveway of around 40m², homeowners can expect to pay between £2,000 and £2,800, including materials, labour, and basic groundwork. Larger driveways or those needing extensive excavation and drainage work may cost more. Properties in Greater London, including Enfield, tend to sit at the higher end of the UK price range compared to northern regions, mainly due to labour and delivery costs.

Cost Breakdown

Driveway Size

Estimated Cost Range

Average Completion Time

Small (up to 20m²)

£1,000 to £1,600

1 day

Medium (20m² to 40m²)

£1,600 to £2,8001 to 2 days

Large (40m² and above)

£2,800 to £4,600+

2 to 3 days

Cost of Different Gravel Types

Different gravel types have varying price points and are typically sold by the tonne. The type you choose affects not only the cost, but also the finish, durability, and maintenance needs of your driveway.

Crushed Rock

A close-up of grey angular crushed rock aggregate, commonly used as a sub-base layer for driveways.

Crushed Rock

Crushed rock is one of the most affordable gravel options, typically costing £50£55 per tonne. Its angular shape allows it to compact tightly, making it well-suited for sub-base or structural layers where a smooth, decorative finish is less important.

River Rock

Smooth, rounded river rock gravel in mixed grey and beige tones, often used for driveway surfaces and borders.

River Rock

River rock costs around £55£60 per tonne. Its naturally smooth, rounded texture gives a softer appearance than crushed rock, though it compacts less densely, making it more suitable for surface layers or decorative borders rather than heavy structural use.

Self-Binding Gravel

A fine, sandy texture makes self-binding gravel ideal for creating a firm, level driveway surface once laid and compacted.

Self-Binding Gravel

Sometimes it is called hoggin; it costs approximately £90£95 per tonne. It is made up of stone particles, sand, and clay, which bind together tightly when compacted to form a solid, stable surface. This makes it a popular choice for driveways that need a firmer finish underfoot and for vehicles.

Pea Gravel

Small, rounded pea gravel in natural stone tones, forming a dense, decorative top layer on a residential driveway.

Pea Gravel

Pea gravel typically costs £100 to £110 per tonne. Its small, rounded stones pack densely together, creating a smooth, stable surface that works well as a decorative top layer, particularly when paired with a cellular grid system to prevent migration.

Marble Chips

Polished white and grey marble chips laid as a premium decorative driveway surface.

Marble Chips

Marble chips sit at the higher end of the price range, costing around £150£160 per tonne. Sourced from specific quarries, they are chosen primarily for their appearance rather than durability, giving driveways a bright, premium finish.

Key Factors That Affect the Gravel Driveway Cost

Crushed rock and river rock are commonly used for sub-base or structural layers, where appearance matters less. Pea gravel and self-binding gravel are popular top-layer choices, as they compact more densely and create a firmer, more stable surface. Marble chips and other decorative aggregates sit at the higher end, chosen mainly for their appearance rather than durability. Driveway experts in Enfield can help you choose the right combination of gravel types to balance cost, appearance, and long-term durability for your specific driveway.

Driveway Size

The larger the driveway, the more materials and labour are required, which directly increases the overall cost. Most paving contractors quote on a per m² basis, so an accurate measurement of the area is the first step to getting a realistic price.

Cellular Grid System

Many installers recommend using a cellular grid, a plastic honeycomb layer placed beneath the decorative gravel. This system holds the gravel in place, providing a more level, stable finish and preventing it from migrating or forming bald patches over time. A quality grid system typically adds around £15-£20 per m² to the overall cost, but it significantly extends the driveway’s lifespan and appearance, making it a worthwhile investment for most homeowners.

Excavation Depth and Waste Disposal

A driveway gravel installed with a cellular grid system typically requires excavation of around 230mm below the finished surface level, comprising a free-draining sub-base, a sand-laying course, the grid layer itself, and the decorative gravel on top. Without a grid system, the excavation depth is reduced to around 190mm, which can lower waste disposal costs, though it comes at the expense of long-term stability. Waste disposal is often one of the higher hidden costs in a driveway project, as the volume of material removed directly affects the final price.

Drainage Requirements

Proper drainage is essential to prevent gravel from shifting or to prevent water from pooling after rainfall. Adding a permeable sub-base or drainage channels increases the cost but helps the driveway last longer and perform better in wet conditions.

Edging and Border Materials

Edging keeps gravel contained and prevents it from spreading onto lawns or pathways. Options range from simple timber or plastic edging to more premium materials like brick, granite setts, or stone borders, each affecting the final price differently.

Site Access

Good access for delivery vehicles makes installation more cost-effective, as materials can be tipped directly and waste removed efficiently. Where access is restricted, such as in narrow side passages or sloped driveways, contractors may need smaller equipment or additional labour to move materials manually, which can increase the overall cost.

Existing Driveway Removal

If an old driveway is already in place, whether concrete, tarmac, or block paving, it will need to be broken up and removed before the new gravel surface can be laid. This removal and disposal process is typically costed separately from the main installation and can be one of the more significant hidden expenses in a driveway project.

Weed Membrane and Ground Preparation

A weed-suppressant membrane is usually laid beneath the sub-base to stop weeds growing up through the gravel over time. While this adds a small amount to the overall cost, it significantly reduces future maintenance and helps keep the driveway looking neat for longer.

Vehicle Use and Sub-Base Strength

Driveways that will regularly support car weight need a more heavily compacted and thicker sub-base to prevent the gravel from shifting or rutting under load. This added structural requirement increases both material and labour costs compared to a purely decorative, foot-traffic-only area.

Labour Rates and Seasonal Demand

Local labour rates in Enfield, along with contractor availability, can influence the final quote. Costs tend to be higher during peak periods, such as spring and summer, when demand for driveway installations rises.

Planning Permission and Drainage Regulations

In certain cases, particularly for front gardens near a public road, local drainage regulations may require permeable surfacing or, in some instances, planning permission. Checking these requirements early on can help avoid delays and unexpected costs later in the project.

DIY vs Professional Installation Cost

AspectDIY InstallationProfessional Installation
Upfront CostMaterials only, typically £800-£1,600 for a medium drivewayMaterials plus labour, typically £1,600-£2,800
Time Required2-3 days, depending on experience1-2 days, completed by a trained team
Risk of ErrorsHigher, particularly with sub-base depth and compactionLower, with correct groundwork and drainage from the start
Long-Term CostMay require early repairs if sub-base or drainage is done incorrectlyReduced risk of sinking, shifting, or drainage issues later

Installing a gravel driveway yourself can reduce upfront costs, since labour charges are avoided. However, getting the sub-base depth, compaction, and drainage right is critical, as mistakes here often lead to sinking or shifting gravel within the first year. Professional installation costs more upfront but reduces the risk of costly repairs later, particularly for driveways with poor ground conditions or drainage issues.

Tips to Save Money on Your Gravel Driveway

  • Choose a cost-effective gravel type: Choose a cost-effective gravel type: Crushed rock or river rock cost less than decorative options like marble chips or premium coloured aggregates, while still performing well as a base or top layer. If you’re comparing all driveway materials, read the guide on the cheapest driveway option to see how gravel stacks up.
  • Get multiple quotes: Prices can vary among contractors in the same area, so comparing at least 2 or 3 quotes helps ensure a fair price.
  • Plan around existing ground conditions: If the current surface is level and in reasonable condition, less excavation and waste removal is needed, which can reduce labour costs.
  • Consider a smaller decorative top layer: Using a cheaper aggregate for the sub-base and a thinner layer of premium gravel on top can reduce material costs without compromising the finished look.
  • Book installation outside peak season: Driveway installers are often busier in spring and summer, so scheduling work in autumn or winter may result in more competitive pricing.
  • Maintain your driveway regularly: Occasional raking and topping up small areas prevents the need for a full re-gravel, which is a more costly job.

Working with a trusted paving company in Enfield also helps keep costs down in the long run. An experienced paving contractor, First4 Paving understands the groundwork, drainage, and material choices needed for a driveway to perform well over time, helping you avoid the kind of mistakes that lead to costly repairs later. We provide professional Gravel services across Enfield and the surrounding areas.

Contact us for a free, no-obligation quote and let our team help you find the right gravel driveway solution for your Enfield home.

Conclusion

A gravel driveway remains one of the most cost-effective and versatile options for homeowners in Enfield, with prices typically ranging from £1,000 for smaller driveways to over £4,600 for larger, more complex installations. Beyond the initial cost, gravel driveways also offer great long-term value thanks to low maintenance needs, natural drainage, and the ease of repairing or topping up sections without a full replacement.

Final costs depend on factors such as driveway size, gravel type, required groundwork, and drainage needs, so properties with sloped access or larger surface areas tend to fall at the higher end. Getting an accurate quote comes down to assessing these factors for your specific property, so it’s worth arranging a site visit for a tailored price.

FAQs

What is the cheapest type of gravel for a driveway? 

Crushed rock and river rock are among the cheapest options, typically used for sub-base or structural layers rather than the visible top surface.

Does the size of the driveway affect the price per m²? 

Yes, smaller driveways often cost more per m² than larger ones, as fixed costs like site setup and equipment hire are spread across a smaller area.

Are there hidden costs in a gravel driveway installation? 

Waste disposal, sub-base materials, and site access requirements can all add to the final cost if not accounted for in an initial quote.

How long does a gravel driveway last? 

With proper installation and occasional maintenance, a gravel driveway can last between 15 and 20 years.

Can I lay a gravel driveway myself? 

While it is possible to install a gravel driveway as a DIY project, professional installation ensures proper groundwork and drainage, which affects the driveway’s long-term performance and reduces the risk of additional repair costs later.

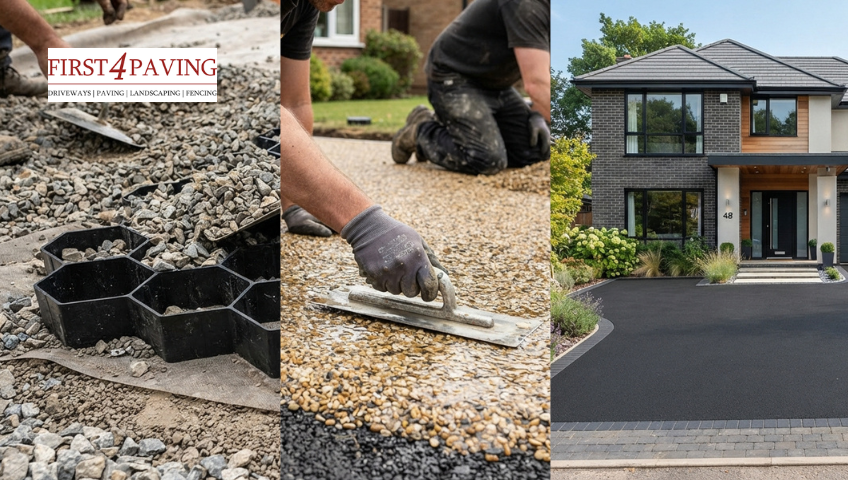
How long do resin driveways last

How Long Do Resin Driveways Last in Enfield? Complete Lifespan Guide

If you’re a homeowner in Enfield considering a driveway upgrade, resin driveways have likely caught your attention. Known for their sleek, modern finish and excellent drainage properties, resin driveways have become one of the most popular choices across Enfield in recent years. But one question homeowners ask most often is: how long do resin driveways actually last?

On average, a well-installed resin driveway can last between 15 and 25 years, depending on the type of resin used, installation quality, and maintenance. In this guide, we’ll break down everything you need to know about the lifespan of resin driveways in Enfield, the factors that affect durability, and how to make your driveway last even longer.

What Are Resin Driveways?

Resin driveways are surfaces made by mixing natural aggregates (like gravel or stone) with a resin binder to create a smooth, durable finish. There are two main types:

  • Resin Bound: A smooth, permeable surface where aggregate is fully mixed with resin before laying, offering better durability and a more premium finish.
  • Resin Bonded: A rougher, loose-stone finish where resin is applied to the surface first, then stone is scattered on top, generally more affordable but less durable.

How Long Do Resin Driveways Last?

When it comes to driveway investments, lifespan is one of the biggest deciding factors, and resin driveways generally perform very well in this department. On average, a properly installed resin driveway in Enfield can last anywhere between 15 and 25 years, but the exact number depends heavily on the type of resin system used.

Resin Bound Driveways (15–25 years) 

This is the more premium and durable option. Because the aggregate is fully coated and mixed with resin before being laid, the surface is smooth, seamless, and highly resistant to cracking, water damage, and general wear. With proper installation and regular maintenance, resin-bound driveways can comfortably reach and sometimes exceed the 25-year mark.

Resin Bound Driveways

Resin Bonded Driveways (8–12 years) 

This is a more budget-friendly option in which the resin is applied first, with loose stones scattered on top. While it gives a similar textured look, it’s less durable overall. If budget is your main concern, read the guide on how much a gravel driveway costs in Enfield to compare it against resin. Stones can dislodge over time, especially under heavy foot or vehicle traffic, which shortens its overall lifespan compared to resin-bound surfaces.

Resin Bonded Driveways

Type

Average LifespanDurability

Maintenance Level

Resin Bound

15–25 yearsHighLow
Resin Bonded8–12 yearsMedium

Medium

It’s worth noting that these figures represent average lifespans under normal conditions. A resin driveway installed by an experienced, qualified contractor using high-quality, UV-stable resin and a properly compacted sub-base will almost always outlast one that’s been poorly installed or made with cheaper materials. In other words, the numbers above are a realistic benchmark, but actual longevity can vary quite a bit depending on installation quality, local weather exposure, and how well the driveway is cared for over the years, all of which we’ll break down in more detail below.

Factors Affecting Resin Driveway Lifespan in Enfield

Several local and practical factors influence how long your resin driveway will last.

Weather Conditions in Enfield

Enfield experiences a typical UK climate: frequent rain, occasional frost, and seasonal temperature shifts. Resin bound driveways handle this well due to their permeable design, which prevents water pooling and reduces frost damage. However, poor installation can make driveways more vulnerable to cracking during colder months.

Quality of Installation

Professional installation is one of the biggest factors in driveway longevity. A poorly mixed resin ratio or uneven application can lead to premature cracking, discolouration, or surface breakdown within just a few years.

Sub-base Preparation

A strong, well-compacted sub-base is essential. Without it, the surface can shift, crack, or develop potholes over time regardless of how good the resin itself is.

Material & Resin Quality

Not all resins are equal. UV-stable, high-grade resins resist yellowing and degradation far better than cheaper alternatives, especially under prolonged sun exposure.

Traffic & Usage

Driveways that regularly handle heavy vehicles or are used frequently may show wear sooner than those with lighter, occasional use.

Maintenance Routine

Routine cleaning and periodic resealing significantly extend a resin driveway’s life, keeping it looking newer for longer.

Warning Signs Your Resin Driveway Needs Attention

Watch out for these common warning signs:

  • Visible cracks or surface splitting
  • Fading or discolouration from UV exposure
  • Weeds or moss growing through the surface
  • Poor drainage or water pooling
  • Loose stones or a “crumbly” texture

If you notice any of these, it may be time for repairs or resurfacing.

How to Extend Your Resin Driveway’s Lifespan

  • Clean regularly: Sweep debris and pressure-wash occasionally to prevent buildup.
  • Reseal every 5–7 years: To restore UV protection and surface strength.
  • Avoid harsh chemicals: Stick to mild cleaning solutions to prevent resin breakdown.
  • Limit heavy vehicle use: Avoid parking excessively heavy vehicles for prolonged periods.
  • Address cracks early: Small repairs now prevent bigger, costlier problems later.

Is a Resin Driveway Worth It for Enfield Homeowners?

Given its 15–25 year lifespan, low maintenance needs, and attractive appearance, a resin driveway is a solid long-term investment. It can also boost curb appeal and property value — an important consideration in Enfield’s competitive housing market.

That’s exactly why so many local homeowners trust First4 Paving, a leading driveway company in Enfield, to deliver high-quality resin Driveway services that stand the test of time. Whether you’re upgrading your existing driveway or starting fresh, our experienced team ensures a finish that’s built to last.

Conclusion

Resin driveways offer an excellent balance of durability, low maintenance, and modern style, making them a popular choice for homeowners across Enfield. With proper installation and regular care, a resin-bound driveway can easily last 15 to 25 years, while resin-bonded options typically last 8 to 12 years.

If you’re considering a new driveway, contact us today for a free, no-obligation quote and let Enfield’s trusted resin driveway experts bring your vision to life.

FAQs

Do resin driveways crack in cold weather? 

Resin bound driveways are designed to be permeable and frost-resistant, but poor installation can increase the risk of cracking in freezing temperatures.

How often should resin driveways be resealed? 

Most experts recommend resealing every 5–7 years to maintain UV protection and surface strength.

Can a damaged resin driveway be repaired? 

Yes, minor cracks and surface damage can often be repaired without needing a full replacement, especially if addressed early.

Is a resin driveway suitable for Enfield’s climate? 

Yes, resin-bound driveways, in particular, handle Enfield’s variable, rainy weather well thanks to their permeable, frost-resistant design.

What Are the Different Types of Fencing

What Are the Different Types of Fencing and How to Choose the Right One

A fence does more than just mark where your property ends. It’s often the first thing people notice about your home, and it plays a big role in keeping your garden private, secure, and protected from the unpredictable  UK weather, from heavy rain to strong winds. In simple terms, fencing is any structure built along a boundary, made of materials such as timber, metal, concrete, or stone, designed to enclose, divide, or decorate outdoor space.

Most homeowners in Enfield and beyond don’t realise how many factors go into choosing the right fence until they’re standing in front of a dozen options, unsure which one will hold up best. A fence that looks great in a showroom might not survive a windy corner plot. 

This guide walks you through what are the different types of fencing, their pros, cons, and realistic lifespan, so you can choose a fence that fits your space, your budget, and how long you actually want it to last.

Different Types of Fencing for Gardens

Closeboard Fencing

Closeboard fencing is one of the most widely used styles in Enfield gardens, and for good reason. It’s made from overlapping vertical timber boards fixed to horizontal rails, which creates a solid, continuous barrier with no gaps. This makes it a strong choice for anyone who wants both privacy and durability, especially in wind-exposed gardens, since the overlapping design helps it withstand gusts better than flat panels.

Closeboard Fencing

Pros

  • Excellent privacy with no gaps between boards
  • Sturdy and holds up well in windy conditions
  • Adds strong kerb appeal with a neat, uniform finish
  • Good sound barrier compared to lighter fencing types

Cons

  • Costs more than panel fencing
  • Needs occasional treatment or staining
  • Heavier construction makes installation more labour-intensive
  • Can warp over time if not properly treated

Lifespan 

With proper care and regular treatment, closeboard fencing typically lasts between 15 and 20 years. Neglecting maintenance can shorten this considerably. Choosing pressure-treated timber can help extend its overall life.

Panel Fencing 

Panel fencing is built from pre-made sections, usually lap or featheredge panels, that are fixed between posts. Because the panels arrive ready-made, installation is much faster than board-by-board fencing, making it a popular option for homeowners who want a fence up quickly without a big budget.

Panel Fencing

Pros

  • Affordable compared to most other fencing types
  • Quick and easy to install
  • Wide availability in various heights and styles
  • Good option for temporary or budget boundary marking

Cons

  • Less durable than closeboard fencing
  • Can crack or blow out in strong winds
  • Thinner panels wear down faster over time
  • Limited privacy if panels aren’t tightly fitted

Lifespan 

Panel fencing usually lasts around 8 to 12 years, depending on timber quality and exposure to weather. Regular treatment can help it last closer to the upper end of that range. Cheaper panels tend to wear out faster.

Picket Fencing 

Picket fencing is instantly recognisable, with evenly spaced vertical boards and a low-to-medium height. It’s more about kerb appeal than privacy or security, which is why it’s most often seen along front gardens or as a decorative border rather than a full boundary fence. If you’re planning your front garden layout, read this guide to front doorstep ideas for more inspiration.

Picket Fencing

Pros

  • Adds a classic, charming look and boosts kerb appeal
  • Easy to install and maintain
  • Works well for defining garden borders
  • Available in a range of colours and styles

Cons

  • Offers very little privacy
  • Not a strong deterrent for security
  • Requires repainting or staining to maintain appearance
  • Not ideal as a sole boundary fence

Lifespan 

A well-maintained picket fence typically lasts 10 to 15 years. Painted or treated timber tends to last longer than untreated wood. Exposure to damp conditions can shorten its lifespan.

Trellis Fencing 

Trellis fencing uses a crisscross lattice pattern and is rarely used on its own. It’s typically added to the top of an existing fence to increase height without making the garden feel too enclosed, and it doubles as a support structure for climbing plants like roses or jasmine.

Trellis Fencing

Pros

  • Adds extra height without blocking light or airflow
  • Works well as a support for climbing plants
  • Softens the look of a plain fence
  • Relatively inexpensive to add to an existing fence

Cons

  • Doesn’t provide much privacy on its own
  • Not suitable as a standalone security fence
  • Can weaken over time under the weight of heavy plants
  • Requires occasional repair if timber splits

Lifespan 

Trellis fencing generally lasts 8 to 12 years, depending on timber quality and exposure. Plant growth can add extra weight and stress over time. Regular checks help catch damage early.

Wrought Iron / Metal Fencing 

Metal fencing, whether wrought iron, aluminium, or steel, is chosen mainly for its strength and long lifespan. It doesn’t offer much privacy since the design is often open or decorative, but it holds up well against weather and wear, which makes it a common choice for driveways, front boundaries, and properties where security matters more than screening.

Wrought Iron Metal Fencing

Pros

  • Extremely strong with high security
  • Requires very little maintenance once installed
  • Adds an elegant, decorative look to a property
  • Resistant to most weather conditions

Cons

  • Higher price point than most timber fencing
  • Can rust if left untreated
  • Offers minimal privacy due to open design
  • Installation often requires professional expertise

Lifespan 

Metal fencing can last 20 to 30 years or more with galvanised or powder-coated finishes. Regular checks for rust help extend its lifespan further. Coastal areas may see faster wear due to salt exposure.

Chain Link Fencing 

Chain link fencing is a simple mesh fence made from galvanised wire. It’s mainly used to mark out boundaries or contain pets rather than for privacy or appearance, and it’s a common sight around larger plots, allotments, or temporary site boundaries because it’s quick to put up and low cost.

Chain Link Fencing

Pros

  • One of the cheapest fencing options available
  • Quick to install over large areas
  • Low maintenance once properly installed
  • Effective for containing pets or marking boundaries

Cons

  • Offers no privacy at all
  • Plain appearance, not ideal for kerb appeal
  • Can sag over time if not tensioned correctly
  • Less secure than solid fencing types

Lifespan 

Chain link fencing typically lasts 15 to 20 years, especially when galvanised or coated. Uncoated wire may rust faster in wet climates. Proper post spacing helps prevent sagging over time.

Vinyl / Composite Fencing 

Composite fencing is made from a mix of wood fibres and recycled plastic, giving it the look of timber without the same upkeep. It resists rotting, warping, and fading far better than natural wood, which is why it’s becoming a popular choice for homeowners who want a low-maintenance fence that still looks good year after year.

Vinyl Composite Fencing

Pros

  • Resists rotting, warping, and fading
  • Requires very little ongoing maintenance
  • Holds its colour and finish for many years
  • Environmentally friendly due to recycled materials

Cons

  • Higher upfront cost than timber fencing
  • Limited style and colour choices
  • Can look less natural than real wood
  • Repairs may be harder to match seamlessly

Lifespan 

Composite fencing typically lasts 25 to 30 years, making it one of the longer-lasting options. Its resistance to rot and pests helps it outlast most timber fencing. Minimal upkeep is needed to maintain this lifespan

Concrete Fencing / Posts 

Concrete fencing, often used as posts combined with timber or gravel boards, is one of the most durable options available. It doesn’t rot, warp, or need regular treatment, which makes it a practical choice for boundaries, though the look is more functional than decorative.

Concrete Fencing

Pros

  • Extremely durable, doesn’t rot or warp
  • Low maintenance over time
  • Excellent for securing boundaries long-term
  • Resistant to pests and weather damage

Cons

  • More industrial, less decorative appearance
  • Heavier and harder to install
  • Higher installation cost due to weight and equipment needed
  • Limited flexibility in design compared to timber

Lifespan 

Concrete fencing can last 30 years or more, making it one of the most long-lasting options available. It requires little to no maintenance throughout its lifespan. This makes it a strong long-term investment for boundaries.

Gabion Fencing 

Gabion fencing is made from wire mesh cages filled with stone, gravel, or other materials. It’s a more modern, architectural option that works particularly well on sloped or uneven ground where traditional fencing panels don’t sit well, and it adds a distinct textured look to a garden.

Gabion Fencing

Pros

  • Highly durable, works well on slopes or uneven ground
  • Adds a unique, modern look
  • Naturally resistant to weather and wear
  • Requires very little maintenance once built

Cons

  • More expensive than most fencing types
  • Takes up more space due to cage width
  • Installation can be labour-intensive
  • Limited privacy unless filled tightly

Lifespan 

With proper installation, gabion fencing can last 25 to 30 years or more. The stone filling doesn’t degrade like timber, adding to its longevity. Wire cages may need occasional checks for wear.

Bamboo Fencing 

Bamboo fencing brings a natural, relaxed feel to a garden and is often chosen for tropical or minimalist outdoor spaces. It’s an eco-friendly option since bamboo grows quickly and sustainably, though it doesn’t last as long as timber or composite fencing unless it’s properly treated against moisture.

Bamboo Fencing

Pros

  • Eco-friendly and sustainably sourced
  • Gives a natural, relaxed garden aesthetic
  • Lightweight and easy to install
  • Affordable compared to hardwood fencing

Cons

  • Shorter lifespan than most other fencing types
  • Can deteriorate faster without weatherproofing
  • Less effective for security purposes
  • May need frequent replacement in wet climates

Lifespan 

Bamboo fencing typically lasts 5 to 10 years, depending on treatment and maintenance. Proper sealing against moisture can help extend its life. Without treatment, it tends to degrade much faster.

Palisade Fencing 

Palisade fencing consists of vertical steel or timber posts with pointed tops, and it’s most commonly seen around commercial properties, schools, or larger boundaries. Its main purpose is security rather than privacy, since the gaps between posts still allow visibility through the fence.

Palisade Fencing

Pros

  • Strong security with tough, pointed-post construction
  • Minimal maintenance once installed
  • Durable against forced entry attempts
  • Suitable for large commercial boundaries

Cons

  • Limited privacy due to gaps between posts
  • Industrial appearance rather than decorative
  • Higher installation cost for larger properties
  • Less suitable for residential front gardens

Lifespan 

Palisade fencing typically lasts 20 to 25 years, especially with treated steel or timber. Regular inspection helps catch rust or damage early. Coastal or humid areas may see slightly reduced lifespan.

Factors to Consider When Choosing Fencing

Picking the right fence isn’t just about style; it’s about matching the material to your garden’s needs. Experienced landscaping contractors in Enfield often recommend weighing up a few key factors before committing to a type of fencing. Here’s what to keep in mind.

  • Purpose: Think about why you need the fence. Privacy, security, decoration, and boundary marking all call for different types of fencing.
  • Budget: Fencing costs vary widely depending on the materials and installation. Set a budget early so you can narrow down your options.
  • Maintenance Requirements: Some fences require regular treatment or repairs, while others, such as composite or concrete, require little to no maintenance.
  • Durability and Weather Resistance: If your garden is exposed to strong winds or heavy rain, choose a fence built to handle it.
  • Planning Permission and Height Restrictions: In the UK, fences over a certain height may need planning permission, especially near roads or boundaries. Check local rules before installing.
  • Style of Your Property: Your fence should complement the look of your home and outdoor space, not clash with it. The same applies to your driveway edging; matching it to your fencing style ties the whole exterior together.

Why Professional Fencing Installation Matters

Even the best fencing material won’t perform well if it’s installed incorrectly. Poor installation can lead to leaning posts, gaps, and fences that don’t survive their first bad storm, no matter how good the material is. Best landscaping companies in Enfield know that getting the groundwork, spacing, and alignment right from the start makes all the difference to how long a fence actually lasts.

From timber fencing to modern composite designs, choosing the right boundary solution is an important step for homeowners looking to improve privacy, security, and overall garden appeal. When it comes to quality fencing solutions, First4 Paving is offering professional fencing installation services tailored to the style and needs of local properties. A well-chosen fence not only protects your outdoor space but also adds value and kerb appeal to homes across the area.

Ready to upgrade your garden with a fence that’s built to last? Get in touch with us today for a free consultation and quote.

Conclusion

Choosing the right fence comes down to understanding what you actually need it for, whether that’s privacy, security, decoration, or simply marking your boundary. From durable options like concrete and metal to more decorative choices like picket and trellis, each type offers a different balance of cost, maintenance, and lifespan. Taking the time to weigh these factors against your budget and property style will help you avoid a costly mistake down the line.

Getting your fence professionally installed makes just as much difference as choosing the right material, since even the best fencing won’t perform well if it’s put up incorrectly. If you’re ready to upgrade your garden with a fence built to last, get in touch with First4 Paving for expert advice and a free quote.

FAQs

How high can a garden fence be without planning permission? 

In most cases, garden fences can be up to 2 metres high without planning permission. If your fence is near a road, this limit usually drops to 1 metre. It’s worth checking local guidelines to be sure.

What is the most durable type of fencing? 

Concrete and metal fencing tend to be the most durable, often lasting several decades with minimal maintenance.

How long does fencing usually last? 

This depends on the material. Wooden fences typically last 10 to 15 years, while metal, concrete, and composite fencing can last 20 years or more.

Can I mix fencing styles on one property? 

Yes. Many homeowners combine styles, such as using closeboard fencing for privacy and trellis on top for extra height or decoration.

how to seal a driveway in Enfield

How to Seal a Driveway in Enfield and Make It Last for Years

Most driveways in Enfield are silently deteriorating and the owners have no idea. A few hairline cracks here, some fading colour there, weeds pushing through the joints. It looks like normal wear and tear. But underneath, water is working its way in, freezing in winter and slowly breaking the surface apart from within.

The fix is simpler than you think. A quality driveway sealer, applied correctly, creates a protective barrier that stops water, blocks stains, prevents weeds, and keeps your driveway looking its best for years. If you’re wondering how to seal a driveway in Enfield, this step-by-step guide explains everything you need to know to achieve a long-lasting finish.

Why Sealing a Driveway Matters

The benefits of sealing a driveway go well beyond appearance. A quality driveway sealer creates a protective barrier that helps protect your driveway from the weather, vehicle traffic, and everyday wear.

  • Water penetration: Water seeping into cracks can freeze and expand in winter, worsening existing damage over time.
  • Oil and fuel stains: Unsealed surfaces absorb spills quickly, often leaving permanent marks. A sealed driveway makes stains much easier to clean, but if you’re already dealing with a stubborn mark, here’s how to remove an oil stain from a driveway.
  • Weed growth: Sealer helps lock in jointing sand, reducing gaps where weeds can take root, particularly on block-paving driveways.
  • UV fading: Prolonged exposure to sunlight can cause tarmac, concrete, and resin surfaces to fade. Sealing helps preserve their appearance for longer.
  • General surface wear: Daily vehicle and foot traffic gradually wear down driveway surfaces. A protective sealant adds an extra layer of durability.

For homeowners in Enfield, regular driveway sealing is one of the most cost-effective ways to extend a driveway’s lifespan and reduce the likelihood of costly repairs.

Signs Your Driveway Needs Sealing

Not sure if it is time to seal your driveway? Here are some of the most common warning signs:

  • The surface has lost its original colour and appears faded or dull
  • Water absorbs into the surface rather than beading on top
  • Weeds are growing through block paving joints
  • Small cracks are beginning to appear
  • Oil, dirt, and tyre marks are becoming difficult to remove
  • Jointing sand is washing out between paving blocks

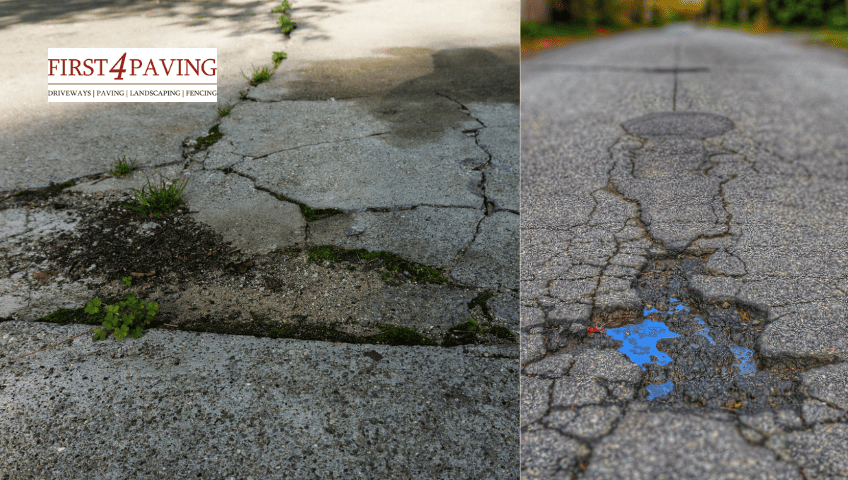
cracked driveways in Enfield

Spotting these signs early can prevent expensive repairs later on. If you’re seeing more than one or two of these on your driveway, it’s worth speaking to a professional before the damage gets worse. A quick inspection from an experienced driveway contractor in Enfield can save you a lot of money down the line.

How to Seal a Driveway in Enfield Step by Step

Whether you are tackling this as a DIY project or preparing for a professional visit, understanding how to seal a driveway step by step helps you get the best possible result.

What You Will Need

  • Pressure washer or stiff brush and hosepipe
  • Weed killer (if required)
  • Crack filler suitable for your surface type
  • Kiln-dried sand (for block paving joints)
  • Appropriate driveway sealer for your surface
  • Long-handled squeegee, brush, or roller
  • Protective gloves and old clothing

Step 1 — Choose the Right Conditions

Sealing driveway surfaces is weather-dependent. You need at least two dry days and a temperature above 10°C. Avoid sealing in direct summer sun as the product can dry too quickly. Late summer or early autumn is ideal for UK homes.

Step 2 — Clear and Clean the Surface

Remove all vehicles and debris. Sweep the driveway, then pressure wash the entire surface. If your driveway has stubborn dirt or grime buildup, read this guide on cleaning a tarmac driveway before you begin sealing. Use a specialist driveway degreaser on oil stains and allow it to work before rinsing. Treat any weeds with weed killer and sweep out dead growth from the joints. Allow the surface to dry fully, typically 24 to 48 hours.

Step 3 — Repair Cracks and Damage

Fill any cracks using a suitable filler for your surface type. Never seal over existing damage it hides the problem but does not fix it. For block paving, re-brush kiln-dried sand into the joints at this stage.

Step 4 — Apply the Driveway Sealer

To seal a driveway like a professional, preparation is everything, but application technique matters just as much. Shake or stir the sealer well before opening. Work from the furthest point back towards the street to avoid walking on wet sealer. Apply thin, even coats rather than one thick application. Thick coats take longer to cure, are more likely to streak, and can leave a tacky finish.

Step 5 — Second Coat and Curing

Many sealers benefit from a second coat once the first has dried; check the manufacturer’s instructions. Foot traffic can usually resume after a few hours. Keep vehicles off for at least 24 to 48 hours.

Can You Seal a Driveway Yourself?

If you’re planning how to seal a driveway in Enfield yourself, it is possible, but it is not as simple as it looks. Sealing a driveway yourself is achievable, though the results depend almost entirely on preparation. Many homeowners underestimate this part. Skipping a proper clean, missing cracks, or applying sealer in the wrong conditions can leave a finish that peels or wears away within months.

DIY sealants are also less concentrated than trade-grade products, and a domestic pressure washer rarely matches the performance of professional equipment. For a small driveway in good condition, results can be acceptable. For anything larger or more damaged, the gap between DIY and a professional finish becomes difficult to close.

Professional help is worth considering when there is significant cracking, weed damage, or when a long-lasting result is the priority. 

How Long Does Driveway Sealer Last?

Surface TypeTypical Sealer Lifespan
Tarmac / Asphalt2–4 years
Block Paving3–5 years
Concrete2–5 years
Resin Bound5–10 years

For most residential driveways in Enfield, resealing every 2 to 3 years is the right routine. Block paving may need more frequent attention as jointing sand washes out over time.

Common Driveway Sealing Mistakes to Avoid

Even with good intentions, these common driveway sealing mistakes reduce the effectiveness of the sealant:

  • Sealing over a dirty surface: Dirt and oil trapped under sealer prevent proper adhesion and cause peeling.
  • Applying in cold or wet conditions: Below 10°C or in damp weather leads to poor bonding and an uneven finish.
  • Coats that are too thick: Thick coats streak, stay tacky, and wear unevenly.
  • Ignoring cracks before sealing: Always repair first, never seal over damage.
  • Using the wrong product: Always match the sealer to your specific surface type.

Driveway Maintenance Tips for Enfield Homeowners

After sealing, regular care preserves the finish and extends the time before your next reseal is needed. These driveway maintenance tips are especially relevant for UK homes, where wet winters and temperature changes put outdoor surfaces under constant pressure.

  • Sweep leaves and debris regularly
  • Clean oil spills as soon as they happen
  • Avoid harsh chemicals such as bleach or solvents
  • Use sand or driveway-safe grit in winter instead of salt-based deicers
  • Reapply sealer when you notice protection starting to fade

Knowing how to maintain a sealed driveway is the simplest way to avoid unnecessary repairs and keep your driveway looking its best year-round.

At First 4 Paving, we have years of experience caring for driveways across Enfield and the surrounding areas. Whether you have block paving, tarmac, resin, or concrete, our team provides expert cleaning, repairs, and sealing to keep your driveway protected and looking great. Contact our team today for a free driveway assessment and no-obligation quote.

how to seal a driveway in Enfield

Conclusion

Knowing how to seal a driveway in Enfield is one of the most effective ways to protect it from the UK’s wet winters, frost, and everyday wear. Clean the surface properly, use the right sealer for your surface type, and stick to a regular maintenance routine and your driveway will stay in great condition for years to come.

If you are based in Enfield and need a professional finish, the team at First 4 Paving specialises in driveways Enfield homeowners trust. Get in touch, and we will be happy to help.

FAQ

How long does driveway sealer last?

Between 2 and 5 years depending on the surface type, product quality, and traffic levels.

Does sealing prevent weeds?

It significantly reduces weed growth by locking in jointing sand, though annual maintenance is still recommended.

Does driveway sealer protect against rain?

Yes. A quality driveway sealer creates a protective barrier that helps prevent water from soaking into the surface, reducing the risk of cracks, erosion, and frost damage.

How often should you seal a driveway?

Most driveways should be resealed every 2 to 5 years, depending on the type of surface, weather conditions, and the amount of traffic they receive.


Collage of Enfield featuring the historic market, a scenic park, St Andrew's Church, and family homes, highlighting the area's heritage, green spaces, and community life.

What Is Enfield Famous For? History & Attractions

This North London borough is a historic and fascinating area that combines centuries-old traditions with modern city living. Known for royal connections, beautiful parks, a historic market, and an important role in British industry, it has developed a unique identity over the years.Many people wonder what is Enfield famous for because the area is often overlooked compared with more central parts of London. However, Enfield’s history is filled with heritage, innovation, and cultural diversity, making it a special place to explore.

From ancient woodlands and royal hunting grounds to notable manufacturing achievements, this part of North London has contributed to British history in many ways. Today, it remains a popular place for families, visitors, and those looking for a balance between urban convenience and natural surroundings.

The Historical Importance of the Area

The borough has a long history that dates back many centuries. Originally a rural settlement surrounded by farmland and woodland, it gradually developed into an important market town. During the medieval period, the area became recognised for its strategic location and its connections to important routes leading towards London. Over time, it attracted wealthy families, traders, and influential residents who helped shape its development. The historic character of the borough is still evident in old buildings, churches, and preserved areas. These reminders of the past allow visitors to understand how the area has changed while keeping its traditional charm.

The Legacy of this Area

One of the strongest links between the borough and British royalty is Enfield Chase. This large area of woodland was once a royal hunting ground used by monarchs and members of the aristocracy. Kings and nobles visited it for hunting and leisure, making it an important location during earlier periods of English history. The presence of the royal estate brought attention and prestige to the area. Although much of the original chase has disappeared due to development, its influence remains an important part of the borough’s identity. This royal connection is one of the key reasons behind what is Enfield famous for when people explore its historical background.

Discover the Borough’s Famous Landmarks, Rich History & Local Culture

Beautiful Parks and Green Spaces

One of the borough’s greatest attractions is its impressive collection of parks and open spaces. Unlike many heavily developed areas of London, it offers residents and visitors plenty of opportunities to enjoy nature. Trent Park is among the most well-known green spaces nearby. It features beautiful landscapes, woodland paths, historic buildings, and peaceful walking routes. The park attracts visitors who want to escape the capital’s busy atmosphere.

Other parks and nature areas provide space for outdoor activities, family outings, and relaxation. These green spaces contribute greatly to the borough’s reputation as a pleasant place to live. If you’re planning a visit, check out our guide on things to do in Enfield for more ideas.

The Historic Market

Shoppers browsing stalls at Enfield Market, one of England's oldest traditional markets.

The local market is one of the oldest markets in England and has played an important role in the community for hundreds of years. It has traditionally been a centre for trade, bringing together sellers, shoppers, and visitors. Today, it continues to offer a variety of goods while maintaining its historic character.

Unlike modern shopping centres, the market provides a more traditional experience where people can enjoy a friendly atmosphere and connect with local traders. Its long history makes it an important symbol of the town’s heritage.

The Birthplace of Important Industrial Achievements

The borough has also gained recognition because of its contribution to British industry. It became an important centre for manufacturing and engineering, particularly during the growth of industrial production. The Royal Small Arms Factory, which operated in the area, became famous for producing firearms and supporting Britain’s military history. The factory was known for innovation and high-quality manufacturing.

A Diverse and Vibrant Community

Modern life here is shaped by a multicultural population and a welcoming atmosphere. People from different backgrounds have settled in the borough, creating a diverse community with a wide range of traditions and cultural influences.

This diversity can be experienced through local restaurants, community events, shops, and festivals. The mixture of cultures has helped make the area a lively and interesting place where old traditions and new ideas exist together. Community spirit remains one of its strongest features, with residents taking pride in the local area.

Education and Family Living

Families and schoolchildren enjoying a community park in Enfield.
The borough is also popular among families because of its residential neighbourhoods, schools, parks, and convenient transport connections.

Many people choose to live here because it provides a quieter environment compared with central London while still offering access to the capital. The combination of green spaces, community facilities, and educational opportunities makes it attractive for families.This family-friendly reputation has played a major role in its continued growth and popularity.


Homes, Driveways and Outdoor Landscapes

This area is well known for its attractive residential areas, where many homes combine traditional British architecture with modern outdoor designs. Properties in the area often feature spacious front gardens, brick-built houses, and well-maintained outdoor spaces that add character to the neighbourhood. Many homeowners take pride in creating beautiful entrances with smart driveways, paved pathways, and landscaped gardens that improve both appearance and practicality. 

From block paving and stone driveways to carefully designed garden areas, outdoor improvements are a popular way for residents to enhance their properties. When it comes to quality paving solutions, First4paving is considered one of the best paving companies in Enfield, offering professional driveway and landscaping services designed to complement the style of local homes. These well-planned outdoor spaces not only make properties look more welcoming but can also add value and kerb appeal to homes across this area.


Local Landmarks Worth Visiting

The borough has several landmarks that showcase its fascinating history and architecture. St Andrew’s Church is one of the notable historic buildings in the area, representing centuries of religious and architectural heritage. Its location in the town centre makes it an important local landmark.Visitors can also explore historic estates, old buildings, and places connected with the borough’s past. These sites help tell the story of how a small settlement developed into an important London borough.

Modern Life and the Future

While the borough respects its history, it continues to develop as a modern London borough. Improvements in housing, transport, shopping areas, and public facilities are helping shape its future. The area successfully combines historical charm with modern opportunities, making it suitable for both long-term residents and newcomers. Its ability to protect heritage while adapting to change is one of the reasons it remains an attractive destination.

Conclusion

So, what is Enfield famous for? It is known for royal history, a historic market, beautiful parks, industrial achievements, and a diverse community. Its unique combination of past and present makes it one of North London’s most interesting areas.

Whether you are interested in history, nature, culture, or everyday London life, this borough offers plenty to discover. Its strong heritage and modern development continue to make it a remarkable place with a story worth exploring.

FAQs

What is Enfield best known for?

This borough is best known for its royal connections, historic market, green spaces, and industrial achievements, including its links with manufacturing and engineering.

Is it a good place to live?

Yes, many people consider the borough a good place to live because of its parks, schools, transport links, and family-friendly communities.

Why is the borough historically important?

It is historically important because of its royal hunting grounds, centuries-old market, and contribution to British industry.

What are the main attractions in the area?

Popular attractions include Trent Park, the historic market, old buildings, and various green spaces throughout the borough.

Is it part of London?

Yes, it is a borough in North London and forms part of Greater London.

Collage showcasing attractions and lifestyle in Enfield, featuring tennis courts, a historic manor house with landscaped gardens, a large green park with walkers and runners, suburban residential streets, cyclists and families enjoying countryside trails, a bustling outdoor market, and people dining at cafés along a lively high street.

Things to Do in Enfield: Complete Visitor Guide

Things to Do in Enfield: A Complete Guide to Exploring the Area

This North London borough is one of the most appealing parts of the capital for visitors and residents alike. If you are searching for the best things to do in Enfield, you will discover an area filled with history, green spaces, shopping destinations, and family-friendly attractions. It offers a wonderful mix of heritage, nature, culture, shopping, and entertainment. Whether you are visiting for a weekend, planning a family day out, or considering moving to the area, there is plenty to enjoy.

From historic estates and beautiful parks to bustling shopping areas and diverse restaurants, the borough provides countless opportunities for exploration. Its welcoming atmosphere and strong sense of community have helped make it one of the most popular areas in North London. If you are wondering how to spend your time here, this guide covers some of the best things to do in Enfield.

Discover the Best Places to Visit and Things to Do in Enfield 

Discover the Borough’s Historic Heritage

A historic manor house overlooking a peaceful lake in Enfield, surrounded by green parkland, mature trees, and walking paths on a sunny day.

The area has a rich history that stretches back centuries, and many of its historic attractions continue to draw visitors year-round. Read the guide on what Enfield is famous for to learn more about its royal connections and historic market. One of the best-known landmarks is Forty Hall, a stunning seventeenth-century manor house surrounded by beautiful grounds

The borough is home to several heritage sites that provide insight into its past. Historic buildings, old churches, and preserved landmarks help tell the story of how this part of North London evolved from a rural settlement into a thriving part of Greater London. For history enthusiasts, spending time exploring these locations is one of the most rewarding experiences in the area.

Enjoy Beautiful Parks and Green Spaces

Exploring local parks is one of the most relaxing activities here, especially for those who enjoy spending time outdoors. One of the borough’s greatest strengths is its abundance of green spaces. Residents and visitors alike appreciate the opportunity to enjoy nature without leaving London. Trent Park is among the most popular outdoor destinations, offering extensive woodland trails and open spaces. For nature lovers, enjoying these green surroundings is one of the best things to do in Enfield throughout the year. It is an excellent location for walking, jogging, cycling, or simply relaxing in peaceful surroundings.

Grovelands Park is another favourite among locals. The park features a picturesque lake, attractive pathways, and mature trees that create a tranquil environment in every season. Families often visit for weekend outings, while photographers and nature lovers appreciate the scenic views. Hilly Fields Park is also worth exploring, particularly for those who enjoy elevated viewpoints and open landscapes. It provides a refreshing escape from busy urban life and offers plenty of space for recreation and relaxation.

Experience Shopping and Entertainment

Shopping enthusiasts will find plenty to enjoy in the borough. The town centre serves as the main commercial hub and offers a wide variety of retail options. Visitors can browse well-known high street stores, independent shops, and local businesses that cater to a range of interests and budgets.

The traditional market remains an important part of the local community, providing a lively atmosphere where shoppers can discover fresh produce, clothing, accessories, and household goods. The combination of modern retail facilities and traditional market culture creates a unique shopping experience that reflects the borough’s character. Entertainment options are equally diverse, with cinemas, leisure facilities, cafés, and community events regularly attracting visitors year-round.

Explore Local Food and Dining

A busy restaurant in Enfield with families enjoying meals while a chef grills fresh food over an open flame in a warm and welcoming dining space.

The borough’s multicultural population has helped create a vibrant and diverse food scene.

Whether you are looking for traditional British cuisine, Mediterranean dishes, Turkish specialities, Italian favourites, or South Asian flavours, you will find plenty of excellent dining options across the area. Sampling different cuisines is one of the underrated things to do in Enfield, especially for food lovers looking to try something new.

Independent cafés and family-owned restaurants contribute significantly to the area’s character. Many establishments focus on fresh ingredients, friendly service, and authentic recipes that reflect the local cultural mix. From casual lunches and coffee breaks to evening dining experiences, visitors have no shortage of choices when it comes to food. The variety of cuisines available makes exploring the local restaurant scene an attraction in its own right.

Outdoor Activities and Recreation

For those who enjoy staying active, the borough offers numerous recreational opportunities. Walking and cycling are particularly popular thanks to the extensive network of trails and pathways. The New River Path provides a scenic route through attractive surroundings and is ideal for both relaxed strolls and regular exercise.

Sports enthusiasts can take advantage of local golf courses, football pitches, tennis courts, fitness centres, and leisure complexes located throughout the borough. Many parks also include outdoor exercise facilities, making it easy for residents and visitors to maintain an active lifestyle. The availability of both organised sports facilities and natural outdoor spaces makes this part of North London a great destination for recreation.

Family-Friendly Attractions

Families looking for enjoyable things to do in Enfield will find plenty of activities suitable for both children and adults. Local farms and wildlife attractions give younger visitors the chance to learn about animals and nature while enjoying time outdoors. Seasonal events, educational programmes, and family-focused activities make these attractions especially popular during school holidays.

Many parks throughout the borough feature modern playgrounds, open play areas, and picnic facilities. Parents appreciate the safe and welcoming environment, while children benefit from plenty of opportunities for outdoor fun and exploration. The combination of educational attractions, recreational spaces, and community events makes the area particularly appealing for families.

Arts, Culture, and Community Events

A vibrant outdoor community festival in Enfield featuring local art stalls, live music performances, street entertainers, and families enjoying the event.

The local cultural scene continues to grow, offering residents and visitors a variety of artistic and community-focused experiences.

Throughout the year, the borough hosts festivals, exhibitions, live performances, and seasonal celebrations that bring people together and showcase local talent.

Community centres, theatres, and cultural venues regularly organise events that reflect the diversity of the local population. These activities help create a strong sense of belonging while providing entertainment for people of all ages. Whether you enjoy music, theatre, visual arts, or local festivals, there is usually something happening somewhere in the borough.

What Are Homes, Driveways, and Landscapes Like in this Area?

One feature that often stands out in the borough is the appearance of its residential neighbourhoods. Many properties benefit from attractive front gardens, spacious driveways, and carefully planned landscaping that enhances curb appeal. Homeowners frequently invest in block paving, resin-bound driveways, decorative stone features, and well-designed pathways that complement their homes’ style.

Many properties benefit from attractive block paving, resin, and tarmac driveways that enhance curb appeal and add value to the home. If you’re considering resin, it’s worth knowing how long resin driveways last in Enfield before you invest.. These high-quality driveways contribute to the clean, attractive, and family-friendly character for which this area is known. For homeowners looking to upgrade their property, First 4 Paving is the best paving company in Enfield, offering professionally installed driveways that combine durability, practicality, and style.

Why People Love Living Here

The wide variety of things to do in Enfield is one of the reasons why so many people choose to live in the area. The borough offers a lifestyle that appeals to a wide range of people. Families appreciate the excellent schools, green spaces, and community atmosphere, while professionals benefit from strong transport links and easy access to Central London. The area successfully balances urban convenience with suburban comfort, making it a desirable place to live.

Residents often highlight the abundance of parks, recreational facilities, shopping opportunities, and cultural activities as key reasons for choosing the borough. The combination of modern amenities and natural beauty gives this part of North London a unique character that continues to attract new visitors and residents alike.

Conclusion

This borough offers far more than many people expect. Its rich history, beautiful parks, diverse dining options, family-friendly attractions, and thriving community spirit create an environment that is both welcoming and enjoyable. Whether you are interested in exploring historic landmarks, spending time outdoors, shopping, dining, or simply experiencing a different side of London, there is something here for everyone.

With so many things to do in Enfield, both visitors and residents can enjoy everything from historic landmarks and beautiful parks to shopping, dining, and family-friendly attractions. It remains one of North London’s most rewarding destinations to visit and explore.

FAQs

What is Enfield famous for?

Enfield is known for its historic attractions, green spaces, family-friendly atmosphere, and landmarks such as Forty Hall and Trent Park.

Is it worth visiting?

Yes, the borough offers a variety of attractions, including parks, shopping areas, cultural venues, restaurants, and historic sites, making it well worth visiting.

What are the best parks in the area?

Some of the most popular parks include Trent Park, Grovelands Park, Hilly Fields Park, and the grounds surrounding Forty Hall.

Is it a good place for families?

Yes, the borough is considered one of North London’s more family-friendly places thanks to its schools, parks, recreational facilities, and strong sense of community.

Are there good restaurants in the borough?

Yes, the local food scene includes British, Mediterranean, Turkish, Italian, Indian, and many other international cuisines.

What are the residential areas like?

Many neighbourhoods feature attractive homes, landscaped gardens, well-maintained driveways, and a welcoming suburban atmosphere.