Can You Lay a Driveway in Winter

Can You Lay a Driveway in Winter?

Yes, you can lay a driveway in winter, but the weather decides how well it turns out.

Most materials need dry ground and temperatures above freezing while they are laid and set. Frost, heavy rain and waterlogged soil can weaken the base or spoil the finish. A good contractor will work around the forecast so the job is done properly, not quickly.

If you are planning a new driveway in Enfield or elsewhere in Uk, this guide covers what works in cold weather and when it is better to wait.

What Temperature Is Too Cold to Lay a Driveway?

As a general rule, most driveway work is best done when the air temperature stays above 5°C, and the ground isn’t frozen. Below that, materials set slowly, bedding layers can freeze and the finished surface may be weaker.

The figures below are general guidance. Exact limits depend on the product, so your contractor should check the manufacturer’s advice before starting.

SurfaceCold weather limitWhat happens if it is too cold
Block pavingAvoid frozen ground and frozen bedding sandUneven bedding and loose blocks later
TarmacUsually above 5°C, dry baseMix cools too fast and does not compact well
ConcreteAbove 5°C and no frost on the daySlow strength gain and frost damage to the surface
Resin-bound gravelAbove 5°C and fully dryResin cures poorly and the surface can stay soft
Loose gravelGround not frozenLeast affected, but a frozen base will not compact

Which Driveway Materials Work Best in Winter?

Block paving and loose gravel cope best in cold weather because they don’t rely on a chemical or heat-based set. Concrete, tarmac, and resin-bound surfaces are more sensitive, so your choice of material strongly affects whether winter work is a good idea.

Block Paving

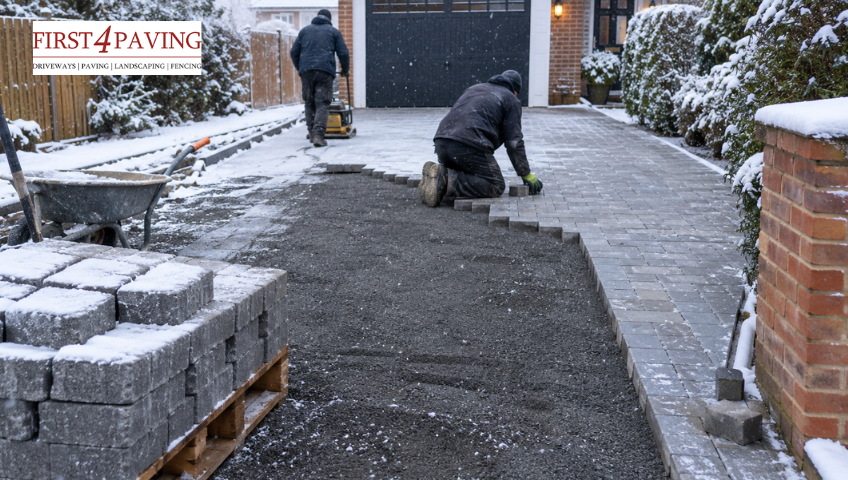
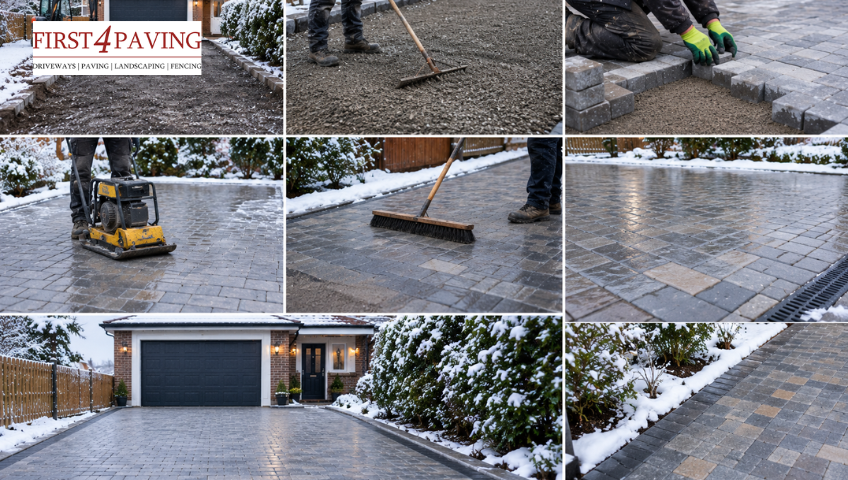
Block paving is the most winter-friendly option. The blocks sit on a compacted sub-base and a layer of bedding sand, so nothing needs to cure. You can work on cold, dry days as long as the ground isn’t frozen and the sand isn’t wet or frosted. If frost is forecast overnight, cover the laid area, then fill and compact the joints once the blocks are dry.

Gravel

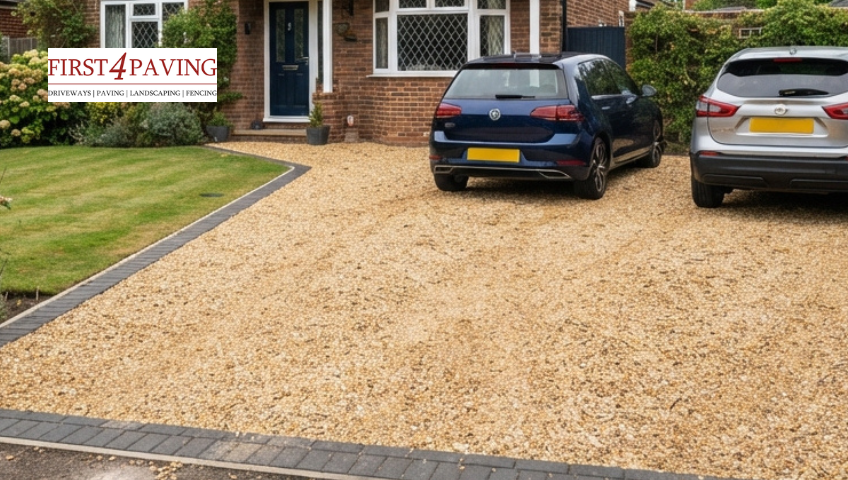
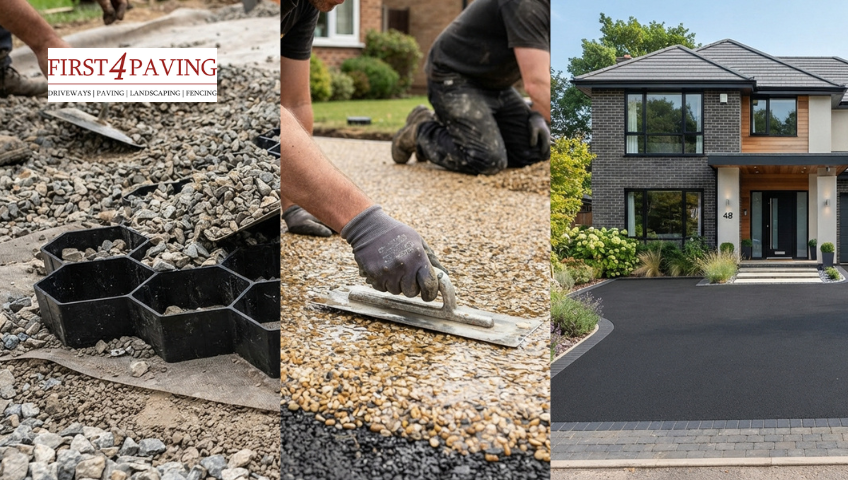
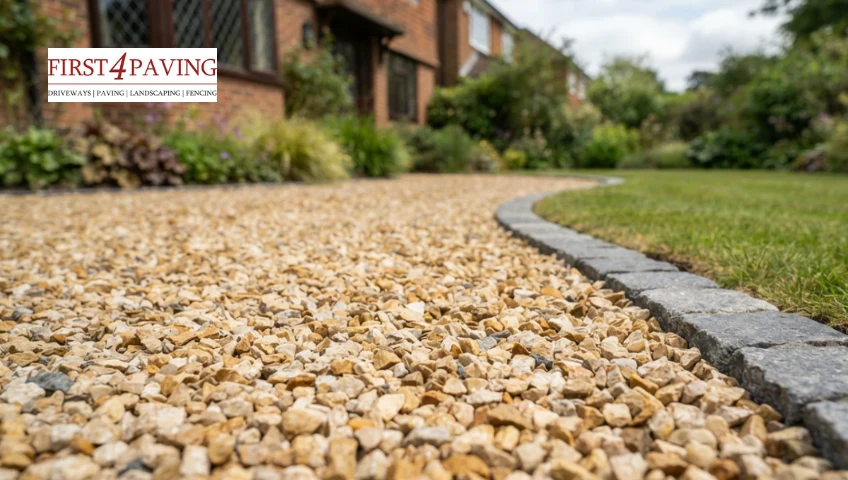
Gravel is also flexible in cold weather. It doesn’t set, so low temperatures don’t affect the surface itself. What matters is the ground underneath. If the soil is frozen or flooded, you can’t compact the sub-base properly, and the driveway will settle unevenly later. Edging and a stabilisation grid still need a solid base, especially on a sloping drive.

Tarmac

You can lay tarmac in colder months, but it needs more care. The mix arrives hot and has to be laid and compacted quickly before it cools. On cold, wet or windy days, it loses heat fast, which can leave the surface weak and poorly bonded. Dry weather and a well-prepared base are essential.

Need a tarmac driveway?
Our team lays tarmac driveways in Enfield and the surrounding areas, and we only start when the weather allows the mix to be compacted properly.

Concrete

Concrete is the most vulnerable material in winter. Frost can damage fresh concrete before it gains strength, causing flaking, cracking, and a weak surface. It needs good timing, a dry forecast and protection, such as covers or insulation, while it cures. If hard frost is expected, it is usually safer to wait.

Resin-Bound Gravel

Resin-bound gravel needs a dry surface and mild temperatures to cure properly. Cold or damp conditions slow the curing process and can leave the surface soft or patchy. As a result, it is usually the first job to be postponed in winter, and spring or summer is a better time.

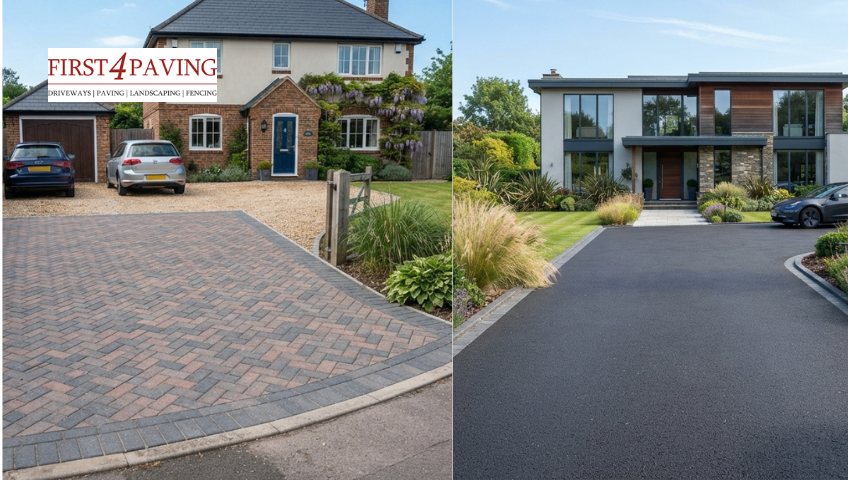
If you are unsure which surface suits your property, the choice usually comes down to block paving vs tarmac, weighing cost, upkeep and lifespan. A short site visit is usually enough to tell you which surface will perform best and look right for your property, whatever the season.

Pros and Cons of Laying a Driveway in Winter

Winter work can save time and sometimes money, but it carries a higher risk of delays and poorer results.

ProsCons
Contractors are often more available and can start soonerRain and frost can stop work for days at a time
You may be able to book a date before the spring rushConcrete, tarmac and resin-bound surfaces may need to wait
Block paving and gravel can be laid on dry, cold daysWet ground makes the sub-base harder to compact
The driveway is ready for spring and summer useShorter daylight hours mean slower progress

How to Lay a Driveway Safely in Winter

The method does not change in winter, but the planning has to be tighter. These five steps make the biggest difference to how the finished driveway turns out.

Work to the Forecast

Schedule the surfacing for dry spells and check the forecast a few days ahead. Keep a backup day in case of rain or frost, so the job can move without rushing or cutting corners. A short delay is better than laying a surface in poor conditions.

Check the Ground

Do not build on frozen or waterlogged soil. The sub-base needs firm ground to compact properly, and a base laid on soft or frozen soil can settle unevenly once the weather warms up. If the ground is too wet, wait for it to drain.

Protect Fresh Work

Cover new concrete or bedding sand overnight so frost cannot reach it. Frost on freshly laid material can weaken the surface before it has had time to settle or gain strength. Covers, insulation sheets or tarpaulins are simple ways to protect the work.

Keep Drainage Working

Water that cannot escape will freeze and lift the surface. Install falls, channels, and soakaways from the start so rainwater runs away from the driveway and house instead of sitting in the base. Where possible, follow SuDS-compliant drainage principles, such as permeable surfaces and soakaways, so water drains naturally instead of running onto the road. Good drainage matters even more in winter, when the ground is already wet. 

Allow for Curing

Some surfaces need extra time before cars can use them in cold weather. Concrete and resin-bound gravel cure more slowly in the cold, so the driveway may need to stay closed longer than usual. Your contractor should tell you exactly when it is safe to drive on.

When Laying a Driveway Is Not the Right Option

Winter work is not always a good idea. In some conditions, waiting a few weeks protects both the driveway’s quality and your money. Here are the situations where it is better to hold off:

  • Hard frost is forecast: If freezing temperatures are expected for several days, the ground and bedding layers can freeze solid. Materials cannot be compacted properly, and fresh concrete or resin can be damaged before it sets.
  • The ground is waterlogged: Heavy rain and saturated soil make it impossible to compact the sub-base correctly. A base laid on wet ground can sink or develop soft spots later.
  • You have chosen concrete or resin-bound gravel: These surfaces rely on curing, and cold, damp weather slows or ruins the process. Spring or early summer is the better time.
  • The driveway contractor cannot give a weather plan: If they cannot explain when they would postpone the job or how they would protect the work from frost, that is a warning sign.

Conclusion

You can lay a driveway in winter if the ground is firm, the weather is dry, and the material suits the conditions. Block paving and gravel handle the cold best, while concrete and resin-bound surfaces are usually better left until spring.

The right choice depends on your site, your timing and the forecast. First 4 Paving can advise on the best surface and start date for your property before any work begins.

Get Your Free, No-Obligation Driveway Quote

Serving Enfield, Hertfordshire and nearby areas. No deposit needed. Nothing to pay until completion.

FAQs

Can you lay block paving in winter?

Yes. Block paving is one of the best options for cold weather, as long as the ground is not frozen or waterlogged and the sub-base can be compacted properly.

Can concrete be poured in frost?

It is not recommended. Frost can damage fresh concrete before it gains strength, so contractors usually avoid pouring when temperatures are near or below freezing.

Is it cheaper to lay a driveway in winter?

Sometimes. Contractors may have more availability and offer earlier start dates, but weather delays can add time, so cheaper is not guaranteed.

What is the best driveway surface for winter?

Block paving is usually the safest choice, as it can be laid in cold, dry weather and does not rely on a curing process.

What Is the Cheapest Option for a Driveway in Hertfordshire

What Is the Budget-friendly Option for a Driveway? Average Cost, Materials & Expected Lifespan

  1. Gravel is the Budget-friendly driveway option for homeowners across the UK, typically costing between £40 and £70 per m² fully installed, followed closely by tarmac at around £45 to £95 per m². If you’re looking for the most affordable driveway option, these two materials are a great starting point; both are quick to install and widely available, though they offer less durability than pricier options like concrete or block paving.

Choosing a new driveway is a balancing act between upfront cost, longevity, and the upkeep you’re willing to do. With material prices, labour, and groundwork all adding up, it pays to know exactly where your money goes furthest. 

In this guide, we’ll walk you through the different types of cheap driveway materials available in the UK, which driveway is the Budget-friendly overall, how their costs and lifespans compare, and the extra tricks that can shave even more off your final bill.

How Do the Budget-friendly Driveway Materials Compare on Cost?

Before choosing a material, it helps to see the full picture side by side. Here’s how the most budget-friendly driveway surfaces compare on price and lifespan.

MaterialMaterial Only (per m²)Fully Installed (per m²)Typical Lifespan
Gravel£25 – £50£40 – £705 – 12 years (15+ with care)
Tar and Chip£15 – £30£20 – £457 – 10 years
Tarmac£30 – £50£45 – £9515 – 20 years
Concrete£35 – £60£60 – £11520 – 30+ years
Block Paving£40 – £70£75 – £13020 – 30 years
Resin Bound£50 – £80£85 – £135+15 – 25 years

As the table shows, gravel and tarmac come out on top for pure upfront cost, while concrete and block paving cost a little more but last considerably longer. Getting a fair, itemised quote before committing is always the best way to see how these figures translate to your own driveway.

Which Driveway Materials Are the Budget-fr iendly to Install?

Gravel is one of the options driveway experts in Enfield consistently recommend to homeowners looking for the lowest possible upfront cost. It remains one of the most affordable and widely used driveway materials across the UK.

What is the cheapest option for a driveway

Gravel

Gravel is consistently the Budget-friendly driveway material in the UK, and for an average-sized driveway, it typically costs less than any other option on this list. It’s made from small stones and rocks sourced from quarries or riverbeds, so it needs very little processing before it reaches your driveway, keeping material costs low. This is a big part of why gravel driveways are cheaper than most alternatives: low processing, abundant supply, and quick installation, often taking just one to two days, all keep both material and labour costs down.

Beyond the price, gravel drains well, comes in a wide range of colours and finishes, and is easy to repair by simply topping up the affected area. The trade-off is maintenance: gravel needs a proper sub-base and weed membrane to stop it shifting, sinking, or sprouting weeds, and it can scatter onto paths or verges over time.

Snapshot: Installed from £40–£70 per m² (materials only £25–£50) · lasts 5–12 years, 15+ with proper care

Tarmac

Tarmac is one of the most popular cheap driveway options because it’s widely available, quick to lay, and holds up well under regular vehicle use. It’s particularly cost-effective for larger driveways, since labour and material costs per square metre tend to fall as the area increases.

A tarmac surface is smooth, low-maintenance, and simple to patch if a section is damaged. It does need to cure for a few days after laying, and because it isn’t porous, proper drainage is essential to prevent water pooling. Colour choice is also limited compared with block paving or resin.

Installation Cost: £45–£90 per m² (materials only £30–£50)

Lifespan: 15–20 years with resealing

Concrete

Concrete costs a little more than gravel or tarmac but makes up for it with a much longer lifespan, which is why many homeowners see it as the best value cheap driveway option rather than simply the cheapest. Plain, unreinforced concrete that’s poured and left to cure is the most affordable option, while stamped or coloured finishes cost more because of the extra labour involved.

Concrete resists heat well, provides a smooth, even surface, and requires only occasional cleaning and resealing to remain in good condition. The main downsides are its vulnerability to freeze-thaw cracking in cold weather and the fact that repairs to damaged sections can be more involved than with gravel or asphalt.

Installation Cost: £60–£110 per m² (materials only £35–£60)

Lifespan: 20–30+ years

Tar and chip

Tar and chip (sometimes called chipseal) is a good middle ground for anyone who likes the look of tarmac but wants to spend less. A layer of hot tar is spread across the driveway and then covered with stone chippings, giving good grip and a textured finish at a lower price point than full asphalt.

The main compromise is. Tar and chip driveways typically need resealing or partial replacement sooner than tarmac or concrete driveways, so while the upfront savings are real, it’s worth factoring in the extra maintenance over time.

Installation Cost: £20–£45 per m² (materials only £15–£30)

Lifespan: 7–10 years

Concrete block paving

Block paving isn’t the Budget-friendly material on this list, but concrete blocks are noticeably more affordable than clay alternatives while still offering the durability and kerb appeal block paving is known for. You can lift and replace individual blocks if they’re damaged, which keeps long-term repair costs lower than surfaces that must be replaced as a whole, and it’s worth understanding the full process for laying a block paving driveway before weighing block paving against tarmac on price and lifespan.

With a wide range of colours, patterns, and permeable options, block paving also offers more design flexibility than gravel, tarmac, or plain concrete, without moving into the higher price bracket of natural stone or resin.

Installation Cost: £75–£140 per m² (materials only £40–£70)

Lifespan: 20–30 years 

What Factors Can Lower Your Driveway Costs?

Choosing a cheap material is only part of the equation. If you’re looking for the Budget-friendly way to make a driveway overall, how it’s designed and installed can make just as much difference to the final cost as the material itself. 

Keep the design simple

A straight, rectangular driveway will always cost less than a curved or intricately shaped one, since it needs less material and less labour to lay. Save any decorative flourishes, such as a border or pattern, for small accents rather than the whole surface.

Mix materials to spread the cost

Combining a cheaper base material, such as gravel or tarmac, with strips of block paving or a brick border can improve your property’s curb appeal without the expense of paving the entire driveway with a premium material. Browsing a few driveway edging ideas is a good starting point if you’re planning this kind of mixed-material approach. This is a popular way to make a budget driveway look more attractive and well-designed.

Consider doing some of the work yourself

Gravel driveways, in particular, suit a DIY approach, since laying a sub-base, weed membrane, and stone is straightforward compared with tarmac or concrete, which usually need professional plant and mixing equipment. Taking on the groundwork yourself can meaningfully cut labour costs, provided it’s done correctly.

Stay on top of maintenance

Regular cleaning, prompt crack repairs, and resealing where needed all help avoid the bigger expense of an early replacement. This matters most for lower-cost materials like gravel and tar and chip, which need more upkeep to reach their expected lifespan.

gravel driveway installation in hertfordshire

Which Budget-friendly driveway option is right for you?

If your absolute priority is the lowest possible upfront cost, gravel is hard to beat, especially if you’re happy to do some of the installation yourself. If you’d rather spend a little more for something smoother and lower-maintenance, tarmac falls within a similar price bracket and requires less ongoing effort. For those planning to stay in their home long-term, concrete or concrete block paving costs more initially but often works out cheaper per year of use because it outlasts gravel and tarmac by a decade or more. For most standard house driveways, gravel or tarmac will still be the Budget-friendly option, unless durability is a higher priority than upfront cost.

At First4Paving, we offer gravel & Shingle services to suit a range of budgets and property styles. As experienced driveway contractors in Enfield, we help you weigh up your budget, how much maintenance you’re willing to take on, and how long you want the driveway to last before it needs attention again. If you’re ready to upgrade your property, contact us to find the right solution for your home.

Conclusion

There’s no single “cheapest” driveway that suits everyone, but gravel and tarmac consistently offer the lowest upfront costs, while concrete and block paving provide better long-term value for a modest price increase. Weighing cost, lifespan, and maintenance is the best way to find the option that actually saves you money in the long run. 

Whichever material you’re leaning towards, getting a clear, no-obligation quote is the easiest way to see real numbers for your own driveway. The team at First4Paving can talk you through the options, from gravel and tarmac installation to concrete and block paving, and help you find the most cost-effective fit for your home.

FAQ

How much does a gravel driveway cost? 

A gravel driveway typically costs between £25 and £50 per m² for materials only, or £40 to £70 per m² fully installed, making it the Budget-friendly driveway option in the UK. The final price depends on the driveway size, gravel type, and any chosen edging.

Is gravel the Budget-friendly driveway option compared with tarmac? 

Yes, gravel is generally the cheaper of the two, with fully installed costs around £40–£70 per m² compared with £45–£95 per m² for tarmac, though tarmac tends to last longer with less ongoing maintenance.

Can I lay a cheap driveway myself to save money? 

Yes, gravel driveways are the most DIY-friendly option, since they don’t require specialist mixing or laying equipment, unlike tarmac or concrete, which are best left to professionals.

Does driveway shape affect the cost? 

Yes, a simple straight or rectangular driveway will cost less than a curved or patterned design, since it uses less material and requires less labour to install.

Is the Budget-friendly driveway option always the best value? 

No, the Budget-friendly material upfront isn’t always the best value over time, as options like gravel require more frequent maintenance and replacement than pricier, longer-lasting surfaces like concrete or block paving.

how to seal a driveway in Enfield

How to Seal a Driveway in Enfield and Make It Last for Years

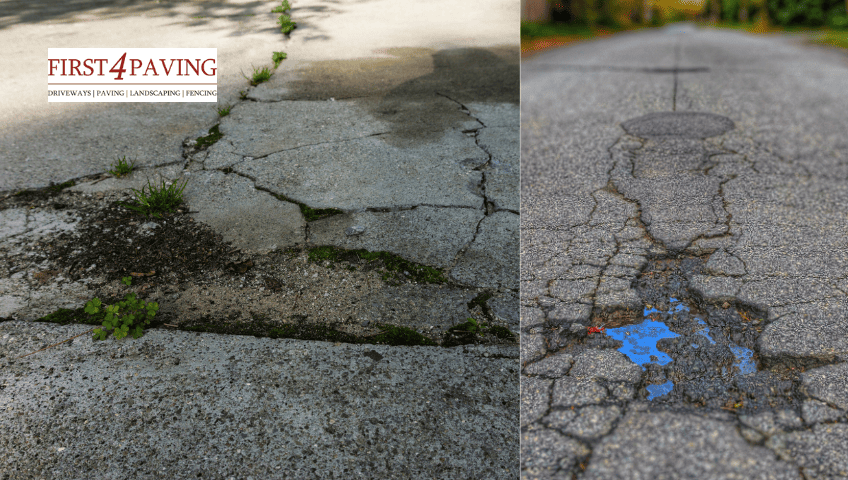
Most driveways in Enfield are silently deteriorating and the owners have no idea. A few hairline cracks here, some fading colour there, weeds pushing through the joints. It looks like normal wear and tear. But underneath, water is working its way in, freezing in winter and slowly breaking the surface apart from within.

The fix is simpler than you think. A quality driveway sealer, applied correctly, creates a protective barrier that stops water, blocks stains, prevents weeds, and keeps your driveway looking its best for years. If you’re wondering how to seal a driveway in Enfield, this step-by-step guide explains everything you need to know to achieve a long-lasting finish.

Why Sealing a Driveway Matters

The benefits of sealing a driveway go well beyond appearance. A quality driveway sealer creates a protective barrier that helps protect your driveway from the weather, vehicle traffic, and everyday wear.

  • Water penetration: Water seeping into cracks can freeze and expand in winter, worsening existing damage over time.
  • Oil and fuel stains: Unsealed surfaces absorb spills quickly, often leaving permanent marks. A sealed driveway makes stains much easier to clean, but if you’re already dealing with a struggle here’s how to remove an oil stain from a driveway.
  • Weed growth: Sealer helps lock in jointing sand, reducing gaps where weeds can take root, particularly on block-paving driveways.
  • UV fading: Prolonged exposure to sunlight can cause tarmac, concrete, and resin surfaces to fade. Sealing helps preserve their appearance for longer.
  • General surface wear: Daily vehicle and foot traffic gradually wear down driveway surfaces. A protective sealant adds an extra layer of durability.

For homeowners in Enfield, regular driveway sealing is one of the most cost-effective ways to extend a driveway’s lifespan and reduce the likelihood of costly repairs.

Signs Your Driveway Needs Sealing

Not sure if it is time to seal your driveway? Here are some of the most common warning signs:

  • The surface has lost its original colour and appears faded or dull
  • Water absorbs into the surface rather than beading on top
  • Weeds are growing through block paving joints
  • Small cracks are beginning to appear
  • Oil, dirt, and tyre marks are becoming difficult to remove
  • Jointing sand is washing out between paving blocks

cracked driveways in Enfield

Spotting these signs early can prevent expensive repairs later on. If you’re seeing more than one or two of these on your driveway, it’s worth speaking to a professional before the damage gets worse. A quick inspection from an experienced driveway contractor in Enfield can save you a lot of money down the line.

How to Seal a Driveway in Enfield Step by Step

Whether you are tackling this as a DIY project or preparing for a professional visit, understanding how to seal a driveway step by step helps you get the best possible result.

What You Will Need

  • Pressure washer or stiff brush and hosepipe
  • Weed killer (if required)
  • Crack filler suitable for your surface type
  • Kiln-dried sand (for block paving joints)
  • Appropriate driveway sealer for your surface
  • Long-handled squeegee, brush, or roller
  • Protective gloves and old clothing

Step 1 — Choose the Right Conditions

Sealing driveway surfaces is weather-dependent. You need at least two dry days and a temperature above 10°C. Avoid sealing in direct summer sun as the product can dry too quickly. Late summer or early autumn is ideal for UK homes.

Step 2 — Clear and Clean the Surface

  1. Remove all vehicles and debris. Sweep the driveway, then pressure wash the entire surface. If your driveway has stubborn dirt or grime buildup, read this guide on cleaning a tarmac driveway before you begin sealing. Use a specialist driveway degreaser on oil stains and allow it to work before rinsing. Treat any weeds with weed killer and sweep out dead growth from the joints. Allow the surface to dry fully, typically 24 to 48 hours.

Step 3 — Repair Cracks and Damage

Fill any cracks using a suitable filler for your surface type. Never seal over existing damage it hides the problem but does not fix it. For block paving, re-brush kiln-dried sand into the joints at this stage.

Step 4 — Apply the Driveway Sealer

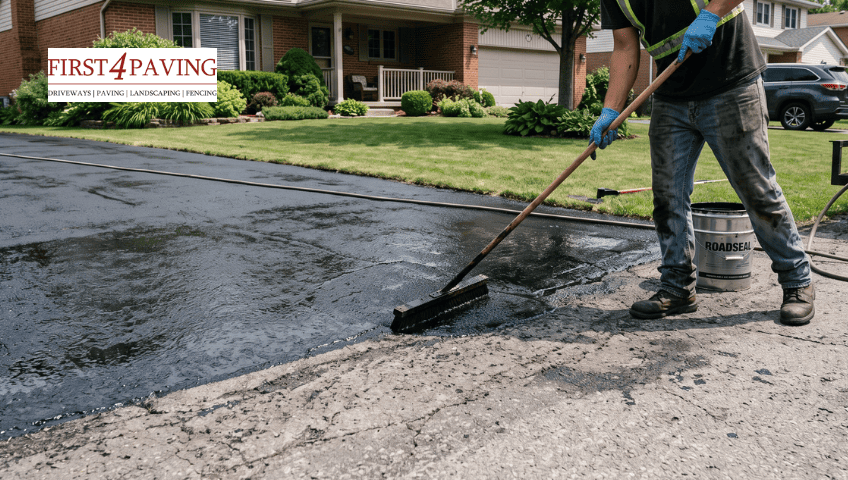
To seal a driveway like a professional, preparation is everything, but application technique matters just as much. Shake or stir the sealer well before opening. Work from the furthest point back towards the street to avoid walking on wet sealer. Apply thin, even coats rather than one thick application. Thick coats take longer to cure, are more likely to streak, and can leave a tacky finish.

Step 5 — Second Coat and Curing

Many sealers benefit from a second coat once the first has dried; check the manufacturer’s instructions. Foot traffic can usually resume after a few hours. Keep vehicles off for at least 24 to 48 hours.

Can You Seal a Driveway Yourself?

If you’re planning how to seal a driveway in Enfield yourself, it is possible, but it is not as simple as it looks. Sealing a driveway yourself is achievable, though the results depend almost entirely on preparation. Many homeowners underestimate this part. Skipping a proper clean, missing cracks, or applying sealer in the wrong conditions can leave a finish that peels or wears away within months.

DIY sealants are also less concentrated than trade-grade products, and a domestic pressure washer rarely matches the performance of professional equipment. For a small driveway in good condition, results can be acceptable. For anything larger or more damaged, the gap between DIY and a professional finish becomes difficult to close.

Professional help is worth considering when there is significant cracking, weed damage, or when a long-lasting result is the priority. 

How Long Does Driveway Sealer Last?

Surface TypeTypical Sealer Lifespan
Tarmac / Asphalt2–4 years
Block Paving3–5 years
Concrete2–5 years
Resin Bound5–10 years

For most residential driveways in Enfield, resealing every 2 to 3 years is the right routine. Block paving may need more frequent attention as jointing sand washes out over time.

Common Driveway Sealing Mistakes to Avoid

Even with good intentions, these common driveway sealing mistakes reduce the effectiveness of the sealant:

  • Sealing over a dirty surface: Dirt and oil trapped under sealer prevent proper adhesion and cause peeling.
  • Applying in cold or wet conditions: Below 10°C or in damp weather leads to poor bonding and an uneven finish.
  • Coats that are too thick: Thick coats streak, stay tacky, and wear unevenly.
  • Ignoring cracks before sealing: Always repair first, never seal over damage.
  • Using the wrong product: Always match the sealer to your specific surface type.

Driveway Maintenance Tips for Enfield Homeowners

After sealing, regular care preserves the finish and extends the time before your next reseal is needed. These driveway maintenance tips are especially relevant for UK homes, where wet winters and temperature changes put outdoor surfaces under constant pressure.

  • Sweep leaves and debris regularly
  • Clean oil spills as soon as they happen
  • Avoid harsh chemicals such as bleach or solvents
  • Use sand or driveway-safe grit in winter instead of salt-based deicers
  • Reapply sealer when you notice protection starting to fade

Knowing how to maintain a sealed driveway is the simplest way to avoid unnecessary repairs and keep your driveway looking its best year-round.

At First 4 Paving, we have years of experience caring for driveways across Enfield and the surrounding areas. Whether you have block paving, tarmac, resin, or concrete, our team provides expert cleaning, repairs, and sealing to keep your driveway protected and looking great. Contact our team today for a free driveway assessment and no-obligation quote.

how to seal a driveway in Enfield

Conclusion

Knowing how to seal a driveway in Enfield is one of the most effective ways to protect it from the UK’s wet winters, frost, and everyday wear. Clean the surface properly, use the right sealer for your surface type, and stick to a regular maintenance routine and your driveway will stay in great condition for years to come.

If you are based in Enfield and need a professional finish, our expert team specialize in driveways Enfield homeowners trust.

Get in touch, and we will be happy to help you.

FAQ

How long does driveway sealer last?

Between 2 and 5 years depending on the surface type, product quality, and traffic levels.

Does sealing prevent weeds?

It significantly reduces weed growth by locking in jointing sand, though annual maintenance is still recommended.

Does driveway sealer protect against rain?

Yes. A quality driveway sealer creates a protective barrier that helps prevent water from soaking into the surface, reducing the risk of cracks, erosion, and frost damage.

How often should you seal a driveway?

Most driveways should be resealed every 2 to 5 years, depending on the type of surface, weather conditions, and the amount of traffic they receive.


How to Landscape a Garden

How to Landscape a Garden: The Full Process, Step by Step

    Most garden projects go wrong for the same reason. People start with the fun part — picking paving slabs, choosing plants — and only think about levels, drainage and access once the digger is already booked.

Get the order right, and the rest becomes straightforward. This guide walks through the whole garden landscaping process the way a landscaper actually works: survey first, drainage second, hard landscaping third, planting last. It covers UK planning rules, realistic 2026 costs, what changes on clay soil, and the mistakes that cost people money twice.

How to Landscape a Garden in 10 Steps (Quick Summary)

  1. Decide how you’ll use the space before you design anything.
  2. Measure the garden and check the levels, not just the outline.
  3. Test your soil and note where the sun falls through the day.
  4. Check planning rules — especially for front gardens, raised decking and fences.
  5. Plan where water will go before you plan where paving will sit.
  6. Set a budget and split it between hard landscaping and planting.
  7. Clear the site, dig out, and set your levels and falls.
  8. Build the hard landscaping: patio, paths, walls, steps, fences.
  9. Prepare the soil properly, then turf and plant.
  10. Add lighting, irrigation and finishing touches last.

Each step below explains the reasoning, the numbers, and what goes wrong when people skip it.

The Full Garden Landscaping Process, Step by Step

Step 1: Work Out How You’ll Actually Use the Garden

A garden design that ignores daily habits looks good in a drawing and annoys you for a decade.

Sit down and answer these before sketching anything:

  • Where does the sun hit at 6 pm in June? That’s where the seating goes, not wherever’s closest to the back door.
  • Do you need a bin store, bike store, or somewhere to dry washing? These get forgotten and then bolted on badly.
  • Are there children or a dog? That changes lawn size, planting choice and whether gravel is a good idea.
  • How much maintenance will you genuinely do? Be honest. A border that needs weekly attention becomes a weed bed by August.
  • Will you eat outside? A table for six needs about 3m x 3m of clear paving, more if chairs need to push back.

Write down the three things you want most. Everything else is negotiable when the budget tightens — and it usually does.

Step 2: Survey the Garden Properly

Measure the boundaries, then measure the levels. Level changes are what turn a £6,000 job into a £16,000 one, and they’re invisible on a plan view.

What to record:

What to checkWhy it matters
Garden dimensions and boundary linesSets the design and the fencing cost
Level differences from house to rear boundaryDetermines retaining walls, steps, and how much soil moves
Damp proof course (DPC) height on the house wallFinished paving must sit at least 150mm below it
Position of manholes, gullies, drain runsThese must stay accessible; you cannot build over them
Side access width and gate heightUnder about 900 mm, and everything comes through the house by barrow
Existing trees and their spreadRoots, shade, and possible legal protection
Where water pools after heavy rainShows you the low points and drainage problems

The DPC point catches people out constantly. Paving laid too high against the house bridges the damp proof course and pushes moisture into the wall. Two brick courses of clearance is the working rule. If you’re paving right up to a threshold, you need a drainage channel there instead.

Checking levels without kit: run a taut string line from a peg at the house wall to a peg at the far end, keep it level with a spirit level, and measure down to the ground every couple of metres. Crude, but it tells you whether you have a 200mm drop or a 900mm one — and that’s the number that shapes the budget.

Step 3: Know Your Soil and Light

Soil determines what survives. Light determines what thrives.

A two-minute soil test: dig a hole about 30cm deep. Squeeze a handful of damp soil.

  • Rolls into a smooth sausage and stays shiny — clay.
  • Feels gritty and won’t hold shape — sandy.
  • Holds shape but crumbles when poked — loam. That’s the good one.
  • Pale, stony, fizzes with vinegar — chalky and alkaline.

Then fill the hole with water and watch it. Gone within an hour or two: free-draining. Still sitting there the next morning: you have a drainage problem to solve before anything else happens.

Much of North London, including large parts of Enfield, sits on London Clay, with river terrace gravels along the Lea Valley to the east. You can check the bedrock under any address free on the British Geological Survey map viewer. Clay holds water in winter, sets like concrete in summer, and swells and shrinks with the seasons.

Light: track shade across a full day and note it. North-facing gardens get sun at the far end; south-facing get it near the house. Shade under a mature tree is dry shade, which is a much harder planting brief than damp shade and needs entirely different plants.

Step 4: Check the Planning Rules Before You Commit

Most back garden work is permitted development. Front gardens and anything raised are where people get caught.

Front gardens and driveways

Since October 2008, paving your front garden has had its own rule. If the area is more than five square metres and you use an impermeable surface that drains onto the road, you need planning permission. Use a permeable surface, or direct the run-off into a border, lawn, or soakaway on your property, and no permission is needed regardless of size.

Permeable options include gravel, permeable block paving, porous asphalt and resin-bound surfacing. Standard concrete, sealed imprinted concrete and normal tarmac are impermeable unless the run-off is handled.

Five square metres is roughly one parking space, so almost any real driveway clears that threshold. 

Decking and raised patios

Decking and raised platforms are permitted development only if:

  • No part sits more than 300mm (30cm) above ground level at any point.
  • The decking, together with outbuildings and other structures, covers no more than 50% of the garden.
  • None of it sits forward of the principal elevation of the house.

Go above 300mm anywhere, and you need planning permission. On a sloping garden that’s easy to breach without realising — the deck can be 150mm high at the house and a metre high at the far end. Councils take overlooking seriously, and enforcement notices for raised decking are common.

Fences, walls and gates

Two metres is the general maximum height without permission. That drops to one metre where the boundary adjoins a highway used by vehicles, or a footpath beside one. Height is measured from ground level on the higher side.

Trees

Trees can be protected by a Tree Preservation Order, or simply by sitting in a conservation area. In a conservation area, you generally have to give the council six weeks’ written notice before pruning or felling a tree above 75mm trunk diameter. Unauthorised work on a protected tree is a criminal offence with serious fines. Enfield publishes its protected tree map and notification process on the council’s tree protection page.

Front gardens and driveways

The ones nobody mentions

  • Conservation areas and Article 4 directions can remove permitted development rights entirely. Check before you spend on a design.
  • Flats and maisonettes don’t get householder permitted development rights at all.
  • The Party Wall etc. Act 1996 applies if you excavate within 3 metres of a neighbour’s building and go deeper than their foundations. Retaining walls and deep footings can trigger it.
  • Retaining walls over about a metre should be designed properly, not built by eye. A failed retaining wall is dangerous and expensive.

Step 5: Solve Drainage Before You Design Anything

Water is the single biggest cause of landscaping failure in the UK, and it’s almost always designed out at the start rather than fixed later.

The rules of thumb:

  • Patios need a fall of roughly 1:80 — about 12mm drop per metre — running away from the house.
  • Never fall towards a wall, a doorway, or a neighbouring boundary.
  • Paved run-off should go to a border, lawn, gully or soakaway, not to the street.
  • On clay, a soakaway may not work at all. The ground won’t take the water. You’ll need a linear drainage channel connected to a suitable outlet instead.

Where the water goes matters legally as well as practically. Directing new run-off onto a neighbour’s land creates a genuine dispute, and directing it to the highway is what the front garden rules exist to prevent.

If the garden already floods, deal with the cause first. That might be a French drain across the slope, a raised bed system that takes the water, or breaking up a compacted layer left behind by the housebuilder. Laying a patio over standing water just moves the puddle somewhere less convenient.

Step 6: Set the Budget — And Know Where It Goes

The uncomfortable truth about landscaping costs is that most of the money is spent on things you’ll never see again once the job is finished.

Groundworks — excavation, waste removal, sub-base, drainage — commonly account for 30% to 50% of a hard landscaping budget. That’s before a single slab is laid.

Typical 2026 UK cost ranges

These are indicative ranges reported across UK trade and quote-comparison sites in 2026. They include labour and materials. London and the South East typically run 20% to 30% above these figures.

ElementTypical range
Full garden landscaping, per m²£80 – £250 per m²
Patio, supplied and laid£80 – £200 per m²
Premium porcelain or natural stone patio£200 – £300+ per m²
Natural turf, including ground prep£15 – £30 per m²
Artificial grass, installed£60 – £120 per m²
Timber fencing£25 – £60 per linear metre
Retaining walls£150 – £300 per m² of facing
Breaking out and removing existing concrete£40 – £80 per m²

Whole-project bands most people land in: a refresh with turf, tidied borders and a small patio from around £3,000–£5,000; a mid-range project with new patio, fencing, lawn and planting at roughly £8,000–£18,000; a full redesign with level changes, walls, lighting and drainage from £18,000 upwards.

These are ranges, not quotes. Your garden cost depends on access, level changes, ground conditions, and how much material has to leave the site. Only a site visit produces a real figure.

The costs people forget

  • Muck-away. Excavated soil and broken concrete have to go somewhere. Skips and grab lorries add up fast, and clay is heavy.
  • Access. No side gate means every barrow of aggregate goes through the house or over the neighbour’s land. Some jobs price 20–30% higher on access alone.
  • Making good. Reinstating the lawn after machinery has crossed it, repointing where the patio meets the house, painting new fence posts.
  • VAT. Check whether quotes include it. A 20% surprise ruins a budget.

How to split the money

A useful starting split is roughly 70% hard landscaping, 30% soft — paving, walls, decking and fencing take the larger share, with turf, soil and plants taking the rest. If you need to cut costs, shifting that balance toward planting is the biggest single lever you have. Grass and shrubs cost a fraction of what paving costs per square metre.

A better saving than cheper materials: reduce the paved area rather than downgrade the paving. A smaller patio in decent stone beats a sprawling one in slabs that spall after three winters.

FIRST 4 PAVING · SINCE 1998

Want a real number instead of a range?

Free site visit, free design, no upfront payment and a fixed price for the whole project.

Step 7: Get the Order of Works Right

Sequence isn’t a formality. Doing things out of order means doing them twice.

  1. Clear the site. Remove old structures, unwanted planting, rubbish. Protect anything staying.
  2. Set out. Mark the design on the ground with pegs, string and marker paint. Live with it for a few days. Shapes read differently at full size.
  3. Excavate and set levels. Establish the finished levels and falls now — everything else references them.
  4. Install drainage and ducting. Any pipe, channel, cable or irrigation line that runs under a hard surface goes in now. Retrofitting means digging it all up.
  5. Build retaining structures and foundations. Walls, steps, footings for anything structural.
  6. Lay sub-bases. Compacted in layers, not all at once.
  7. Lay paving, build steps, install decking.
  8. Install fencing and boundaries. After paving, so you’re not working around new posts, but before topsoil goes down.
  9. Prepare soil and shape beds.
  10. Turf and plant.
  11. Lighting, furniture, pots, mulch.

Fencing sits at step 8 deliberately. Post holes on a boundary need access along that boundary, and dug spoil is easier to handle before the lawn exists.

Step 8: Groundworks — The Part That Decides Whether It Lasts

Excavation depth. A pedestrian patio is typically dug out 150–250mm to allow for sub-base, bedding and the paving itself. Driveways go deeper. On soft or clay ground, dig deeper.

Sub-base. Compacted MOT Type 1 crushed aggregate, laid and whacked down in layers of 50–75mm rather than in one thick pass. A single deep layer looks compacted on top and stays loose underneath. That’s where the settlement comes from two winters later.

Bedding. Paving should go onto a full mortar bed, not five dabs of mortar under each corner. The “five spot” method leaves voids, and voids fill with water, and water freezes. It’s the most common cause of cracked slabs in the UK.

Clay ground specifically. Clay moves. It swells when wet and shrinks when dry, and in a dry summer that movement is enough to open joints and tilt slabs. On clay you want a deeper, well-compacted sub-base, a geotextile membrane between subsoil and aggregate to stop the two mixing, and drainage that doesn’t rely on water soaking away into ground that won’t accept it. Fence posts want concreting properly and set below the seasonal movement zone.

Membranes. A woven geotextile under the sub-base separates layers and stops fines migrating upward. Plastic sheeting under a lawn is a different thing entirely — it traps water and kills the grass. Don’t confuse the two.

Step 9: Hard Landscaping Choices

Paving materials compared

MaterialStrengthsWatch out for
PorcelainVery low porosity, colour-stable, easy to clean, doesn’t stainSlippery if you choose an unsuitable finish; needs a slurry primer on the back of each slab; harder to cut
Indian sandstoneWarm natural look, wide availability, forgiving to layPorous — takes algae in shade; colour variation between packs
Concrete slabsCheapest per m², consistent sizingFades and can spall in frost; obviously manufactured
Block pavingIndividual blocks can be lifted and relaid; permeable versions availableNeeds proper edge restraint or it spreads; joints need sand topping up
GravelCheap, permeable, good for drainage and securityMigrates without edging; hard for wheelchairs, buggies and heels
Resin-boundSmooth, permeable, no jointsNeeds a sound base beneath; specialist installation

For shaded North London gardens, porcelain earns its extra cost. Sandstone in permanent shade grows algae and needs cleaning every year or two; porcelain doesn’t absorb enough water for that to happen.

Decking

Composite decking costs more upfront and needs almost nothing afterwards. Softwood costs less and needs treating, and it will need boards replacing eventually. Both need airflow underneath — a deck built tight to the ground rots from below.

Keep it under 300mm to stay within permitted development, and put a non-slip finish anywhere it gets shade or rain, because wet timber decking in a shady garden is genuinely dangerous.

Fencing

Concrete posts and gravel boards outlast timber posts substantially, because the rot happens at ground level where the post meets wet soil. Closeboard fencing lasts longer than lap panels. Check who owns the boundary before you take anything down — the deeds say, and neighbours often assume wrongly.

Solid fencing in a windy spot acts as a sail. Slatted or hit-and-miss designs let wind through and stay standing.

Step 10: Soft Landscaping — Soil, Turf and Planting

Soil preparation

This is where most DIY gardens fail. Machinery and foot traffic compact the ground during the build. Laying turf or plants straight onto compacted subsoil gives you shallow roots, standing water and a lawn that dies in its first dry summer.

Before anything goes in:

  • Break up the compacted layer to a spade’s depth.
  • Remove builders’ rubble, not just the visible pieces.
  • Add organic matter — well-rotted compost or manure — and work it in. On clay this improves structure; on sand it improves water retention.
  • Aim for 100–150mm of decent topsoil for lawn, 300mm+ for beds and considerably more for anything you want to grow well.

Turf

Lay turf onto a firm, raked, level bed. Butt the joints tightly and stagger them like brickwork. Water it thoroughly and keep watering daily for the first two to three weeks — new turf dies from drying out at the seams more often than from anything else. Stay off it for two or three weeks.

Best time: autumn, roughly September to November, when the soil is still warm and rain does the watering for you. Spring works. Mid-summer turfing is a watering commitment most people won’t keep.

Seed is far cheaper than turf but takes a full season to look established, and it needs bare soil kept moist and bird-protected. Fine if you can wait.

Artificial grass

Worth being clear-eyed about. It’s genuinely low maintenance, it stays green in drought, and it works in permanently shaded gardens where real grass gives up. It also gets uncomfortably hot in direct summer sun, supports no wildlife, needs a proper sub-base like paving does, and has a finite life before it needs replacing and disposing of. It’s not maintenance-free either — it needs brushing and rinsing, and it collects leaves.

Planting

Structure first, then filler. Trees and larger shrubs set the bones of the garden; perennials fill the gaps. A common ratio is roughly one third evergreen so the garden isn’t bare from November to March.

Practical points:

  • Check the mature size on the label, not the pot size in the shop.
  • Plant in odd-numbered groups of three or five. It reads more naturally than pairs.
  • Bare-root plants and hedging go in between November and March and cost a fraction of potted equivalents.
  • Keep trees away from the house. On shrink-swell clay, thirsty species close to shallow foundations are a subsidence risk — willow, poplar and oak are the usual suspects.
  • Mulch beds with 50–75mm of bark or compost. It suppresses weeds, holds moisture and slowly feeds the soil.

Step 11: Garden Lighting and Finishing Touches

Run electrical ducting during groundworks even if lighting comes later. An empty duct costs almost nothing; digging up a finished patio costs a great deal.

Outdoor mains wiring is notifiable work under Part P of the Building Regulations and should be done by a qualified electrician. Low-voltage systems are simpler and safe for DIY.

Light what’s worth seeing — a specimen tree, a wall texture, the steps — rather than flooding the whole garden. Warm-white, downward-facing fittings on the lowest usable output. Bright lights aimed sideways go straight into a neighbour’s window.

Garden Lighting and Finishing Touches Enfield

Best Time of Year to Landscape a Garden

Enfield’s weather shapes when each job is best done, and the table below sets out what suits each season.

SeasonGood forAvoid
Spring (Mar–May)Planting, turfing, starting buildsContractors are busiest; lead times stretch
Summer (Jun–Aug)Hard landscaping, dry ground for machineryTurfing and planting unless you’ll water daily
Autumn (Sep–Nov)Turfing, planting, hedging — the best windowLate autumn concrete work if frost threatens
Winter (Dec–Feb)Design, quotes, bare-root planting, clearanceMortar work in frost; heavy machinery on saturated ground

Booking a project in winter for spring delivery usually gets you better availability and more of the contractor’s attention than calling in April.

Common Garden Landscaping Mistakes and What They Cost

Paving laid too high against the house. Bridges the damp-proof course and causes damp inside. Fix: lift and relay, or install a drainage channel. Expensive either way.

No fall, or fall towards the house. Water pools on the patio and runs at the wall. Fix: relay the whole thing.

Thin or badly compacted sub-base. Slabs rock and sink within two winters. Fix: take up and start again.

Five-spot mortar bedding. Voids under slabs, cracks after frost.

Turf onto compacted ground. Yellow patches, standing water, and a lawn that dies in the first hot spell.

Impermeable front garden paving without permission. Councils can and do issue enforcement notices requiring removal.

Raised decking above 300mm without permission. Same outcome, plus an unhappy neighbour.

Planting for how it looks in the pot. Three years later, everything’s fighting for space and the shrub by the path has swallowed the path.

Ignoring access. Discovering on day one that the side gate is 700mm wide changes the price and the programme.

Landscaping Ideas for Different Garden Types

Small gardens

Diagonal layouts make a small plot feel larger than square ones do. Don’t wall the perimeter with narrow beds — a couple of generous beds beat a thin strip all the way round. Multi-use furniture, vertical planting on fences, and a single larger tree rather than several small ones all help. Resist paving the whole thing; a small green area does more for the feel of the space than another two metres of patio.

Sloping gardens

Two approaches: terrace it into level platforms with retaining walls, or work with the slope using stepped planting and a winding path. Terracing costs considerably more — retaining walls, drainage behind them, steps, handrails — but gives you usable flat space. Remember the 300mm decking rule and check whether new raised areas overlook neighbours, because that’s what planning objections are made of.

Water always runs downhill. Whatever you build, plan where it collects at the bottom.

Shaded gardens

Reflected light helps: pale paving, light fence colours, mirrors used carefully. Plant for the conditions rather than fighting them — ferns, hostas, hellebores, epimedium, box, hydrangea. Porcelain paving over sandstone, because shade means algae. If a neighbour’s tree causes the shade, you can prune growth overhanging your boundary back to the line, but only if the tree isn’t protected, and the cuttings legally belong to the tree’s owner.

Clay soil gardens

Never dig or walk on clay when it’s wet — you’ll compact it into something nothing will grow in. Add organic matter every year rather than trying to fix it in one go. Raised beds sidestep the problem entirely for planting. For hard landscaping, expect deeper excavation, more sub-base, and a drainage solution that doesn’t assume water will soak away.

Front gardens

Keep some of it planted. Beyond the planning rules, a fully paved front garden makes the house look harder and does nothing for the street. A permeable driveway with planted margins costs no more than a fully paved one and both drains better and looks better.

Should you do it yourself or hire a landscaper?

Reasonable DIY: planting, turfing a flat area, painting fences, gravel paths with edging, small raised beds, mulching, low-voltage lighting.

Worth paying for: anything involving level changes, retaining walls, drainage, patios over about 15m², driveways, structural work near boundaries, and any job needing a mini-digger.

If your project appears anywhere on that second list, get it priced by a professional landscaper in Enfield before you order materials. A quote costs nothing and usually saves more than it reveals.

The honest reason isn’t skill — it’s that the failure mode is expensive. A badly planted shrub costs £15 to replace. A badly laid 30m² patio costs several thousand to take up and do again, and you’ll have lived with it settling for two years before you accept it needs redoing.

Access is the other factor. Professionals have grab lorries, whackers, and the ability to move eight tonnes of aggregate in a day. Barrowing that through a house takes a fortnight and ruins the hallway.

Landscaping a garden in Enfield and North London

A few things apply specifically to gardens in this part of London.

Ground conditions. Much of the borough sits on London Clay, with river terrace gravels toward the Lea Valley in the east. Clay affects everything: sub-base depth, drainage design, fence post fixing, and which trees you can safely plant near the house. It’s the main reason a patio that would be straightforward in Norfolk needs more groundwork here.

Surface water. North London’s drainage network is under pressure, and paved-over front gardens are a recognised contributor to surface water flooding. The permeable paving rules exist for that reason, and local authorities take them seriously.

Conservation areas and protected trees. Enfield has a number of conservation areas and around the borough there are trees under Tree Preservation Orders. Both can restrict what you build and what you cut back. Check the council’s planning constraints information before finalising a design that involves removing a tree or building near one.

Housing stock. A lot of Enfield’s suburban housing dates from the interwar period — long, narrow rear gardens, side access of variable width, and original shallow foundations that make tree planting near the house worth thinking about carefully.

Access. Terraced and semi-detached streets across Enfield, Edmonton, Palmers Green and Winchmore Hill often have restricted parking and narrow side returns. That affects how materials reach the garden and therefore what the work costs.

Conclusion

The gardens that still look good in ten years share the same things: levels sorted properly, water going where it should, a base built deeper than it needed to be, and planting chosen for the conditions rather than the photograph.

If your project involves changes in level, drainage problems, clay ground or anything structural, get a landscaper out to look at it before you commit to a design. A site visit costs nothing and usually changes at least one thing about the plan.

First 4 Paving has been landscaping gardens across Enfield, North London and Hertfordshire since 1998 — garden design, patios, paving, turfing, fencing, decking and drainage. Free site visits, free design, and no upfront payment.

Planning your garden?
Talk to First 4 Paving about your project and get a clear idea of the cost.

FAQs

How long does it take to landscape a garden?

A small refresh takes two to four days. A mid-sized project with a patio, fencing and turf usually runs one to three weeks. Full redesigns with level changes, walls and drainage take four to eight weeks or longer. Weather delays are normal on groundwork and mortar work.

What’s the cheapest way to landscape a garden?

Keep the existing levels, use gravel rather than paving, grow from seed instead of turf, plant bare-root in winter, and buy smaller plants and let them grow. Changing levels is where costs escalate, so working with what you have saves the most.

Should I lay turf or artificial grass?

Real turf if the area gets reasonable light and you’ll mow it. Artificial if the garden is deeply shaded, gets heavy dog or child traffic that kills grass, or if mowing genuinely won’t happen. Artificial costs more to install and has a replacement cost at end of life, so the long-term saving is smaller than it first appears.

Can I lay a patio on soil?

No. Paving laid on soil sinks, tilts and cracks. It needs excavation, a compacted sub-base and a proper bedding layer. Skipping the base is the most expensive shortcut in landscaping.

What order should I do my garden in?

Clear, set out, excavate, drainage and ducting, foundations and walls, sub-base, paving and decking, fencing, soil preparation, turf and planting, lighting last.


How Weather in Enfield Impacts Landscaping, Cleaning, and Outdoor Work

Many Enfield homeowners believe UK weather is too unpredictable to plan outdoor work around. One minute it’s sunny; the next, you’re watching rain roll in and wondering if you should’ve waited another week to book that driveway clean.

Here’s the thing, though. Enfield’s weather isn’t actually random. It follows fairly consistent seasonal patterns, and once you understand them, you can time your landscaping, cleaning, and outdoor projects far more effectively than most people realise.

This guide breaks down exactly how weather affects landscaping, exterior cleaning, and general outdoor work across Enfield, season by season, so that you can plan with confidence instead of guesswork.

What Enfield’s Weather Actually Looks Like Through the Year

Enfield sits in a temperate oceanic climate zone, which means no extreme heat, no brutal winters, but plenty of rain spread fairly evenly across the year.

A few numbers worth knowing:

  • Average annual rainfall sits around 720mm, spread across roughly 130 rainy days a year
  • Temperatures typically range from about 9°C in January to 23°C in July
  • August tends to be the wettest month, while March is usually the driest
  • Frost and near-freezing mornings are most common through January and February

None of this means outdoor work grinds to a halt for half the year. It just means timing matters, and knowing what each season brings helps you avoid costly mistakes.

How Weather in Enfield Impacts Landscaping

Landscaping work is more weather-sensitive than most homeowners expect. Soil, plants, turf, and hard surfaces all react differently depending on temperature and moisture, and poor timing can undo weeks of planning.

Weather in Enfield Impacts Landscaping

Wet Weather and Waterlogged Ground

Heavy or prolonged rain saturates soil, making it unstable and difficult to work with. If you’ve ever tried digging a flower bed after a wet week, you’ll know the ground turns to soft mud rather than firm, workable earth.

This matters for a few reasons:

  • Waterlogged soil compacts poorly, which weakens the base for patios, paths, or new turf
  • Trenches for drainage or edging can flood, adding delays
  • Heavy machinery and foot traffic on soaked ground cause rutting and long-term damage to lawns

Light rain rarely causes major issues, but sustained wet spells, particularly through autumn, often push landscaping timelines back.

Frost and Freezing Conditions

Enfield winters aren’t severe, but frost still causes real problems for landscaping projects. Frozen ground is extremely hard to dig, and any concrete or mortar work laid in freezing temperatures risks weakening as it cures.

Frost heave is another concern. When water in the soil freezes and expands, it can lift or crack recently laid surfaces, undoing work that looked perfectly solid the day before.

Turfing is also best avoided during hard frosts, since newly laid grass struggles to root properly in frozen soil.

Heat and Dry Spells

Enfield summers rarely reach extreme temperatures, but dry spells still create their own set of challenges. Compacted, dry soil doesn’t hold new plants or turf well, and freshly laid grass can dry out and die within days if it isn’t watered consistently.

Hard landscaping is generally easier in dry weather, but there’s a balance. Very hot, sunny conditions can cause materials like concrete to cure too fast, increasing the risk of surface cracking.

Best Time to Landscape a Garden in Enfield

The best time to landscape a garden in Enfield depends more on soil condition than anything else. Late spring through early summer usually offers the most workable ground: winter and early spring rain has drained away, but the peak dry spells of high summer haven’t set in yet to bake the soil hard. That balance matters most for turfing and planting, since roots need soil that’s neither waterlogged nor compacted dry.

Fencing and some hard landscaping jobs are less fussy about this window and can often go ahead across most of the year, weather on the day permitting. If you’re planning a full garden landscaping project, factoring season and ground conditions into the schedule from the outset can make the difference between work that lasts and work that needs redoing within a year. 

How Weather in Enfield Impacts Cleaning

Why Rain Doesn’t Actually Clean Your Driveway

Many homeowners assume rain does half the cleaning job. It doesn’t. Rainwater picks up dust, pollen, and airborne grime as it falls, then deposits it across your driveway or patio as it dries, often leaving faint streaking and residue behind rather than removing it.

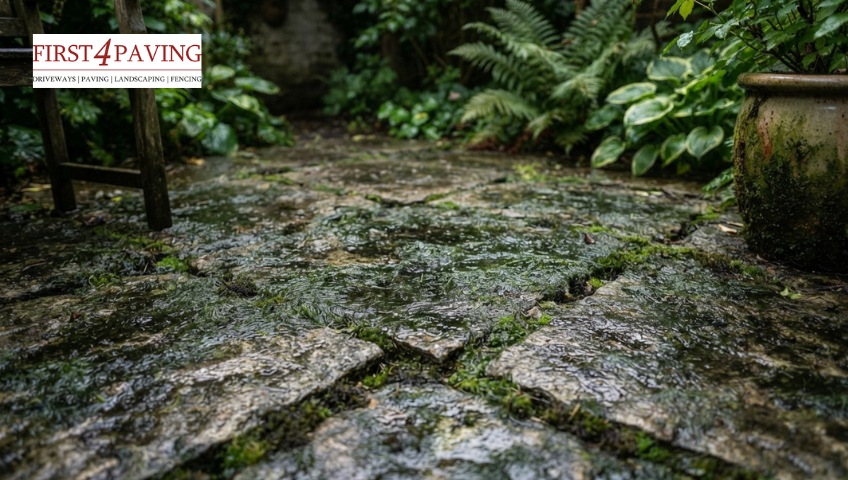
Worse, rain creates the damp conditions that moss, algae, and lichen need to establish themselves in the first place. So while it might look like your driveway gets a rinse, it’s often quietly getting dirtier and more slippery underneath.

Moss, Algae and Damp Season Buildup

Shaded, north-facing, or poorly draining areas of a driveway or patio are particularly prone to organic growth during Enfield’s wetter months. Once moss or algae takes hold in block paving joints or on porous stone, it spreads quickly if left untreated.

This buildup isn’t just cosmetic. It makes surfaces genuinely slippery, which becomes a real safety concern on steps, paths, and driveways during autumn and winter.

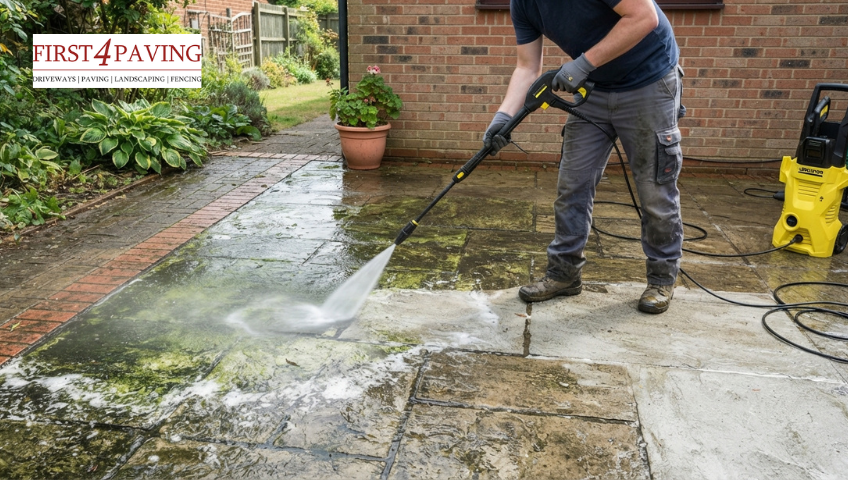
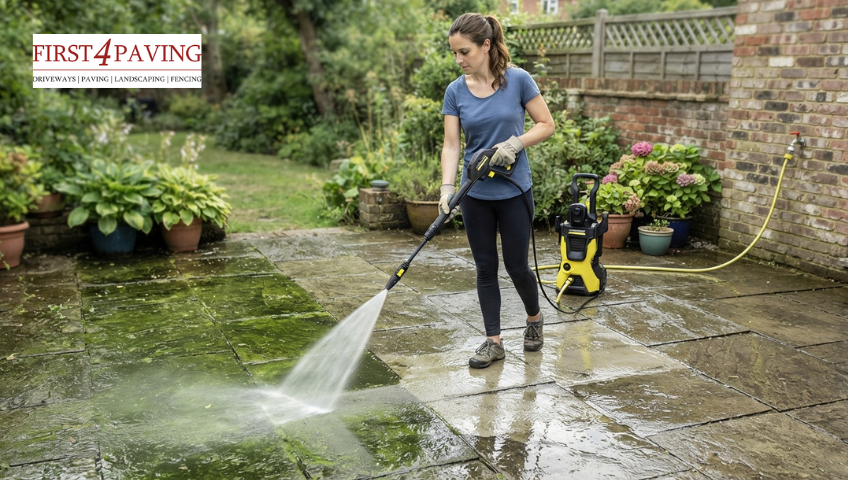
Best Weather for Pressure Washing

The best weather for pressure washing depends on how quickly the surface can dry afterwards, not just whether it’s sunny. Dry, mild days with a light breeze let cleaning solutions sit and work properly before rinsing, rather than being washed away too soon or drying out before they’ve done their job.

A few practical points:

  • Avoid pressure washing during or right before heavy rain, since the ground won’t dry properly
  • Skip freezing days, as water can turn to ice on the surface and create a hazard
  • Very hot, direct sun isn’t ideal either, since cleaning solutions can dry out too quickly to work effectively

If your driveway or patio has picked up moss, algae, or stubborn staining, professional pressure washing timed to the right weather window delivers noticeably better, longer-lasting results than a rushed DIY job in the rain. Our Driveways & Patios Cleaning service explains the methods we use for each surface type. For a season-by-season timing guide, see the summary table below. 

How Weather in Enfield Impacts Outdoor Work

Not every outdoor job reacts to weather in the same way. Some tasks can push through light rain without issue, while others need dry, stable conditions from start to finish.

outdoor space

Job by Job Weather Sensitivity

Driveways and paving: Laying block paving, tarmac, or resin needs reasonably dry, mild conditions. Rain can interfere with subbase compaction, and finishing touches like kiln-dried sand or resin bonding need dry weather to set properly. Gravel and shingle driveways are a little more forgiving, since there’s no bonding process to disrupt, though ground preparation still goes more smoothly in a dry spell. 

Patios: Natural stone and porcelain paving require dry conditions so bonding agents and primers can cure correctly. Grouting and jointing are particularly weather-sensitive, since heavy rain can wash the compound away before it sets, which is why patio installation timing matters as much as the materials themselves. 

Fencing: This is one of the more flexible outdoor jobs. Fence posts can usually go in during light rain, as long as the ground isn’t waterlogged or frozen solid.

Best Months for Outdoor Projects in Enfield

Picking a dry month is only half the equation; availability matters just as much, and late spring and summer book up fastest as contractors’ busiest season. Autumn and even winter can work well for more flexible jobs like fencing, often with better availability and less waiting around.

A Season-by-Season Summary for Enfield Homes

Here’s a compact, at-a-glance version of the timing points above, useful to keep handy when you’re planning work across the year:

SeasonMonthsKey Tasks
SpringMar–MayThe ground has dried out enough for turfing and planting. Good time for a full driveway and patio clean after winter grime. 
SummerJun–Aug Peak window for driveway installs, patio laying, and pressure washing. Book early, as this is the busiest season for contractors. 
AutumnSep–Nov Good for fencing work, treating early moss growth, and clearing gutters before winter sets in. 
WinterDec–Feb Outdoor work is still possible on dry, mild days. Best used for planning, design, and getting quotes sorted ahead of spring. 

How FIRST 4 PAVING LTD Plans Around Enfield Weather

Since 1998, FIRST 4 PAVING LTD has worked through pretty much every kind of weather Enfield throws at us, from soggy spring mornings to dry summer heatwaves. That experience means we know when to push a project forward and when it genuinely pays to wait for better conditions.

Whether you need a new driveway, a full landscaping project, or a thorough clean to bring tired paving back to life, our team plans around the weather rather than working against it. That’s how we protect the quality of every job, backed by our no-deposit approach on jobs like patio installations. If you’re planning any outdoor project this year, get in touch, and we’ll help you find the right timing.

Frequently Asked Questions

Does bad weather affect the cost of a job?

Not usually the quoted price itself, but weather can affect the schedule. If ground conditions mean extra prep work, such as dealing with waterlogged soil before turfing, that’s the kind of thing a contractor should flag at the quote stage rather than after work starts.

What happens if rain hits partway through an installation?

It depends on the stage. Early groundwork can often continue in light rain, but anything involving bonding, jointing, or freshly poured concrete usually needs to pause until conditions dry out, then resume once it’s safe.

My driveway keeps getting mossy even in shaded spots; what actually helps?

Beyond a one-off clean, the most effective fix is a biocide treatment applied after pressure washing, which slows regrowth in shaded or damp-prone areas far longer than washing alone. Improving drainage nearby also helps reduce how quickly it returns.

What happens if it rains on the day my job is booked?

Most contractors will reschedule rather than push ahead in unsuitable conditions, since rushing weather-sensitive work rarely holds up long term. Ask how a company handles rescheduling before booking, especially for jobs booked well in advance. 

What Is the Best Material for a Patio

What Is the Best Material for a Patio: A Complete Homeowner’s Guide

Porcelain paving is generally considered the best patio material overall. It is non-porous, highly weather-resistant, requires minimal maintenance, and can last 20 to 30 years with little upkeep, making it ideal for the UK’s unpredictable climate. That said, the right choice still depends on your budget and style. 

A patio is one of the most valuable additions you can make to your outdoor space. It extends your living area, boosts kerb appeal, and can even increase your property’s value. However, the material you choose will determine how your patio looks, how long it lasts, and how much upkeep it demands over the years. With so many options on the market, homeowners often find the decision overwhelming.

In this guide, we walk you through the most popular patio materials used across the UK, looking closely at their advantages, drawbacks, and the situations they suit best, so you know exactly which option is right for your home.

Types of Patio Materials for UK Homes

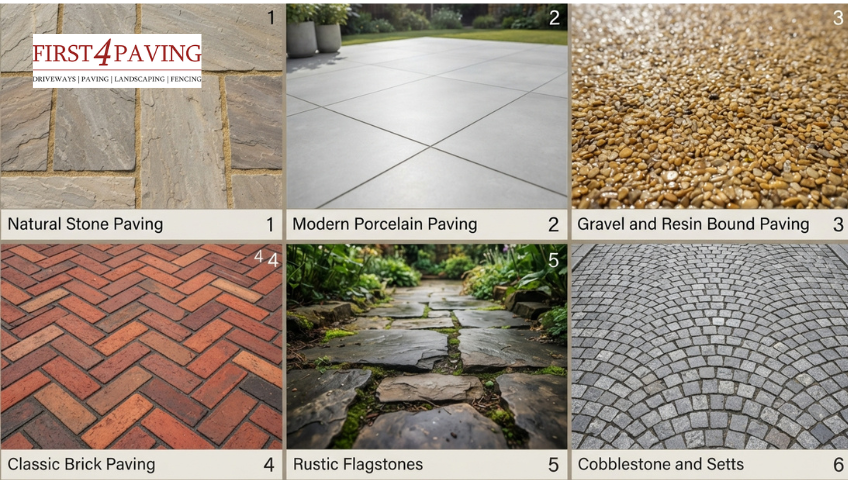
1. Natural Stone Paving

Natural stone, such as Indian sandstone, limestone, or granite, remains one of the most sought-after choices for UK homeowners who want a premium, timeless finish. Its natural origins mean every patio has a distinct character, making it a popular choice for those who want their outdoor space to feel truly one of a kind. It also tends to age gracefully, developing a subtle patina that many homeowners find adds to its charm over time.

Natural Stone Paving

Advantages:

  • Unique, natural variation in colour and texture, meaning no two slabs are identical
  • Extremely durable, often lasting 20 years or more with proper care
  • Adds significant kerb appeal and property value
  • Available in a wide range of finishes, including riven, honed, and tumbled

Considerations:

  • Higher upfront cost compared to concrete or gravel
  • May require periodic sealing to prevent staining and moss growth
  • Some stones, such as sandstone, can be porous and prone to weathering if untreated

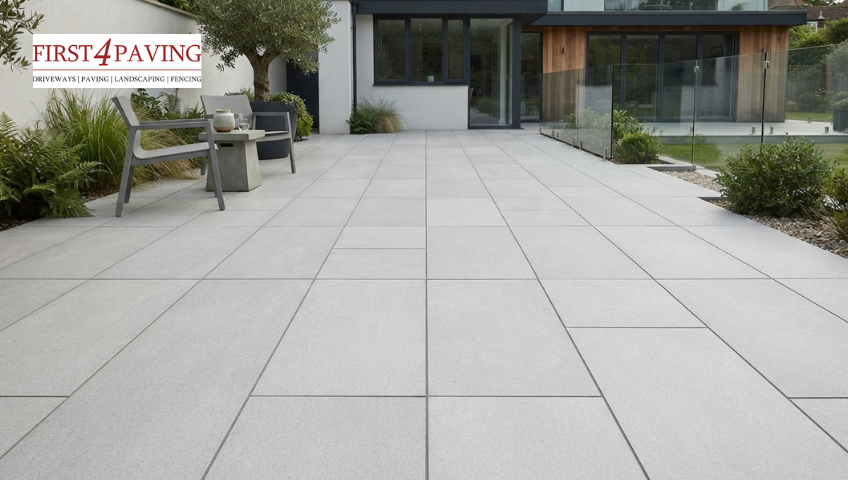
2. Porcelain Paving

Porcelain has surged in popularity in recent years, and for good reason. It combines a high-end appearance with practical, low-maintenance performance. Manufactured under controlled conditions, it offers a level of consistency and precision that natural materials can’t match, making it a favourite among homeowners who want a clean, contemporary finish without compromising durability.

Porcelain Paving

Advantages:

  • Non-porous, so it resists staining, frost damage, and algae — a real advantage over more porous surfaces where stopping green algae on patio slabs becomes an ongoing task
  • Extremely low maintenance, as a quick wash keeps it looking new
  • Consistent colour and finish, ideal for a modern, uniform look
  • Slip-resistant options available for pool areas and wet conditions

Considerations:

  • Higher initial cost, similar to or above natural stone
  • Requires precise installation, so professional fitting is recommended
  • Limited natural texture variation compared to stone

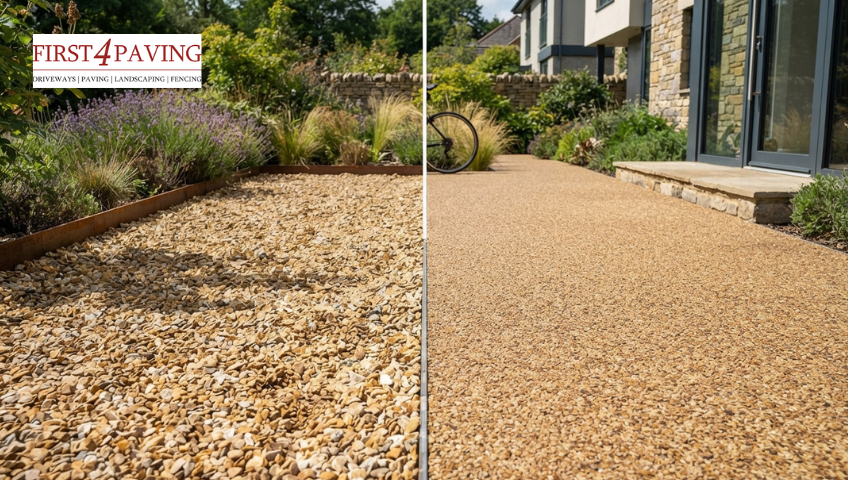
3. Gravel and Resin Bound Surfaces

For homeowners wanting a more informal or contemporary look, gravel and resin-bound patios offer flexibility and fast installation. These surfaces work particularly well for irregular or curved layouts where rigid materials would be more difficult and costly to install, and they can be a practical solution for homeowners looking to update their outdoor space without a lengthy project timeline.

Gravel and Resin Bound

Advantages:

  • Among the most affordable patio options
  • Quick and straightforward to install
  • Resin-bound surfaces are permeable, aiding drainage and reducing puddling
  • Easy to adapt to curved or irregular patio shapes

Considerations:

  • Loose gravel can migrate and requires occasional top-ups
  • Not ideal for high heels, wheelchairs, or pushchairs
  • Resin surfaces may need resealing every few years to maintain appearance

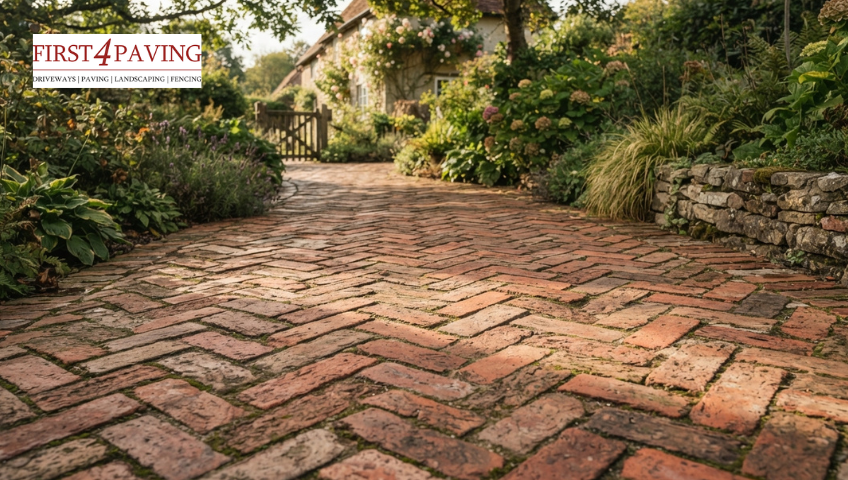
4. Brick Paving

Brick paving brings a warm, traditional character that suits period properties and cottage style gardens particularly well. Its rich, earthy tones and familiar texture make it a natural fit for homes looking to preserve a classic aesthetic, and it pairs especially well with traditional planting schemes and period architectural features.

Brick Paving

Advantages:

  • Classic, timeless appearance that complements traditional and period homes
  • Strong and durable when properly laid
  • Individual bricks can be replaced if damaged, without redoing the whole patio.
  • Wide range of laying patterns, such as herringbone or basketweave

Considerations:

  • More expensive and labour-intensive to install than concrete block paving
  • Porous surface that can absorb stains and support moss or weed growth
  • May require re-pointing over time to keep joints secure

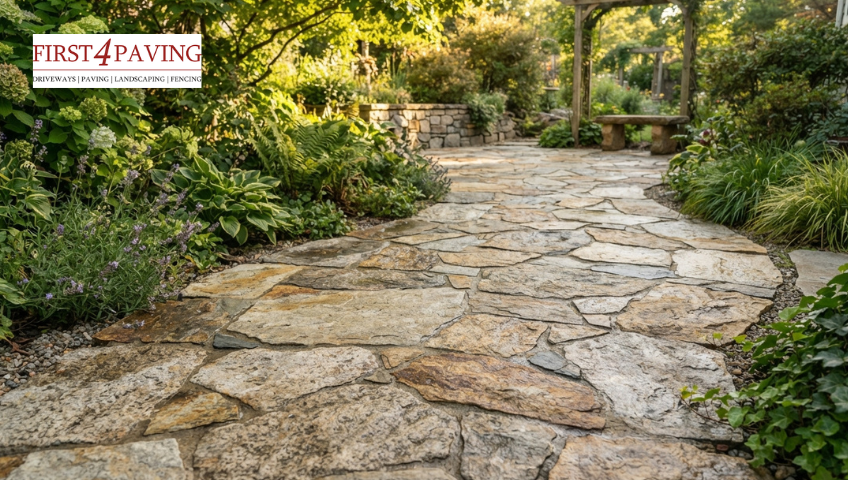
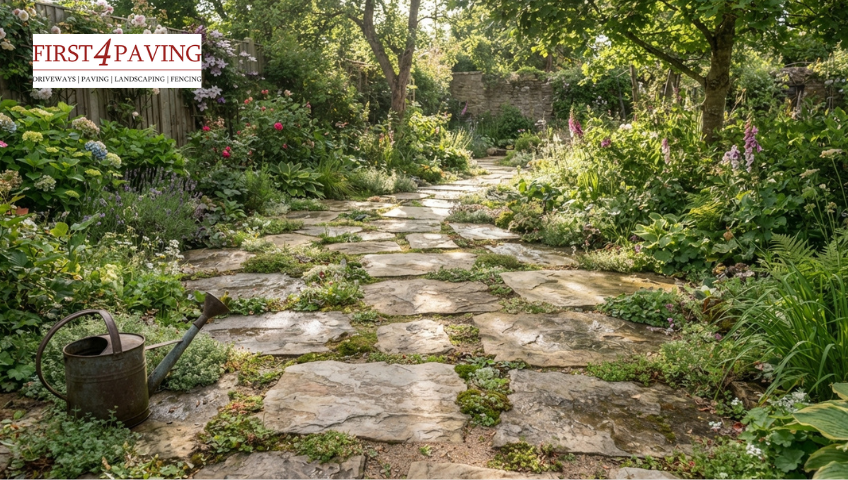
5. Flagstones

Flagstones, including limestone and slate, sit within the natural stone family but offer a distinct texture and finish compared to sandstone or granite. Their smoother, more refined surface gives them a slightly more formal appearance, making them a popular choice for homeowners seeking an elegant, polished look without straying from natural materials.

Flagstones

Advantages:

  • Elegant, refined appearance with a smoother or more uniform surface than riven stone
  • Highly durable and long-lasting when sealed correctly
  • Available in a range of natural tones to suit different garden styles
  • Adds a premium, high-end feel to outdoor spaces

Considerations:

  • Can be slippery when wet if not treated with a suitable finish
  • Higher cost compared to concrete or gravel
  • Requires professional installation for a level, secure finish

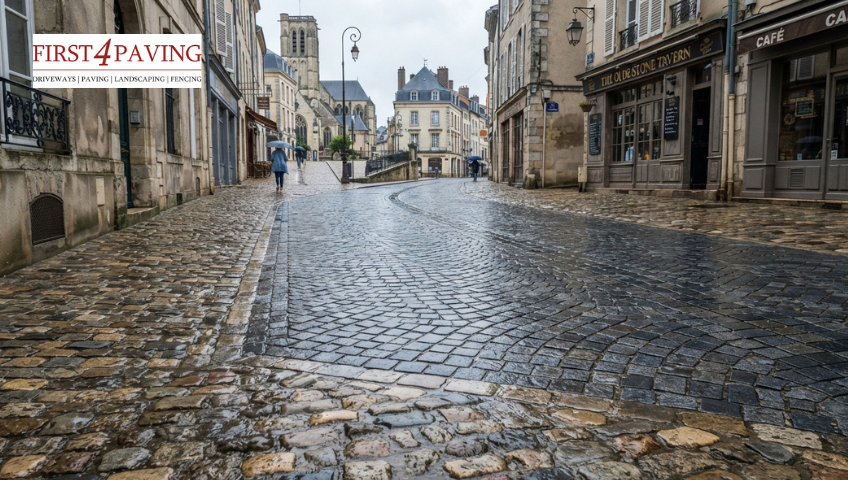
6. Cobblestone and Setts

Cobblestone and granite setts offer a rustic, old-world aesthetic that works particularly well for driveways, borders, or accent areas within a larger patio. Their irregular, textured surface adds a strong sense of character and history to outdoor spaces, and they are often chosen to create a striking contrast when paired with smoother, more contemporary materials. If you’re considering them purely as a border, browsing a few driveway edging ideas can help translate the same look to a patio edge.

Cobblestone and Setts

Advantages:

  • Distinctive, characterful look that adds texture and visual interest
  • Extremely hard-wearing and able to withstand heavy loads
  • Resistant to cracking and weather damage
  • Often used to complement other materials as an edging or feature

Considerations:

  • Uneven surface can make it less comfortable for furniture or bare feet
  • Among the more expensive options due to labour-intensive installation
  • Not ideal as the sole material for a large, functional seating patio

Best Patio Materials Compared

When comparing the best patio materials, our patio experts in Enfield consider several key factors: durability, cost, maintenance, and weather performance 

  • Porcelain Paving: Best for long-term durability and low maintenance
  • Natural Stone: Best for premium, classic appearance
  • Concrete Block Paving: Best budget-friendly option
  • Gravel/Resin Bound: Best for quick installation and flexible layouts
  • Brick Paving: Best for traditional and period style homes

Each system has its place depending on the property type and homeowner expectations. If you are unsure about your budget, it helps to understand how much a new patio costs before making a final decision.

Patio Material Cost, Lifespan & Maintenance Comparison

MaterialAverage Cost (per m²)LifespanMaintenance LevelBest For
Porcelain£70–£11020–30 yearsVery lowOverall best choice, modern homes, low upkeep
Natural Stone£60–£10020–25+ yearsModerate (periodic sealing)Period homes, premium finish
Gravel/Resin Bound£30–£6010–15 yearsModerate (top ups/resealing)Informal gardens, quick installs
Brick Paving£50–£9015–20 yearsModerate (re-pointing)Traditional, cottage-style homes
Flagstones£65–£11020–25+ yearsModerate (sealing)Elegant, high-end patios
Cobblestone/Setts£70–£12025+ yearsLowAccent areas, driveways, edging

Note: Prices are approximate and can vary depending on region, supplier, and installation complexity. Always request a personalised quote for accurate figures.

Key Factors for Choosing a Patio Material

Choosing the right patio material really matters. It helps protect your outdoor space and can save you money over time. Here are a few important things you should keep in mind:

  • Price vs Quality: Lower cost doesn’t always mean better value. Stronger materials reduce future costs.
  • Weather Resistance: In wet or changing climates, use non-porous materials to lower the risk of frost damage and staining.
  • Property Fit: Pick a material that suits your home. Period properties work best with natural stone or brick, while modern homes suit porcelain.
  • Maintenance Level: Less upkeep means saving time and money in the long run.

Professional Patio Installation

A high-quality installation matters as much as the material itself. Poor artistry can lead to uneven surfaces, drainage issues, and costly repairs. Working with experienced installers who specialise in patio paving services ensures that every layer is laid correctly, using the right techniques for long-term performance.

At First4 Paving, we deliver complete patio services with attention to detail and high-quality materials, ensuring strong, reliable, and weather-resistant results for every project.

Contact us today for a free, no-obligation consultation. Our team will guide you through every step, from choosing the perfect material to a flawless installation, so you can start enjoying your new patio sooner than you think.

Conclusion

Choosing the best patio material ultimately comes down to balancing your budget, maintenance preferences, and the look you want to achieve. Natural stone, porcelain, and flagstones offer premium durability and aesthetics for those willing to invest, while concrete block paving, gravel, and brick provide practical, cost-effective alternatives. Whichever material you choose, professional installation is key to ensuring your patio stands up to time and weather. With the right guidance, your new patio can become one of the most rewarding upgrades to your home.

FAQs

What is the most durable patio material?

Natural stone, porcelain, flagstones, and cobblestone are generally considered the most durable, often lasting 20 years or more with proper installation and care.

Which patio material requires the least maintenance?

Porcelain paving is the lowest-maintenance option, as it is non-porous and highly resistant to staining, frost, and algae growth.

What is the cheapest patio material?

Gravel and concrete block paving tend to be the most budget-friendly options, both for material cost and installation.

Can I lay a patio myself, or should I hire a professional?

While some materials like gravel are DIY-friendly, natural stone, porcelain, brick, and flagstones require precise levelling and jointing, so professional installation is strongly recommended for a long-lasting result.

How long does a patio installation typically take?

Most residential patios take between 2 and 5 days to install, depending on the size, material, and any groundwork required.

How to Remove Moss and Weeds From Block Paving

How to Remove Moss and Weeds From Block Paving and Keep It Clean

If you’ve noticed green patches creeping across your driveway or weeds pushing up between the blocks, you’re not alone; it’s one of the most common issues block paving owners face. The quickest way to deal with it is to treat the affected areas with a moss killer or weed treatment, rinse the surface clean, and top up the jointing sand once it’s dry. From there, a bit of regular maintenance is usually enough to keep it from coming back.

In this guide, we’ll explain why moss and weeds appear on block paving in the first place, then give clear, step-by-step instructions for removing both. We’ll also cover the long-term maintenance steps from re-sanding to sealing that make the biggest difference in keeping your driveway clean for good, plus answers to some of the most common questions homeowners ask us about moss and weed control.

Why Moss and Weeds Grow in Block Paving

Block paving is naturally prone to moss and weed growth because of the small gaps between each block. Over time, these joints can become the perfect environment for unwanted growth to take hold.

A few common causes include:

Damp, Shaded Areas

Moss thrives in moisture and low sunlight, which is why it spreads fastest on north-facing driveways or areas shaded by fences, trees, or walls. These spots stay damp for longer after rain, giving moss the ideal conditions to establish itself and spread across the surface.

Worn or Missing Jointing Sand

Jointing sand is what locks the blocks together and keeps the gaps between them sealed. Over time, weather, foot traffic, and regular cleaning can wear this sand away. Once it erodes, small gaps open up between the blocks, the perfect landing spot for windblown weed seeds to settle and take root.

Organic Debris Buildup

Leaves, dirt, grass clippings, and other organic matter that collect on the surface don’t just look untidy; as they break down, they create a layer of decomposing material that acts almost like compost, feeding moss and weed growth in the joints below.

Poor Drainage

If water doesn’t drain properly and pools on the surface, it creates constant damp conditions that speed up moss growth. Poor drainage is often linked to uneven paving, blocked drainage channels, or debris build-up that prevents water from escaping.

Understanding the cause helps you treat the problem properly, rather than just clearing the surface temporarily.

Moss and Weeds Grow in Block Paving

How to Remove Moss From Block Paving

Tools and Materials You’ll Need

Before you start, gather the following:

  • A stiff outdoor brush or wire brush
  • A moss killer (or a natural alternative like diluted vinegar)
  • A pressure washer (optional, but effective)
  • Gloves and eye protection
  • Jointing sand for refilling gaps afterward

Step-by-Step Removal Process

Step 1: Brush Off Loose Moss

Use a stiff brush to remove as much surface moss as possible before applying any treatment. This helps the treatment reach the remaining moss more effectively rather than sitting on top of a thick layer. Focus on areas between the blocks, where moss tends to build up thickest.

Step 2: Apply a Moss Killer

Spray or pour the treatment evenly across affected areas, making sure it reaches into the joints where moss tends to take hold most stubbornly. Choose a dry day for this step, as rain shortly after application can wash the treatment away before it has a chance to work.

Step 3: Leave It to Work

Most treatments need to sit for several hours, or even overnight, to kill moss at the root. Check the product instructions for exact timing. Avoid walking or driving over the treated area during this time to avoid disturbing the treatment.

Step 4: Rinse or Pressure Wash

Once the moss has died back, rinse the area thoroughly or use a pressure washer on a moderate setting to clear away residue. Be careful not to hold the pressure washer too close to the surface, as it can dislodge jointing sand along with the debris.

Step 5: Re-Sand the Joints

Once the surface is dry, brush new jointing sand into any gaps to help prevent regrowth. If using a polymeric variety, give the sand a light water spray afterward, as this helps it set and bind the joints more securely.

Remove Moss From Block Paving

How to Remove Weeds From Block Paving

Weeds pushing through block paving joints are just as common as moss, and most cases can be handled with the right approach and a little consistency. The method you choose usually depends on how established the growth is; you can handle light patches manually, while heavier growth may need targeted treatment. If you’re ever unsure which approach suits your driveway, a driveway expert in Enfield can take a look and point you in the right direction.

Manual Removal

For light weed growth, hand-pulling is often the simplest solution. A weeding tool or old knife can help lift weeds out from between the blocks, roots and all, without damaging the surrounding paving. Pulling weeds after rainfall or watering the area beforehand can make this easier, as softened soil lets roots come away more cleanly rather than snapping off and regrowing.

Check your driveway every few weeks for new growth, since catching weeds early, before they’ve established deep roots, makes manual removal faster and more effective. For scattered, low-growth weeds, this approach is often all you need, and it avoids chemical treatment altogether.

Remove Weeds From Block Paving

Chemical and Natural Weed Killers

For larger areas or more stubborn growth, a treatment may work better than manual removal. Here’s how the most common options compare:

MethodEffectivenessEco-FriendlyBest For
Boiling waterModerateYesSmall, isolated patches
Vinegar/salt sprayModerateYesLight, early-stage growth
Commercial weed killerHighNoLarger driveways with heavy growth
Pressure washingHigh (short-term)YesCombined with re-sanding for best results

How to Keep Block Paving Clean and Weed-Free Long-Term

Removing moss and weeds is only half the job; keeping them from coming back is what really protects your driveway.

Re-Sanding the Joints

Topping up jointing sand (ideally polymeric sand, which hardens once wet) helps lock the blocks in place and makes it much harder for weed seeds to take root.

Sealing the Paving

A quality sealant adds a protective layer that reduces moisture absorption and makes it much harder for moss and weeds to establish themselves, which is why sealing block paving to stop weeds is the most reliable long-term fix.

Regular Maintenance

A few simple habits go a long way:

  • Sweep the driveway regularly to clear leaves and debris
  • Check joints every few months and top up sand as needed
  • Rinse the surface periodically, especially after autumn leaf fall
  • Re-seal every couple of years, depending on wear

When to Call a Professional

If moss and weeds keep returning despite regular maintenance, or if your block paving shows signs of wear like loose blocks or badly eroded joints, it may be time to call professional paving contractors. Persistent regrowth often signals that the underlying jointing sand has broken down significantly, or that drainage issues keep the surface damp- problems surface-level treatments alone can’t fully resolve. A professional clean and re-sand gets right to the root of the issue rather than just masking it for a few weeks.

At First4 Paving, we offer driveway cleaning services designed to give your paving a long-term refresh, not just a quick fix. Our team can assess the condition of your block paving, identify what’s driving the regrowth, and recommend the right combination of treatment, re-sanding, and sealing to keep it looking its best for years to come.

Struggling to keep your driveway moss and weed-free? Contact us for professional cleaning, re-sanding, and sealing services that keep your block paving looking its best year-round.

Conclusion

Moss and weeds are a near-inevitable part of owning block paving, but they don’t have to be a constant battle. With the right removal process, clearing growth, treating the joints, and re-sanding once dry- and a bit of regular upkeep afterwards- your driveway can stay clean and weed-free for the long run. And if the problem keeps coming back despite your best efforts, that’s usually a sign it’s time to bring in a professional for a proper refresh.

FAQs

Does vinegar kill moss on block paving permanently? 

Vinegar can kill surface moss, but it doesn’t always reach the roots, so regrowth is common. For longer-lasting results, a dedicated moss treatment combined with re-sanding works better.

How often should block paving be re-sanded? 

Most driveways benefit from re-sanding every 1–2 years, though this can vary depending on weather exposure and how much foot or vehicle traffic the paving gets.

Is pressure washing bad for block paving? 

Pressure washing is safe when done correctly, but using too high a setting can wash out jointing sand and loosen blocks. Use a moderate setting and follow up with re-sanding.

How to Stop Green Algae on Patio Slabs

How to Stop Green Algae on Patio Slabs: Causes, Solutions and Prevention Tips

Green algae grows on patio slabs because of trapped moisture, shade, and organic debris sitting on the surface. To stop it, clear away moss and leaves regularly, improve drainage and airflow, clean the slabs with an algae-killing solution or pressure wash, and finish with a breathable sealant to stop spores from taking hold again.

If you’ve noticed slippery green patches creeping across your patio, you’re not alone; it’s one of the most common problems homeowners across Enfield and Hertfordshire ask us about. Algae doesn’t just look unsightly; a damp, shaded patio slab covered in green growth becomes genuinely dangerous underfoot, especially after rain or overnight frost. The good news is that green algae is manageable once you understand why it forms. 

In this guide, we’ll walk you through exactly why green algae forms on patio slabs, how to remove it safely without damaging the surface, and the long-term steps that stop it from coming back, covering drainage, airflow, cleaning routines, and sealing, so you get a patio that stays clean season after season, not just for a few weeks.

What Causes Green Algae on Patio Slabs?

Algae is a simple organism that only needs three things to thrive: moisture, organic matter, and a lack of direct sunlight. Most patios provide all three without the homeowner realising it.

  • Patios that don’t drain properly hold rainwater far longer than they should
  • Low spots or cracked pointing trap water on the surface
  • Slabs laid without the correct fall stop water running off
  • Patios under trees or close to fences rarely get enough sun
  • North-facing patios often stay damp for days without direct light
  • Poor air circulation slows down how quickly the surface dries
  • Leaves, grass cuttings, and pollen break down into organic matter
  • Bird droppings and dirt add to the build-up over time
  • This debris settles into the slab’s porous surface and feeds algae spores
  • Natural stone and some concrete slabs are naturally porous — worth bearing in mind when weighing up the best material for a patio if algae resistance is a priority
  • Porous surfaces absorb and hold water instead of letting it run off
  • Without a sealant, these surfaces are far more prone to algae, moss, and lichen

Causes Green Algae on Patio Slabs

How to Remove Existing Green Algae on Patio Slabs

Sweep and Clear Debris First

Before treating the algae itself, clear away leaves, moss, and loose dirt with a stiff outdoor brush. This prevents you from spreading organic matter during cleaning and gives any treatment direct contact with the slab surface.

Use a Dedicated Patio Cleaner or Algae Treatment

A specialist patio and algae cleaner (rather than a generic household detergent) is designed to break down algae at the root and is safe for most paving materials. Apply according to the product instructions, leave it to work, then rinse thoroughly.

Pressure Washing: Use It Carefully

A pressure washer can lift stubborn algae quickly, but you need to use it correctly. Too much pressure or a nozzle too close can damage the slab surface, strip pointing, or push sand out of the joints on block paving, making the area more vulnerable to regrowth. A moderate pressure with a fan nozzle, kept at a consistent distance from the surface, is the safer approach. On a block paving patio, brush fresh jointing sand back into the joints once the surface is dry, which helps stop moss and weeds on block paving from coming back.

A Natural Alternative: White Vinegar or Diluted Bleach

For smaller areas, a solution of white vinegar and water, or heavily diluted bleach, can kill algae effectively. Always rinse thoroughly afterwards and avoid these methods near plants, lawns, or ponds, as they can damage surrounding greenery.

How to Stop Green Algae on Patio Slabs 

Stopping algae for good means tackling the conditions that let it grow back, not just cleaning the surface once. As a patio expert in Enfield would tell you, a few consistent habits make the biggest difference over time. 

Improve Drainage

Poor drainage is one of the most common reasons algae keeps returning. Check your patio for low spots where water pools after rain, as these damp patches are exactly where algae thrives. If pooling is a recurring issue, have a professional assess the slab fall (the slight slope that lets water run off), since this often points to a base or installation problem rather than something surface cleaning can fix.

Trim Back Overhanging Trees and Shrubs

Shaded patios stay damp for far longer after rain, giving algae the perfect environment to spread. Cutting back branches, hedges, and shrubs that overhang the patio lets more sunlight and airflow reach the surface, which naturally slows regrowth. This is especially worth doing in spring and summer when foliage is at its thickest.

Clean Little and Often

Rather than waiting for algae to build up, a quick sweep and rinse every few weeks stops organic debris, leaves, pollen, and dirt from settling into the surface and feeding future growth. This becomes even more important in autumn, when leaf fall is at its heaviest and debris can build up quickly if left unattended.

Apply a Breathable Sealant

A good-quality, breathable sealant is one of the most effective long-term defences against algae. It stops water from soaking into the surface while still allowing trapped moisture underneath to escape, keeping the slabs drier for longer. For the best results, reapply the sealant every couple of years, as its protective properties gradually wear down with weather exposure and foot traffic.

Repoint or Fill Damaged Joints

Cracked, crumbling, or missing pointing between slabs creates small pockets where moisture collects and lingers. These damp gaps are an easy foothold for algae spores to settle and spread. Repointing or filling damaged joints closes off these entry points and helps keep the whole patio surface more resistant to regrowth.

Keep Furniture and Pots Slightly Raised

Garden furniture, plant pots, and other items sitting flush against the slabs block airflow underneath and create trapped, damp patches that rarely dry out. Raising these items slightly with pot feet or furniture risers lets air circulate and prevents hidden damp spots from becoming algae hotspots.

Avoid Overwatering Nearby Plants and Lawns

Excess water from overwatered lawns, flower beds, or hanging baskets often runs onto nearby patio areas, keeping the surface damp longer than it should. Being mindful of how much you water plants close to the patio, and directing runoff away from paved areas where possible, helps keep the surface drier overall.

Check Gutters and Downpipes

A blocked or poorly positioned downpipe can quietly flood the same section of patio every time it rains, creating a persistent damp patch that’s easy to overlook. Checking that gutters are clear and downpipes are directing water away from the patio, rather than onto it, removes a common but hidden source of recurring algae.

Prevention Tips to Keep Algae From Coming Back

  • Sweep the patio regularly to stop leaves and debris settling into the surface
  • Keep trees and shrubs trimmed back to maximise sunlight and airflow
  • Check drainage after heavy rain and address pooling early
  • Reapply a breathable sealant every couple of years
  • Keep gutters and downpipes clear so water doesn’t run onto the patio
  • Raise furniture and pots slightly to prevent trapped damp patches
  • Repoint joints as soon as cracks or gaps appear, rather than waiting

When to Call a Professional

If algae keeps returning no matter how often you clean, it’s often a sign of an underlying drainage or installation issue rather than a surface problem. Uneven falls, poorly bedded slabs, or ageing pointing all create the perfect conditions for algae to keep coming back, and no amount of cleaning will fix that on its own. In some cases, relaying is more cost-effective than repeated treatment, so it’s worth weighing that against new patio installation costs before committing to another round of cleaning.

At First4 Paving, we provide reliable patio services across Enfield and Hertfordshire, and we assess patios for exactly this kind of issue, checking drainage, base condition, and jointing before recommending whether a clean and reseal will do the job, or whether sections need relaying.

If you’re dealing with a patio that keeps growing algae no matter what you try, First4 Paving can help get to the root of the problem and bring it back to how it should look. Contact us today to discuss your patio and get a personalised quote.

Conclusion

Green algae on patio slabs almost always comes down to trapped moisture, shade, and organic build-up, and once you address those root causes, the problem stops coming back. Regular cleaning keeps things looking good in the short term, but drainage, airflow, and a good sealant stop algae from taking hold season after season. If your patio keeps getting green no matter how often you clean it, it’s usually worth having the base and drainage checked rather than repeating the same clean-up every few weeks.

FAQs

How often should I clean algae off my patio?

A light sweep and rinse every few weeks is usually enough, with more frequent attention during autumn when leaf fall is heaviest.

Is pressure washing bad for patio slabs?

Not if it’s done correctly. Too high a pressure or too close a nozzle distance can damage the surface or strip pointing and jointing sand, so a moderate setting with a fan nozzle is safer.

Can I use bleach to remove algae?

Diluted bleach can work on smaller areas, but rinse it thoroughly and keep it away from plants, lawns, and ponds, as it can damage surrounding greenery.

How long does a sealant last on patio slabs?

Most breathable sealants last around two to three years before they need reapplying, depending on weather exposure and foot traffic.

Why does algae keep coming back even after cleaning?

Recurring algae usually points to an underlying issue like poor drainage, shaded conditions, or damaged pointing. Cleaning removes the algae but doesn’t fix the cause.

Block Paving vs Tarmac Driveway: Cost, Durability & Which Lasts Longer?

When it comes to choosing a new driveway, block paving vs tarmac is one of the most common comparisons homeowners across the UK make. Block paving is made from interlocking concrete or clay blocks, offering a decorative, customisable finish, while tarmac is a smooth asphalt surface known for quick installation and budget-friendly cost. Both handle daily vehicle use well but differ significantly in cost, durability, and longevity. If upfront cost is your main driver, it’s worth reading our full guide on the cheapest option for a driveway alongside this comparison.

Block paving generally lasts longer (20–30+ years) and offers more design flexibility, but it costs more upfront. Tarmac is cheaper to install and quicker to lay, but it typically lasts 15–20 years and requires more frequent resealing. If budget is your main priority, tarmac wins. If you want a driveway that lasts decades and boosts kerb appeal, block paving is the better long-term investment.

Choosing between block paving and tarmac is one of the biggest decisions homeowners face when planning a new driveway. Both are popular across the UK, both handle daily traffic well, and both come with their own trade-offs in cost, durability, and lifespan. This guide breaks down exactly how they compare, so you can decide which one is right for your home.

What Is Block Paving?

Block paving is a driveway surface made from individual concrete or clay blocks, laid by hand in an interlocking pattern. Because each block is separate, they can be arranged in different layouts herringbone, basketweave, stack bond and come in a wide range of colours and finishes, from charcoal and buff to brindle and silver grey. If you’re considering this route, our step-by-step guide to laying a block paving driveway covers the process in full.

This flexibility is what makes block paving so popular for homeowners who want their driveway to complement the look of their house, rather than serve a functional purpose.

What Is a Tarmac Driveway?

A tarmac driveway is made from asphalt, a mixture of aggregate and bitumen, laid as a single continuous surface and compacted while hot. It creates a smooth, uniform finish and is one of the fastest driveway surfaces to install, which is why it’s often the more budget-friendly option.

Tarmac doesn’t offer the same design variety as block paving, but it’s a practical, hard-wearing choice, especially for larger driveways or commercial areas.

Which Is More Durable, Block Paving or Tarmac?

Both surfaces are built to handle daily vehicle use, but they respond differently to weather, weight, and wear.

Block paving 

It handles heavy loads well because the weight is distributed across individual blocks rather than across a single continuous surface. It’s also less prone to cracking under pressure, since a single damaged block can be lifted and replaced without affecting the rest of the driveway. However, without proper edge restraints, blocks can shift or sink over time.

Tarmac Driveway

 It performs well under consistent daily use and resists water pooling when laid correctly with proper drainage. But because it’s a single solid surface, it’s more vulnerable to cracking during extreme temperature changes, and oil or fuel spills can soften and permanently stain the surface.

For most UK driveways, block paving slightly edges out tarmac in terms of durability, mainly due to its ability to withstand localised damage and to be repaired.

Block Paving

Which Driveway Needs Less Maintenance?

Maintenance is often the deciding factor for homeowners choosing between the two surfaces. For driveway experts in Enfield, this is one of the most common questions asked before installation, so here’s how the upkeep compares.

Block Paving Maintenance

Block paving needs a bit more regular, hands-on upkeep to keep it looking its best:

  • Re-sanding the joints: over time, the sand between blocks washes away with rain, so it needs topping up to keep the blocks locked in place and stop weeds taking hold
  • Re-levelling sunken blocks: if the ground beneath shifts or settles unevenly, individual blocks can sink slightly and need to be lifted, re-based, and relaid.
  • Weed and moss control: gaps between blocks can allow weeds and moss to grow, so regular sweeping, brushing, or treatment to remove moss and weeds is essential to keep the surface tidy.
  • Periodic sealing: applying a driveway sealant every couple of years helps protect the blocks from staining, fading, and water damage and makes cleaning easier.
  • Regular pressure washing: an occasional deep clean helps lift dirt, oil marks, and algae buildup from the block surface and joints.
  • Replacing damaged blocks: if a block cracks or becomes stained beyond repair, it can be lifted out and replaced with a new one without disturbing the rest of the driveway.
  • Checking edge restraints: the borders or edging that hold the blocks in place should be checked periodically to ensure they haven’t loosened or shifted.

Tarmac Driveway Maintenance

Tarmac needs less frequent attention, but the repairs tend to be bigger when they’re needed:

  • Sealing every few years:  a sealant coat helps prevent water from seeping into the surface, which reduces the risk of cracking and frost damage over time
  • Filling cracks and potholes: small cracks should be patched early before they widen, and potholes should be filled promptly to prevent further deterioration.
  • Full resurfacing:  once the surface has worn down significantly or developed widespread cracking, a full resurfacing is usually needed to restore it properly
  • Removing oil and fuel stains: spills should be cleaned quickly, as tarmac can absorb and soften from prolonged contact with oil or fuel.
  • Clearing debris and standing water:  keeping the surface free of leaves, moss, and puddles helps prevent long-term surface damage.
  • Line and edge maintenance: if the driveway has painted lines or borders, these may need repainting or edge repair as they wear down over time.

Tarmac requires less day-to-day attention, but when it does need work, repairs are often more noticeable (patchwork sections can look different from the original surface). Block paving requires more regular small maintenance tasks, but repairs blend in seamlessly since individual blocks can be swapped out.

Block Paving or Tarmac Driveway: Which one is Better for Drainage?

This is an important consideration in the UK, where planning permission rules apply to non-permeable driveways over a certain size.

Permeable Block Paving

Permeable block paving allows water to drain through gaps between the blocks and into the ground below, often helping homeowners avoid the need for planning permission.

Standard Tarmac Driveway

Standard tarmac is non-permeable, meaning water runs off the surface rather than through it, which may require additional drainage solutions (such as soakaways) to remain compliant with UK regulations.

If drainage and planning compliance are a concern, permeable block paving is usually the more straightforward option.

Tarmac Driveway

What Is the Lifespan of Block Paving and Tarmac Driveways?

This is where the two surfaces really start to differ in the long run.

Block Paving Lifespan

Block paving typically lasts 20–30 years or more, provided it’s installed on a proper sub-base and maintained correctly. Because the surface is made up of individual interlocking blocks rather than a single continuous layer, it handles ground movement, weight, and weather far better over time. Any localised damage can be fixed without affecting the rest of the driveway. With regular joint re-sanding, occasional re-levelling, and periodic sealing, a well-installed block paving driveway can comfortably outlast a tarmac surface by a decade or more.

Tarmac driveway Lifespan

Tarmac typically lasts 15–20 years before it needs resurfacing or significant repair. As a single continuous surface, it’s more susceptible to cracking due to temperature changes, ground movement, and heavy or repeated loads at the same spot. While regular sealing and prompt crack repair can help extend its life, tarmac generally reaches the point of full resurfacing sooner than block paving does.

The lifespan of both surfaces depends heavily on installation quality. A poorly laid tarmac driveway can fail within a few years, just as poorly laid block paving can shift and sink prematurely. Choosing an experienced, reputable installer matters as much as the material itself. Neither tops the list, though: natural stone and clay pavers outlast both.

Block Paving vs Tarmac: Which One Should You Choose?

FactorBlock PavingTarmac
Upfront costHigherLower
DurabilityVery durable, easy localised repairsDurable, but cracks under solid stress
Lifespan20–30+ years15–20 years
MaintenanceRegular small upkeepLess frequent, larger repairs
Kerb appealHigh  customisableModerate  uniform finish
DrainagePermeable options availableRequires separate drainage planning

Choose tarmac if: you want a lower upfront cost, a quick installation, and a simple, uniform look.

Choose block paving if: you want a driveway that lasts longer, adds kerb appeal, and offers more design flexibility.

Why Choose First4 Paving for Your Driveway?

Whichever option suits your home best, First4 Paving installs both block paving and tarmac driveways, so you get honest, unbiased advice rather than a recommendation pushed toward just one option. As Professional driveway contractors in Enfield, our team takes the time to assess your property, budget, and long-term goals before recommending the surface that’s truly right for you, not just the one that’s easiest to sell. We provide expert block paving and tarmac driveway services, and proudly cover driveway installations across Enfield and Hertfordshire, delivering high-quality artistry on every project. We proudly cover driveway installations across Enfield and Hertfordshire, delivering high-quality artistry on every project. 

Contact us today for a free, no-obligation quote and expert guidance on the best driveway choice for your home.

Conclusion

Both block paving and tarmac are proven, reliable choices for UK driveways, but the right one for you depends on your priorities. If a lower upfront cost and quick installation matter most, tarmac is hard to beat. If you’re after a driveway that lasts decades, adds genuine kerb appeal, and can be styled to match your home, block paving is the stronger long-term investment. Whichever direction you lean, getting it installed properly by an experienced contractor ultimately determines how long it lasts and how well it performs.

If you’re still weighing up your options, First4 Paving is here to help you choose with confidence and get the job done right the first time.

FAQs

How long does a block paving driveway last compared to tarmac? 

Block paving typically lasts 20–30 years or more, while tarmac usually lasts 15–20 years, depending on installation quality and maintenance.

Is tarmac cheaper than block paving in the UK? 

Yes, tarmac is generally cheaper to install per square metre than block paving, mainly due to lower labour requirements.

Does block paving need more maintenance than tarmac? 

Block paving requires more frequent, smaller tasks such as re-sanding and weed control, while tarmac requires less frequent but larger repairs such as resurfacing.

Can a tarmac driveway be repaired as easily as block paving? 

Not quite; block paving repairs are easier to blend in since individual blocks can be replaced, while tarmac patches can be more visible against the original surface.